This tutorial explains the approach to define a preview solution for AEM(Adobe Experience Manager)/AMS(Adobe Managed Server) platform to preview the content through Author instance before activating the content to publishers.
Some of the options to enable the preview options are
- Share the author URL with wcmmode=disabled, this requires the reviewer should be on-boarded into the Author environment to carry the review
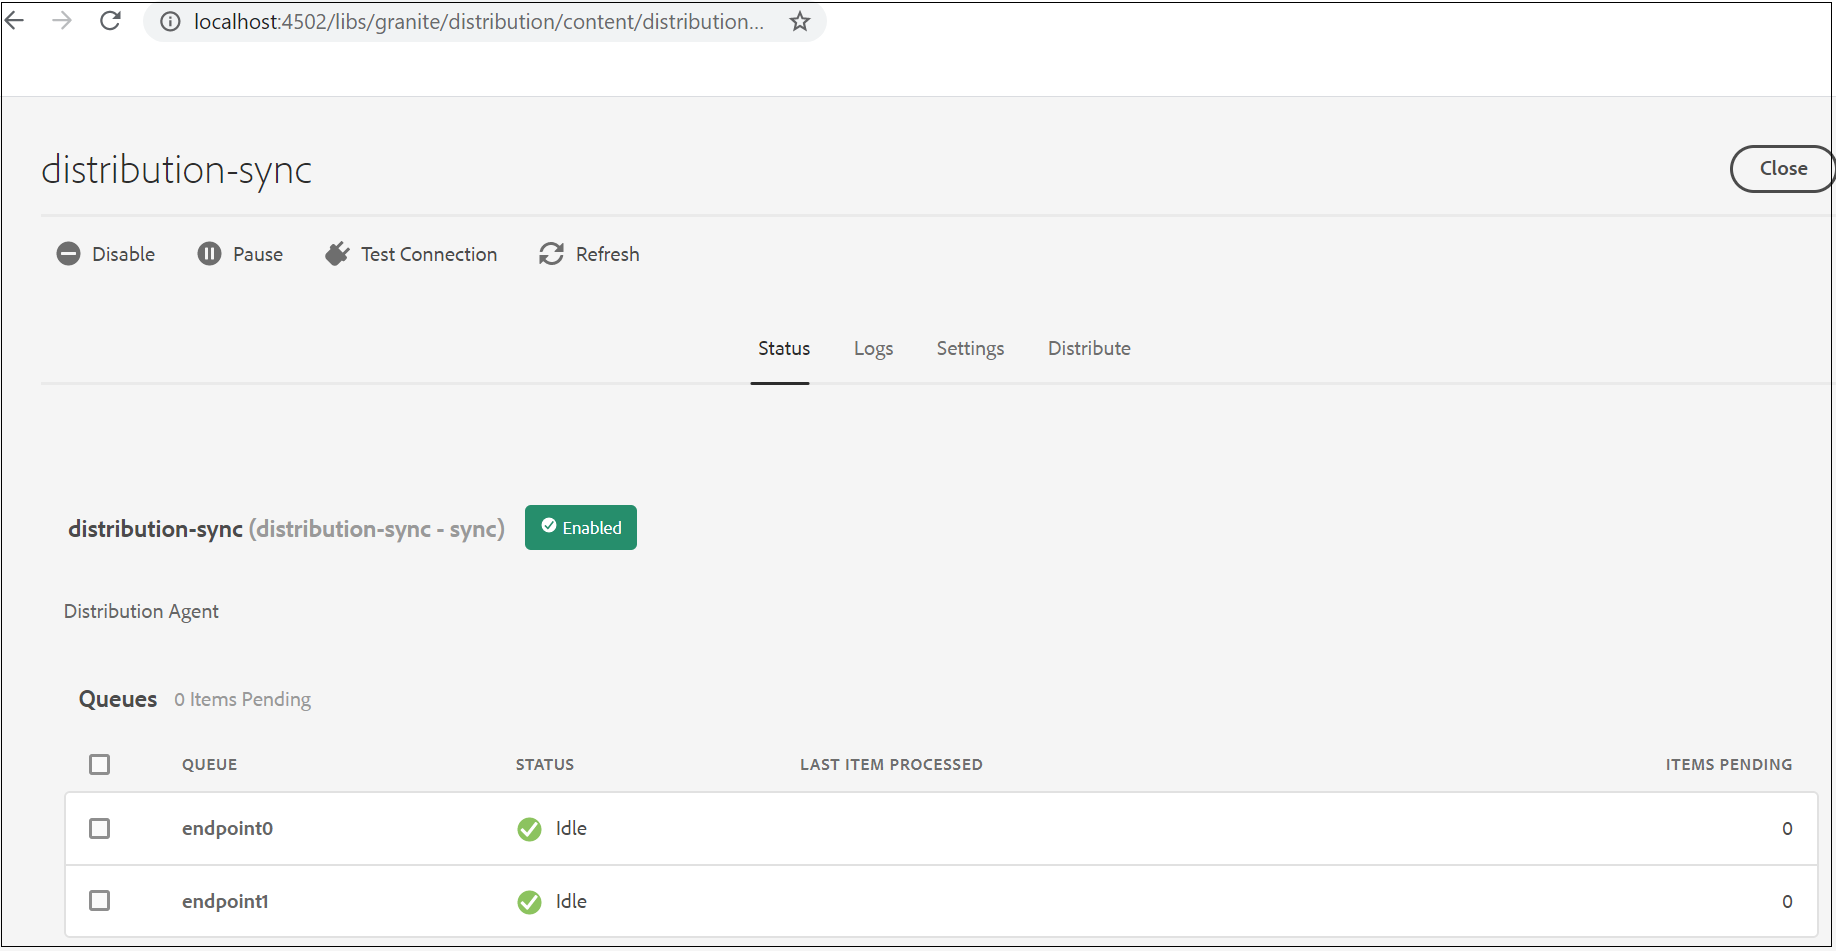
- Enable an additional preview(publish) instance, establish the workflow to send the content to the preview server for review/approval before publishing the content to live, the reviewer can use the dedicated review URL to review the content. This approach needs an additional server license to review the content.
- Move the content to stage servers for review, the workflow can be established to move the content to a Stage environment for review, this approach has some restriction from AMS to move the content from Production to Stage servers through the workflow. This approach can be used for on-premise setup, refer the following URL for more details — https://www.albinsblog.com/2018/02/approach-to-implement-content-preview-in-adobe-experience-manager.html#.X0FhqOhKjb0
Let us now see an alternative simple approach to enable the content review solution in AEM
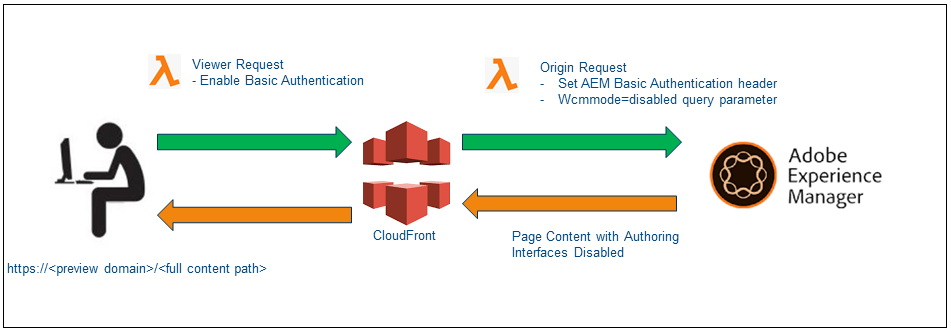
Content in an AEM Author instance is accessible with a special query string parameter that disables the AEM authoring user interface — ?wcmmode=disabled.
Additionally, by configuring a read-only user account within AEM with an explicit password set, the default single sign-on (“SSO”) behavior that redirects regular users to SAML for authentication is bypassed when sending those credentials via a standard HTTP Authorization header.
Combining these facts, a reverse proxy configuration using CloudFront can be set up within an AWS account to provide a lightweight, scalable review
solution with affordable CloudFront data transfer costs.

Cloudfront Configuration
As a first step, let us create the required configurations for CloudFront — the AMS managed CloudFront instance can’t be used to enable these configurations, the custom CloudFront should be used.
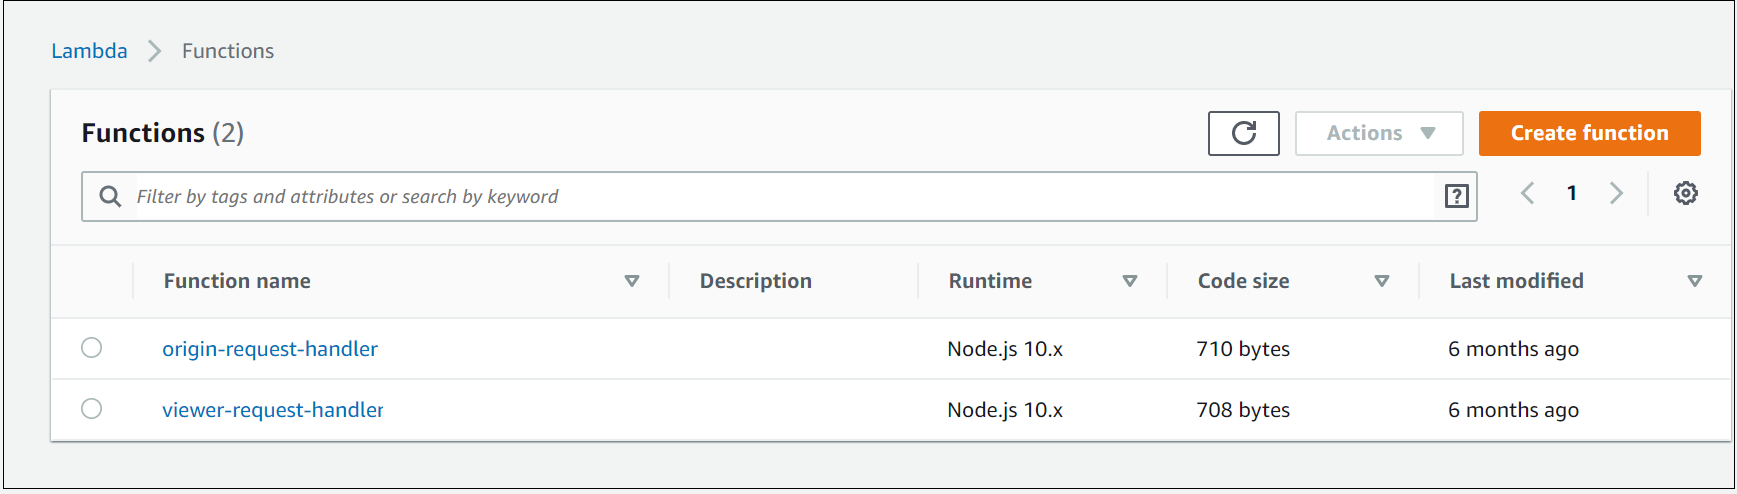
Create two distinct AWS Lambda@Edge functions(Node JS) to be fired on the viewer request and origin request events

config.js
"use strict";module.exports = {
  authUser: "reviewuser",
  authPass: "reviewuser!",
  aemUser: "reviewaemuser",
  aemPass: "reviewaemuser!",
  aemAuthorDisableParam: "wcmmode=disabled"
};
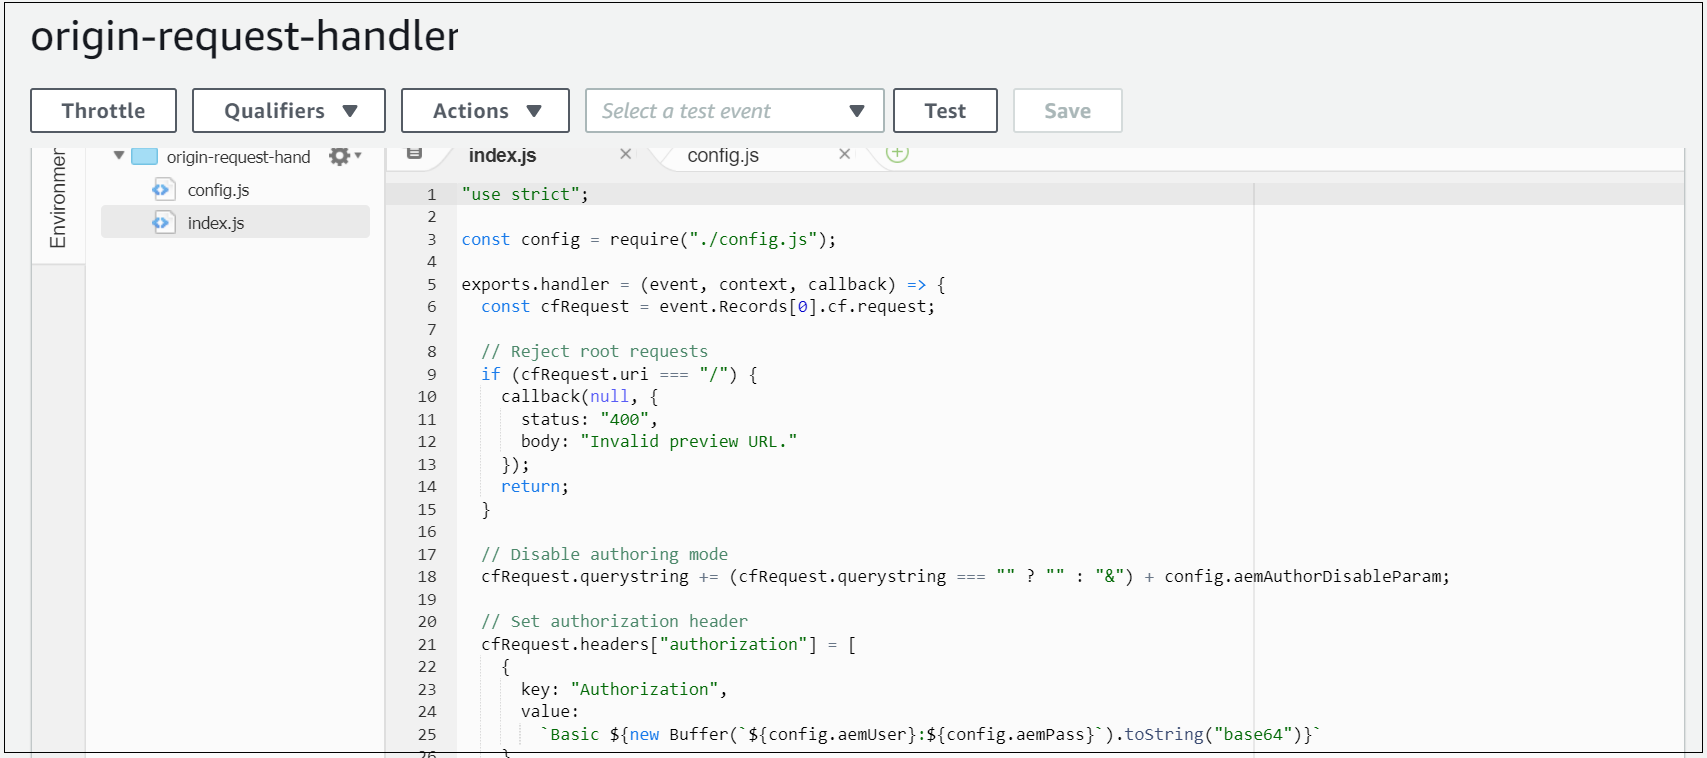
origin-request-handler
When a request hits this CloudFront request, the origin request Lambda script to append the ?wcmmode=disabled query string parameter to the end of the URL (merging with any existing parameters) before forwarding to the origin(AEM Author).
Additionally, ensures the HTTP Authorization header with AEM preview user is added before the origin request;
"use strict";const config = require("./config.js");exports.handler = (event, context, callback) => {
  const cfRequest = event.Records[0].cf.request;// Reject root requests
  if (cfRequest.uri === "/") {
    callback(null, {
      status: "400",
      body: "Invalid preview URL."
    });
    return;
  }// Disable authoring mode
  cfRequest.querystring += (cfRequest.querystring === "" ? "" : "&") + config.aemAuthorDisableParam;// Set authorization header
  cfRequest.headers["authorization"] = [
    {
      key: "Authorization",
      value:
        `Basic ${new Buffer(`${config.aemUser}:${config.aemPass}`).toString("base64")}`
    }
  ];// Send back
  callback(null, cfRequest);
};

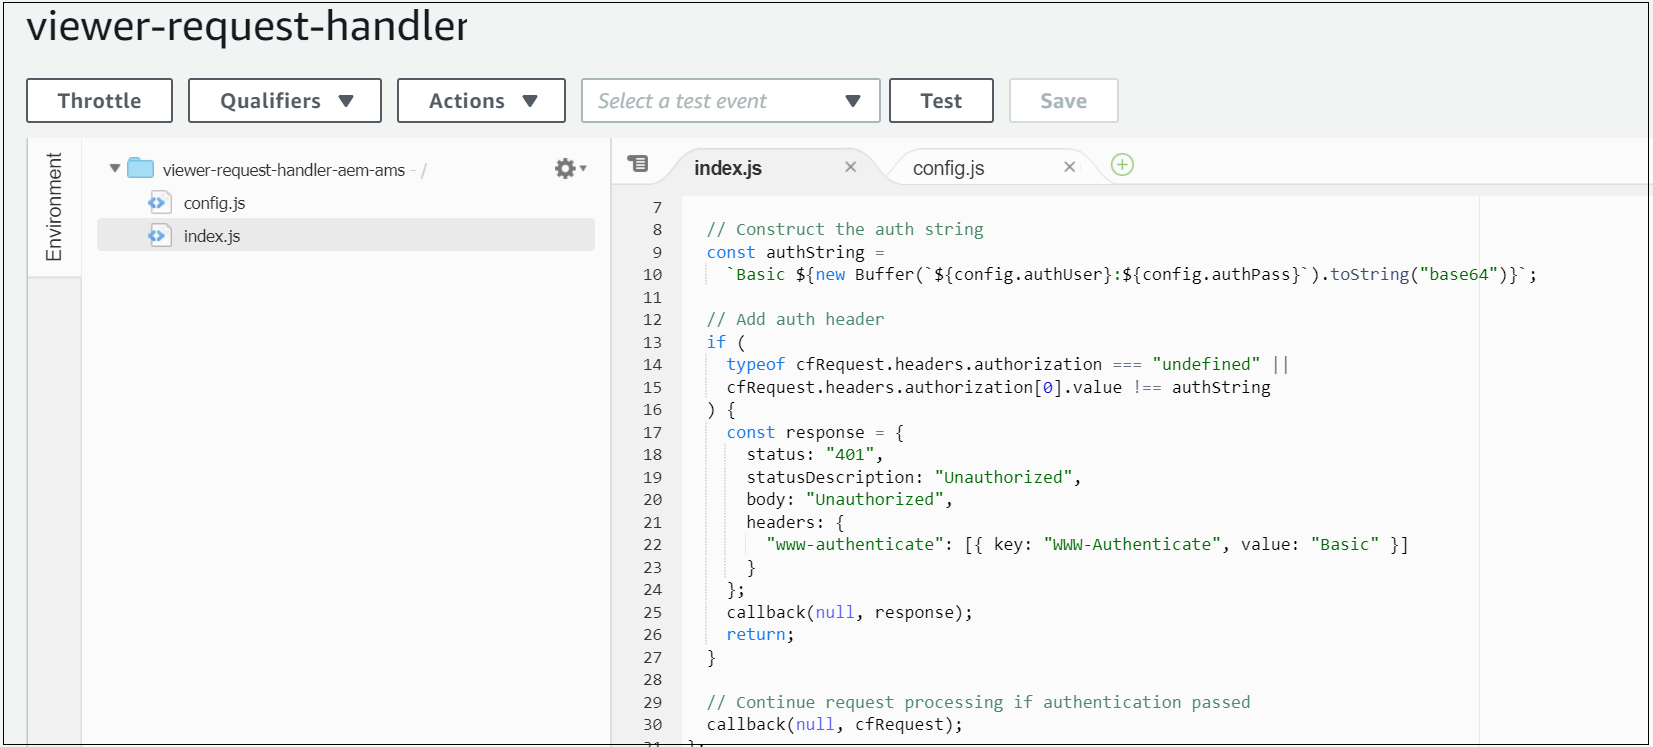
viewer-request-handler
Sets an Authorization header when the viewer request event is fired, ensuring the content at this preview hostname is protected by a standard HTTP Basic Authentication prompt — users prompted with basic authentication to access the preview domain.
"use strict";const config = require("./config.js");exports.handler = (event, context, callback) => {
  const cfRequest = event.Records[0].cf.request;// Construct the auth string
  const authString =
    `Basic ${new Buffer(`${config.authUser}:${config.authPass}`).toString("base64")}`;// Add auth header
  if (
    typeof cfRequest.headers.authorization === "undefined" ||
    cfRequest.headers.authorization[0].value !== authString
  ) {
    const response = {
      status: "401",
      statusDescription: "Unauthorized",
      body: "Unauthorized",
      headers: {
        "www-authenticate": [{ key: "WWW-Authenticate", value: "Basic" }]
      }
    };
    callback(null, response);
    return;
  }// Continue request processing if authentication passed
  callback(null, cfRequest);
};

Configure a new CloudFront distribution with the below settings:
General
- The alternative domain name (CNAMEs): preview-example.com
- Add a custom SSL certificate corresponding to the above hostname
Origin
Origin
- Origin domain name: author-prod-example.com(the author domain name, this domain will be used CloudFront to connect to author server)
- Origin protocol policy: HTTPS Only
Behavior
- Origin protocol policy: HTTPS Only
- Viewer Protocol Policy: Redirect HTTP to HTTPS
- Allowed HTTP methods: GET, HEAD, OPTIONS, PUT, POST, PATCH, DELETE(enable the minimum required options)
- Cache based on selected request headers: Whitelist
- Whitelist: Authorization, Host
- Minimum TTL, Maximum TTL, Default TTL: all set to 60 — CloudFront caches the request for a configurable duration (60 seconds, currently), to avoid applying an unnecessary load to the Author instance;
- Forward cookies: None
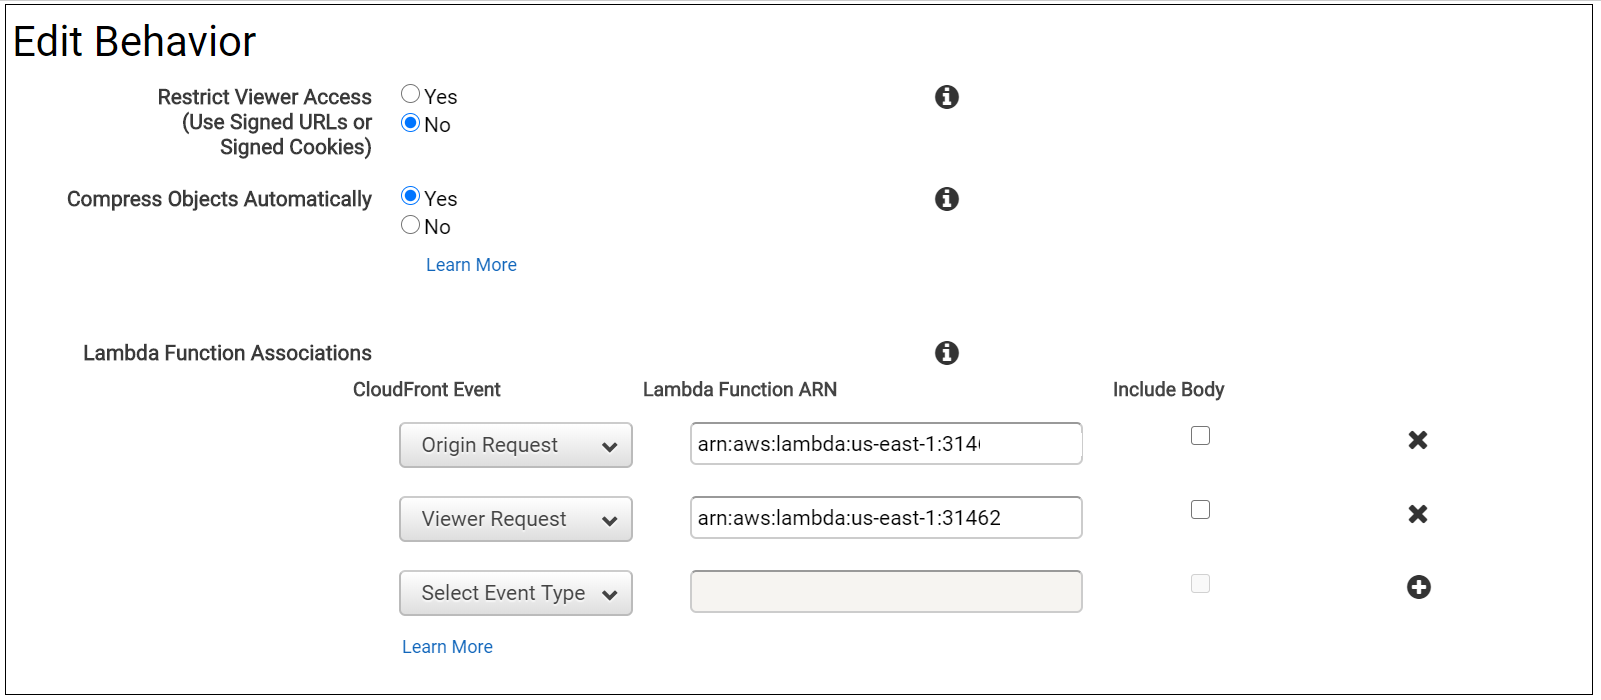
- Compress objects automatically: Yes
- Lambda function associations:
Origin request: point to the ARN of the origin-request-handler
Viewer request: point to the ARN of the viewer-request-handler

Point a new DNS hostname preview-author.example.com(CNAME) to a new AWS CloudFront distribution through DNS Zone manager(e.g xxxxxxxxx.cloudfront.net).
preview-author.example.com CNAME xxxxxxxxx.cloudfront.net
AEM Configuration
Create a preview user in the Author instance with read-only access to the appropriate content/DAM and an explicit password set- reviewaemuser/reviewaemuser!(Please validate with Adobe before implementing this solution if there is any licensing issue with this common user, my understanding is there should not be any impact)
The Author instance is configured with this preview hostname as an additional VHOST in author-vhosts.any — author-vhosts.any, this file enable the supported vhosts for author-farm.any, also disable the http to https redirect in the default.vhost for the specific domain, even though the preview URL is enabled through https the SSL forward related headers will not be sent to the Dispatcher e.g “X-Forwarded-Proto”
default.vhost
RewriteEngine on
 RewriteCond %{HTTP:X-Forwarded-Proto} !https
 RewriteCond %{HTTP_HOST} !^preview-author.example.com$
 RewriteCond %{REQUEST_URI} !^/dispatcher/invalidate.cache
 RewriteRule !/eagle/check https://%{SERVER_NAME}%{REQUEST_URI} [L,R]
author-vhosts.any
"author-prod-example.com"
"preview-author.example.com"
AEM renders the page in the Author instance with the AEM authoring user interface disabled, effectively producing HTML markup identical to the output of the Publish instance once activated
Now the configurations are ready, Web publishers can construct a URL similar to the below, reflecting a page location within AEM, and circulate this to any user needing to preview the currently-authored content before it is activated live to the public-facing website. This URL is accessible with complete content path, but behind the credentials provided(reviewaemuser/reviewaemuser!). https://preview-author.example.com/content/test/us/en/home.html