An image map is an image with clickable areas. The areas are defined with one or more <area> tags. The HTML <map> tag defines an image map.
<img src="workplace.jpg" alt="Workplace" usemap="#workmap"><map name="workmap">
  <area shape="rect" coords="34,44,270,350" alt="Computer" href="computer.htm">
  <area shape="rect" coords="290,172,333,250" alt="Phone" href="phone.htm">
  <area shape="circle" coords="337,300,44" alt="Coffee" href="coffee.htm">
</map>
The idea behind an image map is that you should be able to perform different actions depending on where in the image you click.
In this tutorial let us see how to enable image maps for AEM assets through the Image core component.
AEM enables the support to define the image map for assets along with Image Core components, the image maps can be defined through the Asset UI and the Image Core components enable the map configurations to output HTML
To enable the image map, edit the image through Asset UI
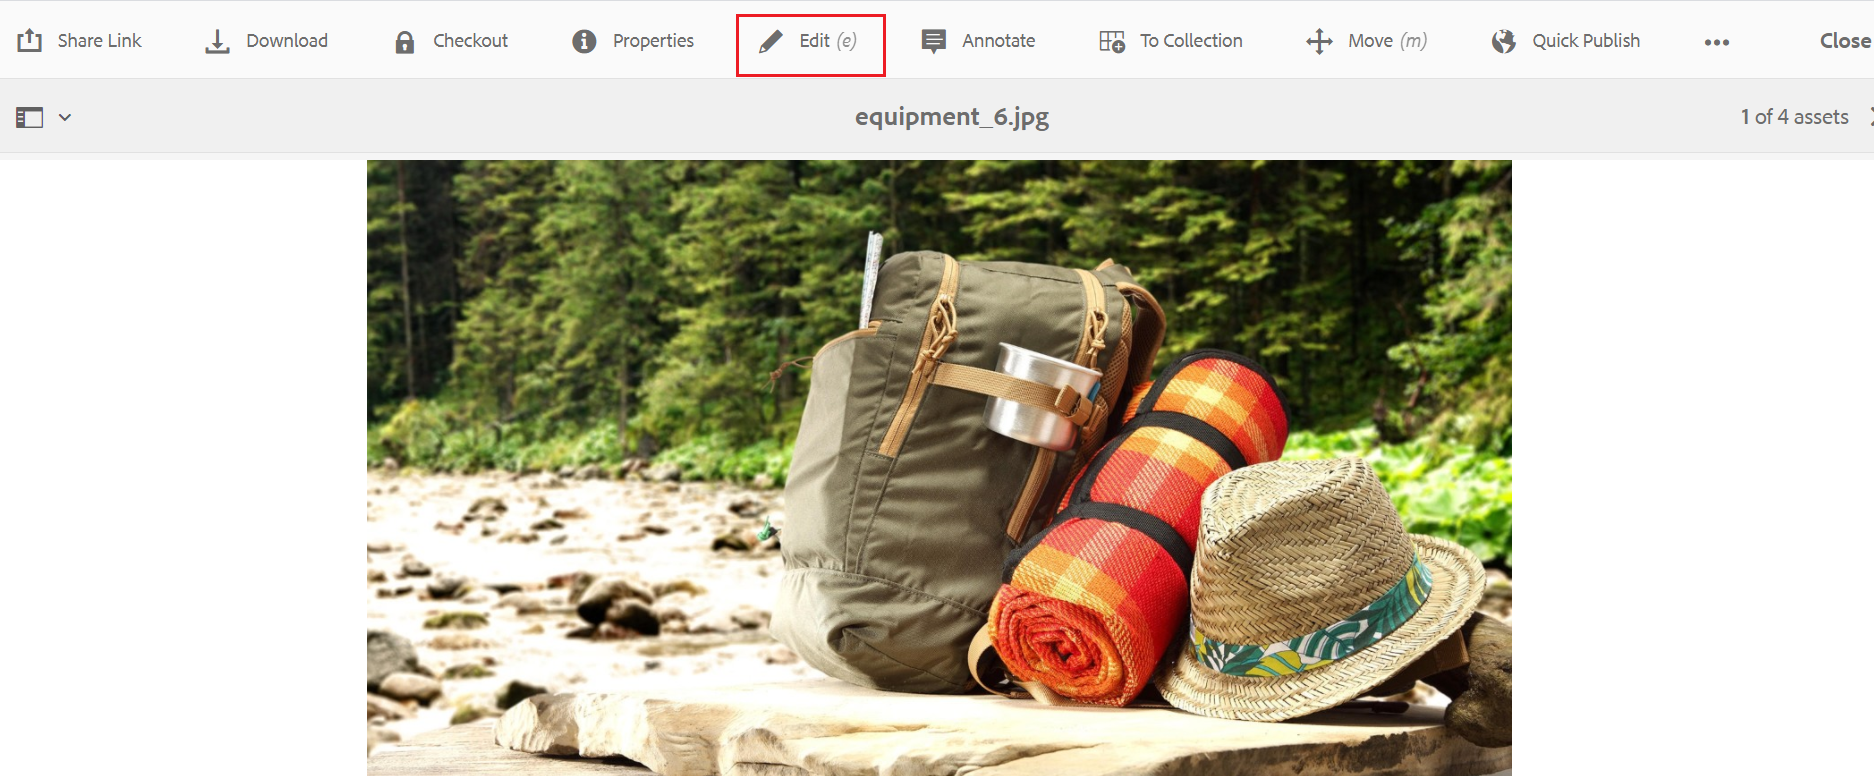
Click on Launch Map — Launch Map feature(AEM 6.3 with Service Pack 3 or AEM 6.4 with Service Pack 2 or other higher versions)along with core component(2.1.0+) enables the support to configure the image map — clickable areas to the assets.
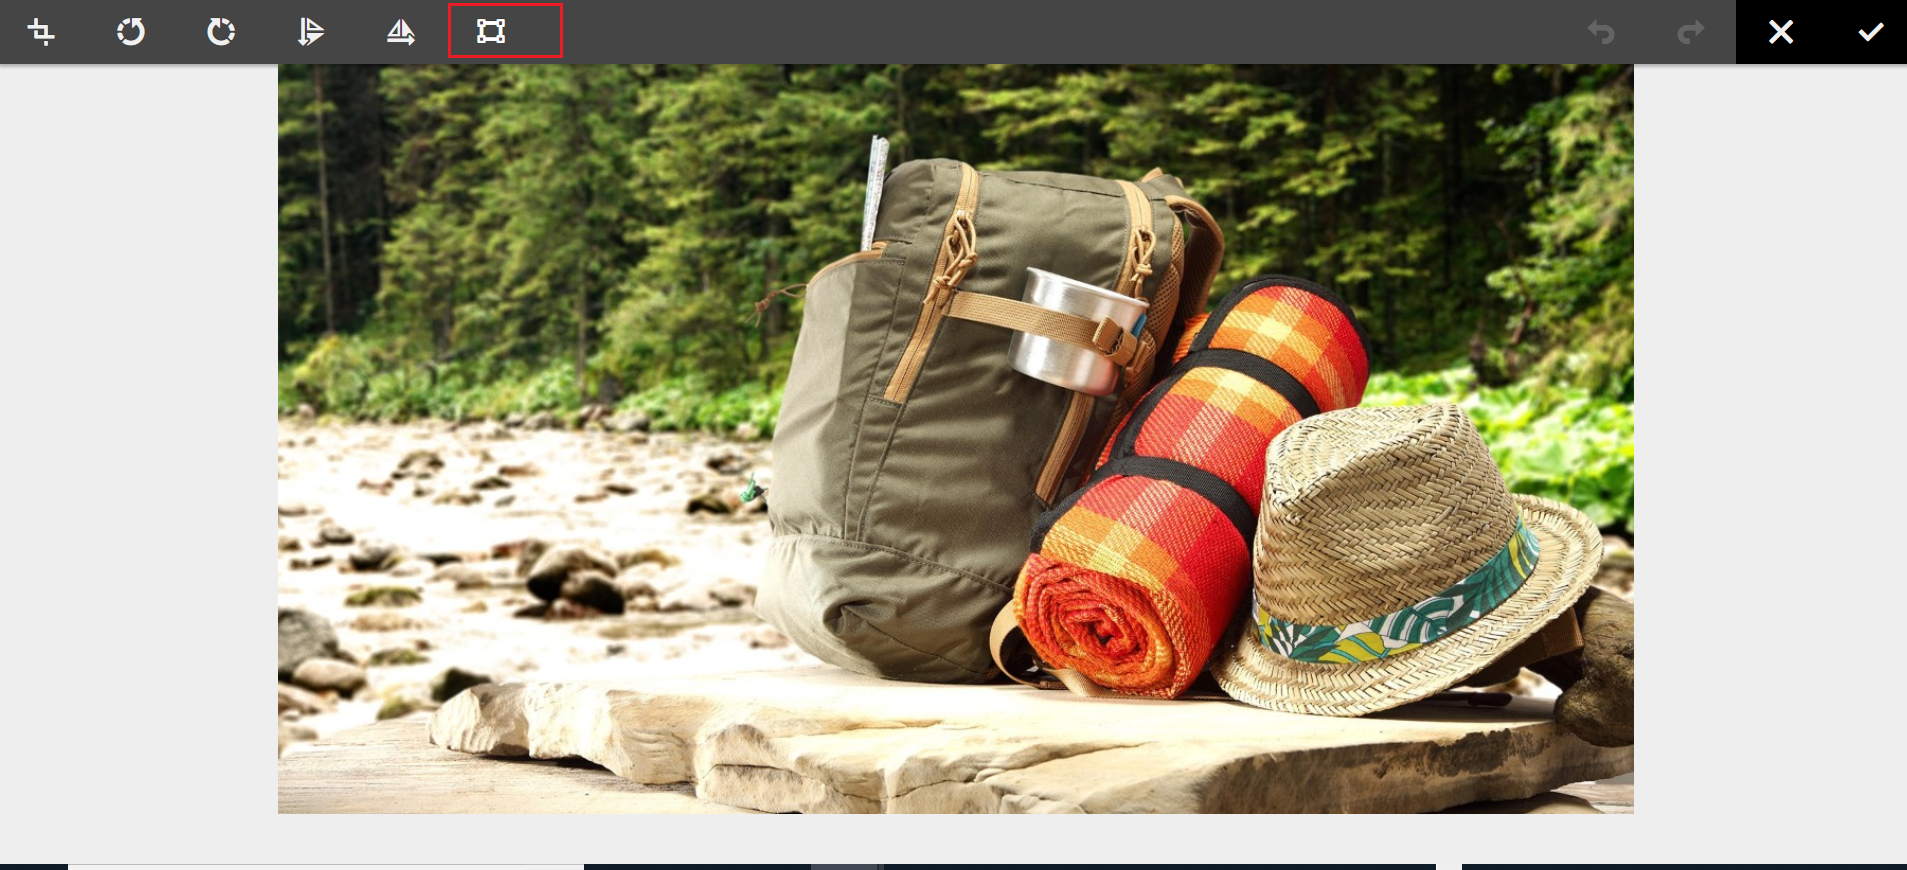
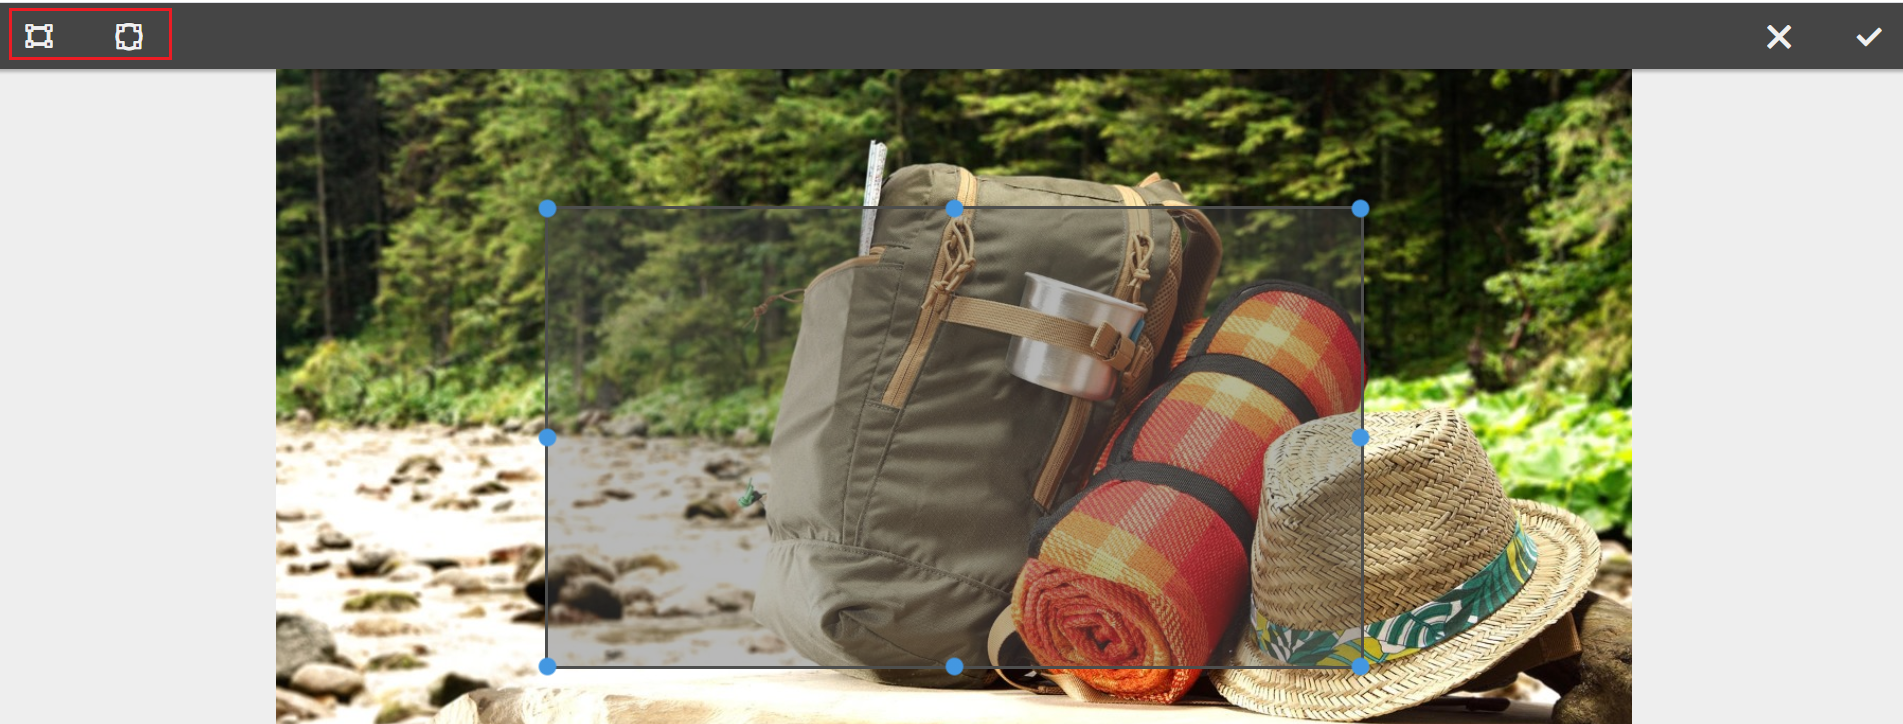
Now you should be able to enable the Rectangular or Circular Map
Define the URL path, Alt Text, and the Target for each Map’s
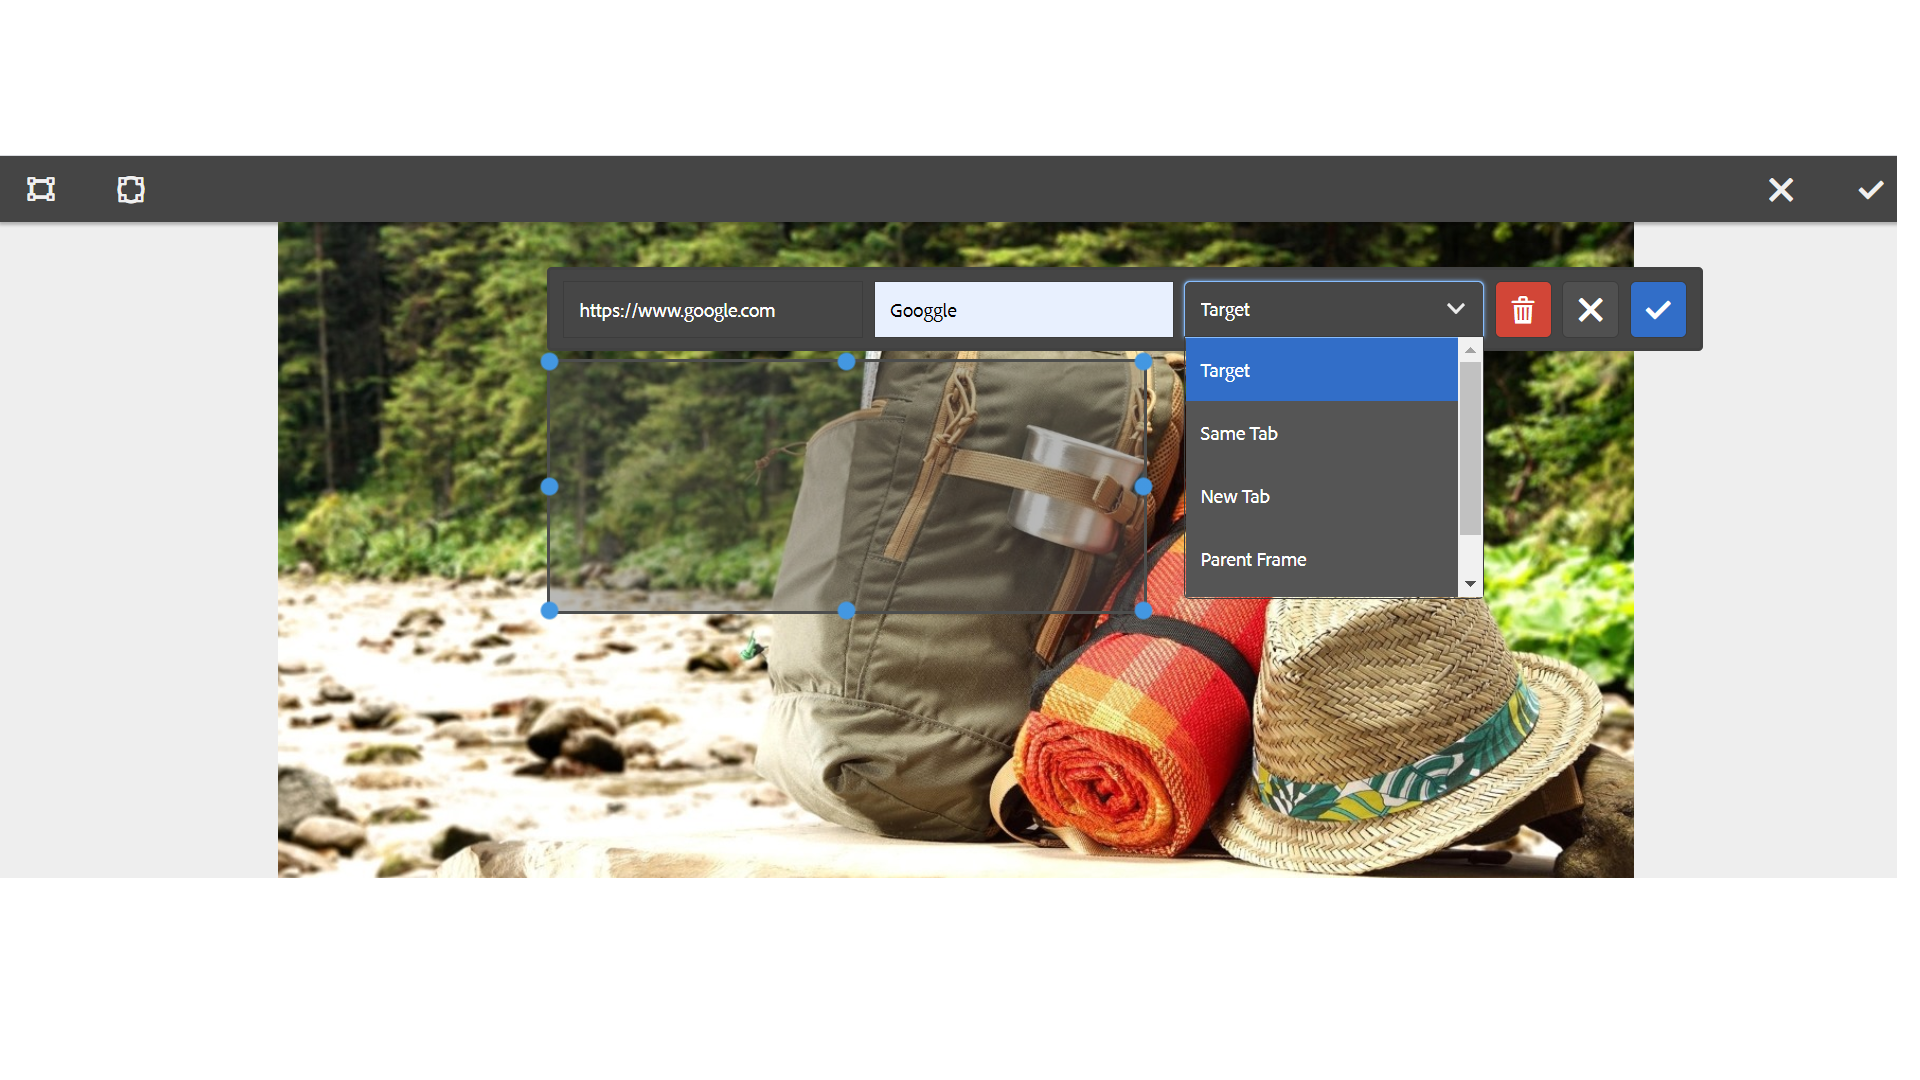
The image map details are stored to the repository upon saving
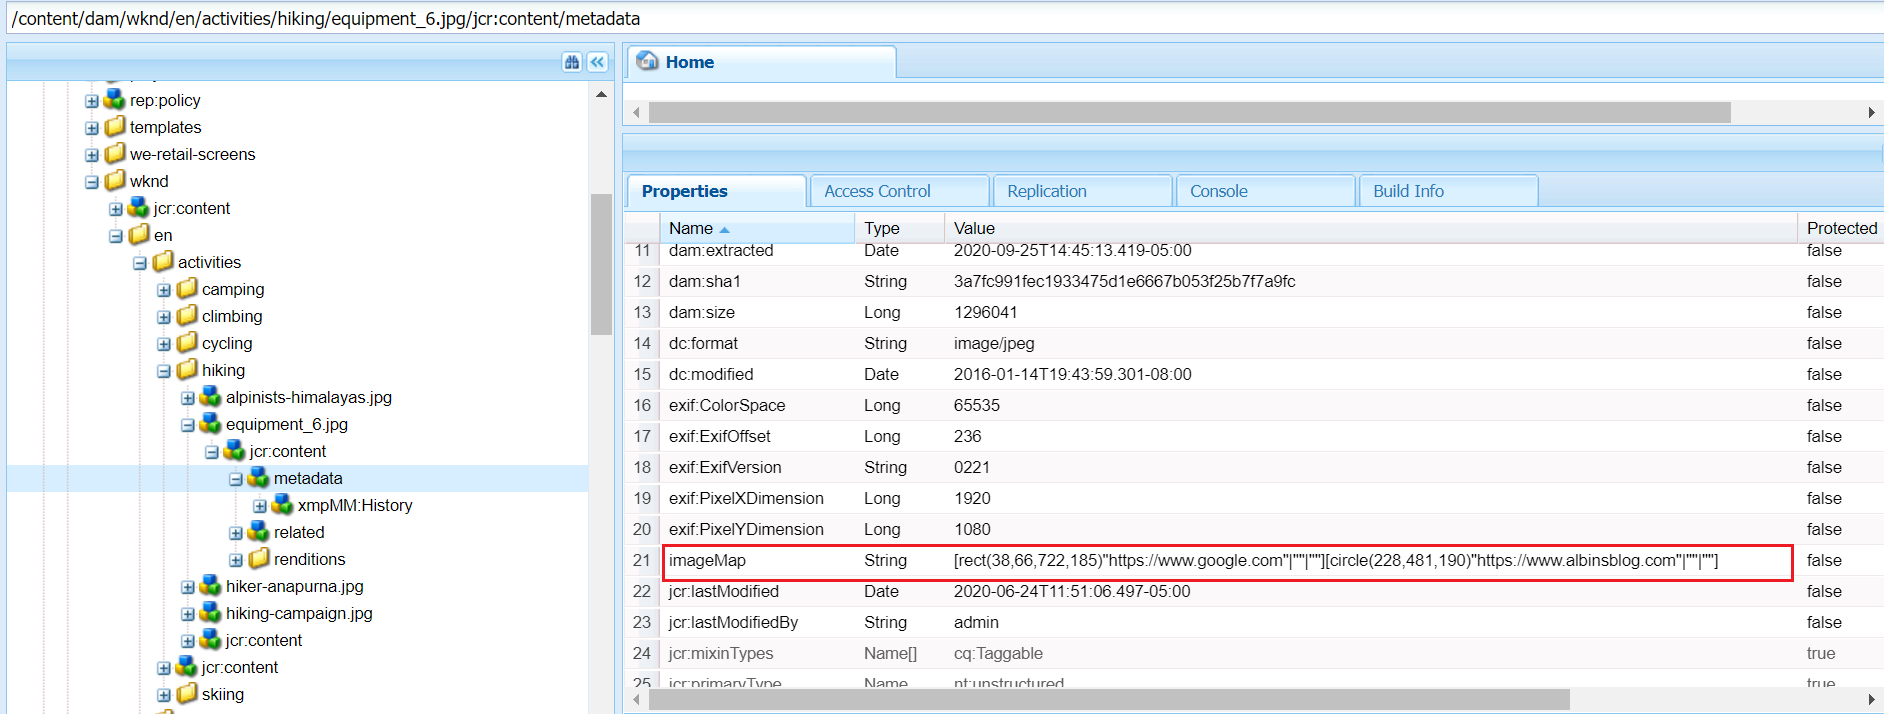
The Image core component can be used to author the image into the pages, the image core component(https://github.com/adobe/aem-core-wcm-components/blob/master/content/src/content/jcr_root/apps/core/wcm/components/image/v2/image/image.html) generates the image map HTML based on the configuration enabled by the author.
<img src="${image.src}" class="cmp-image__image" itemprop="contentUrl" data-cmp-hook-image="image" data-sly-attribute.usemap="${image.areas ? usemap : ''}"                 alt="${image.alt}" title="${image.displayPopupTitle && image.title}"/><map data-sly-test="${image.areas}" data-sly-list.area="${image.areas}" name="${resource.path}" data-cmp-hook-image="map">
   <area shape="${area.shape}" coords="${area.coordinates}" href="${area.href}" target="${area.target}" alt="${area.alt}" data-cmp-hook-image="area" data-cmp-relcoords="${area.relativeCoordinates}">
</map>
This will generate the required HTML output and enable the clickable area based on the configuration that can direct the users to different URLs based on the area where they clicked, redirect the user to a specific URL based on where the user clicked.
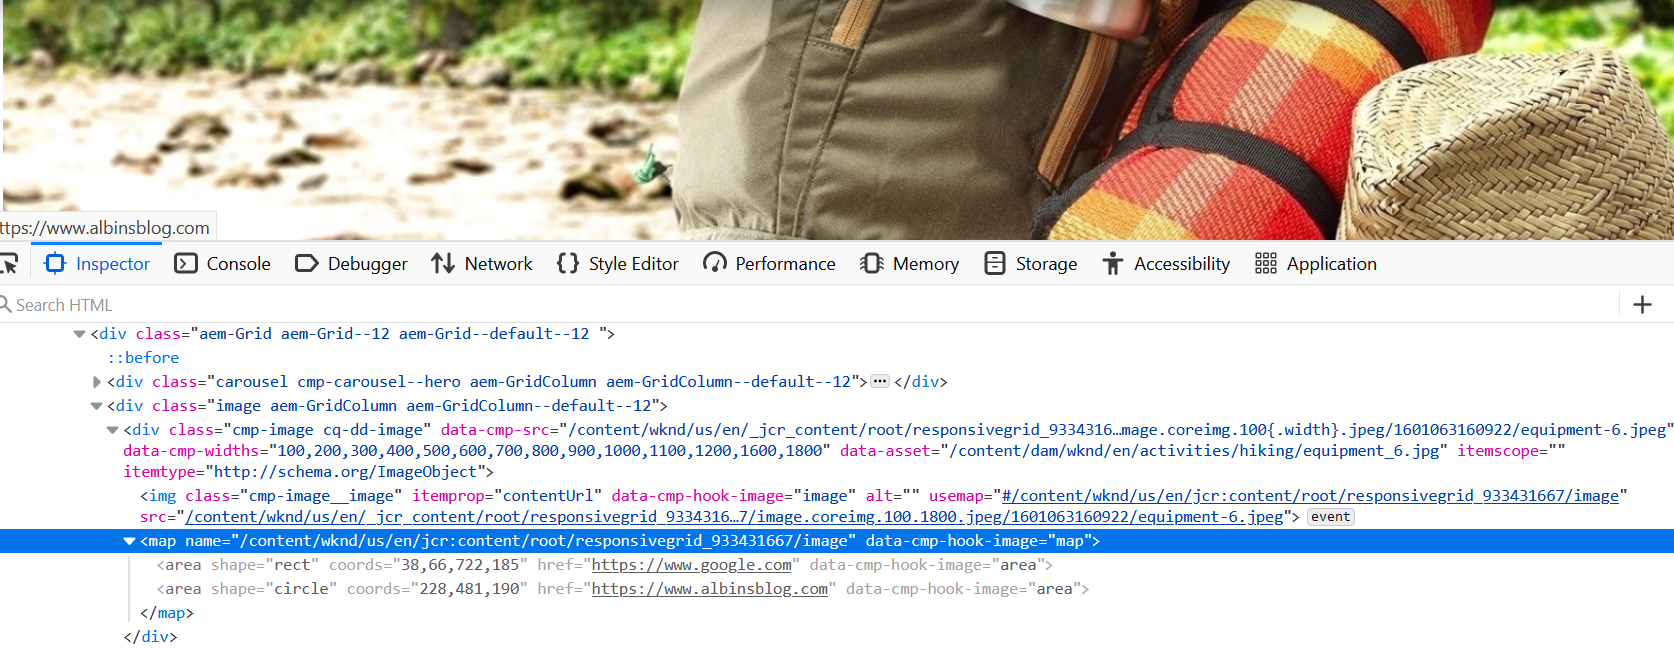
This is the useful feature and can be used by authors to define the image maps through visual editor, AEM internally calculates the coordinates for the selected area and assign the target URL.
The image map configuration changes will not reflect automatically to the images already referenced in the pages, the images should be reconfigured into the pages to reflect the latest image map configurations.
Another observation is, in some cases, the calculated image coordinates are not working as expected — the required HTML is enabled but the areas are not clickable in the UI.
Tech Mastery: Deep Dives into AEM, Cloud Technologies, AI Innovations, and Advanced Marketing Strate
Welcome to Tech Mastery, your expert source for insights into technology and digital strategy. Explore topics like Adobe Experience Manager, AWS, Azure, generative AI, and advanced marketing strategies. Delve into MACH architecture, Jamstack, modern software practices, DevOps, and SEO. Our blog is ideal for tech professionals and enthusiasts eager to stay ahead in digital innovations, from Content Management to Digital Asset Management and beyond.
Friday, September 25, 2020
How to enable image maps for Adobe Experience Manager(AEM) assets? | Launch Map in Adobe Experience Manager
Friday, September 11, 2020
Adobe Experience Manager: Reporting on User’s Last Login Date
In this tutorial let us see the details on how to build a custom user report in AEM to get the user profile data along with last login details.
AEM won’t provide any OOTB feature to track the last login details of the users — timestamp of the user’s login.
Sometimes we may have the requirement to report the last login timestamp of the users for auditing purposes e.g identify the users who are not login to the system for the last 1 month, identify the inactive users, etc
This can be achieved by enabling a Custom AuthenticationInfoPostProcessor to capture the last login timestamp and building a custom ACS AEM Commons report to fetch the required user profile data along with the last login timestamp.
As a first step define a custom AuthenticationInfoPostProcessor component to update the last login timestamp to the user profile.
AuthenticationInfoPostProcessor
AuthenticationInfoPostProcessor allows bundles to modify the AuthenticationInfo object after authentication has been performed.

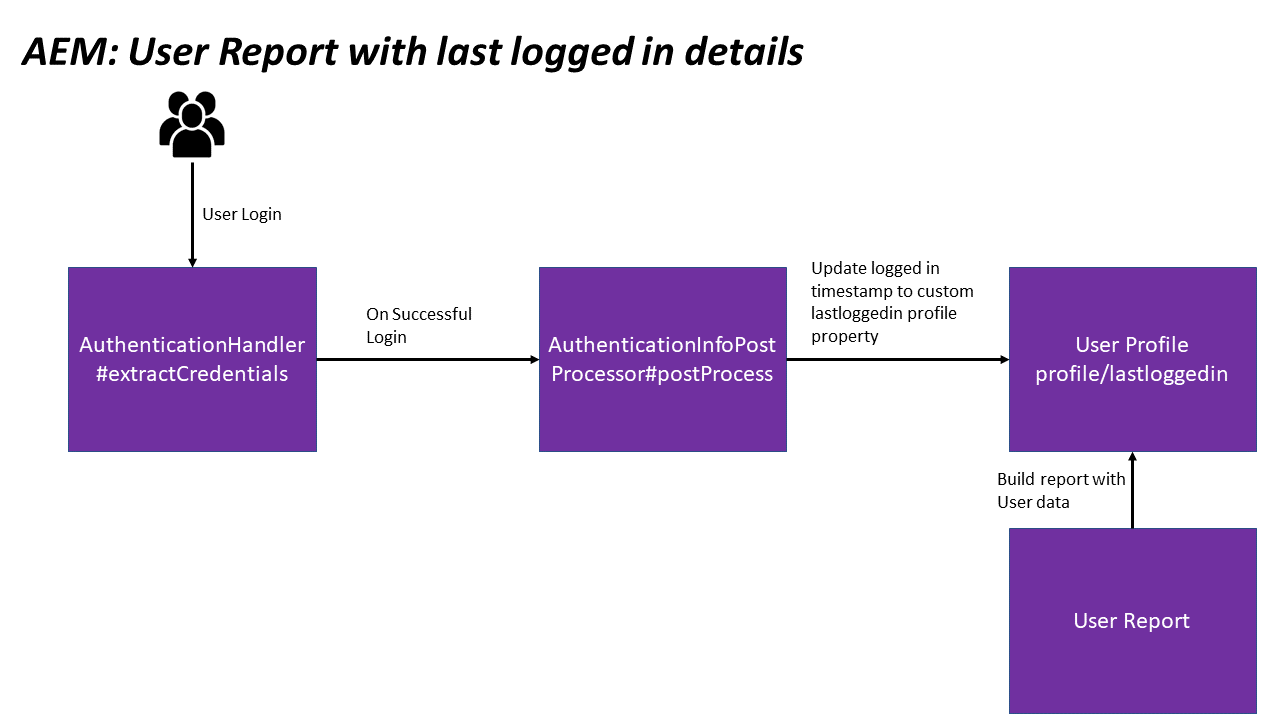
AuthenticationHandler#extractCredentials invokes AuthenticationInfoPostProcessor#postProcess with AuthenticationInfo on successful authentication. The “postProcess” can modify the AuthenticationInfo or perform other operations based on the requirement in our case updating the user profile with login timestamp.
Let us enable a custom AuthenticationInfoPostProcessor that will update the user profile with the last login timestamp.
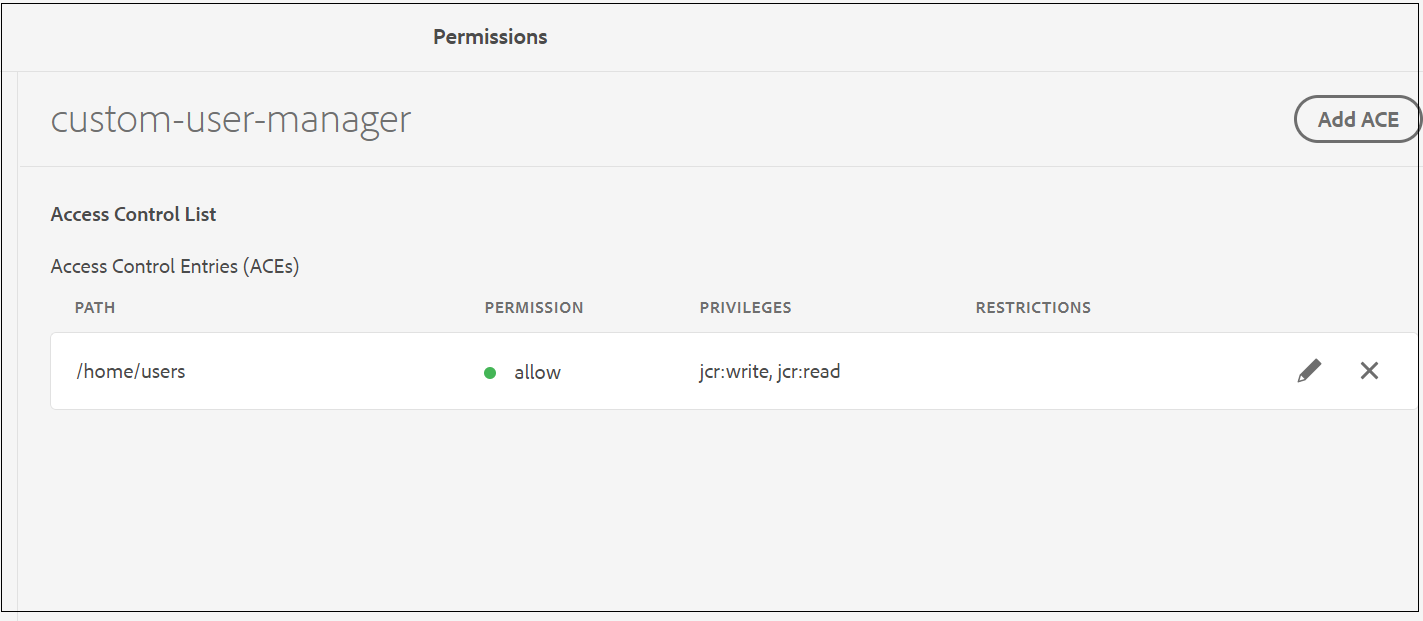
Enable a service user with the name “custom-user-manager” and provide the jcr:read/jcr:write access to /home/users also enable the user service mapping



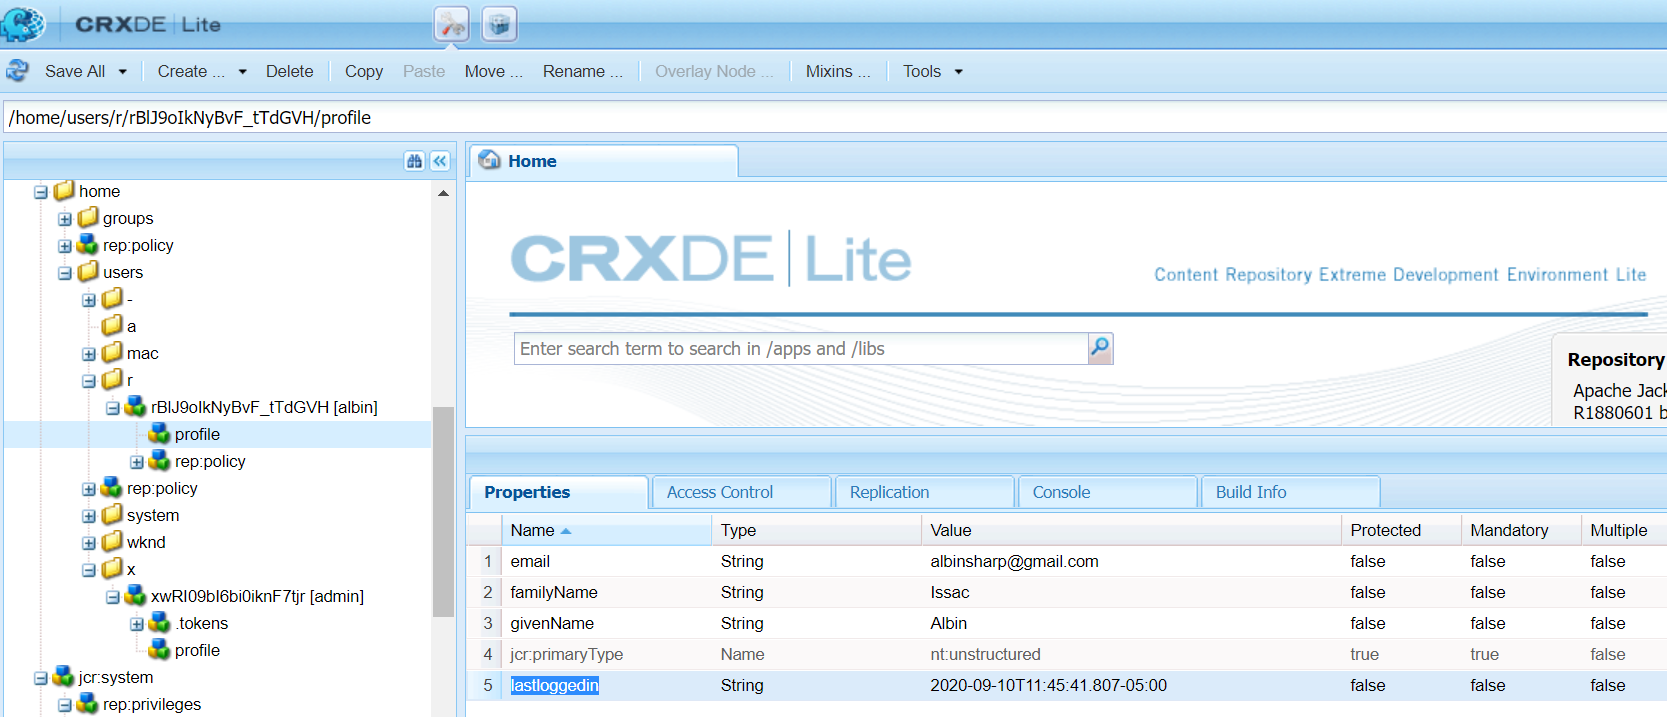
Now the user profile will be updated with the login timestamp on every login to the custom property “lastloggedin”.

Let us now build a custom ACS AEM Commons report to fetch the basic user data
Tools →ACS AEM Commons →Reports
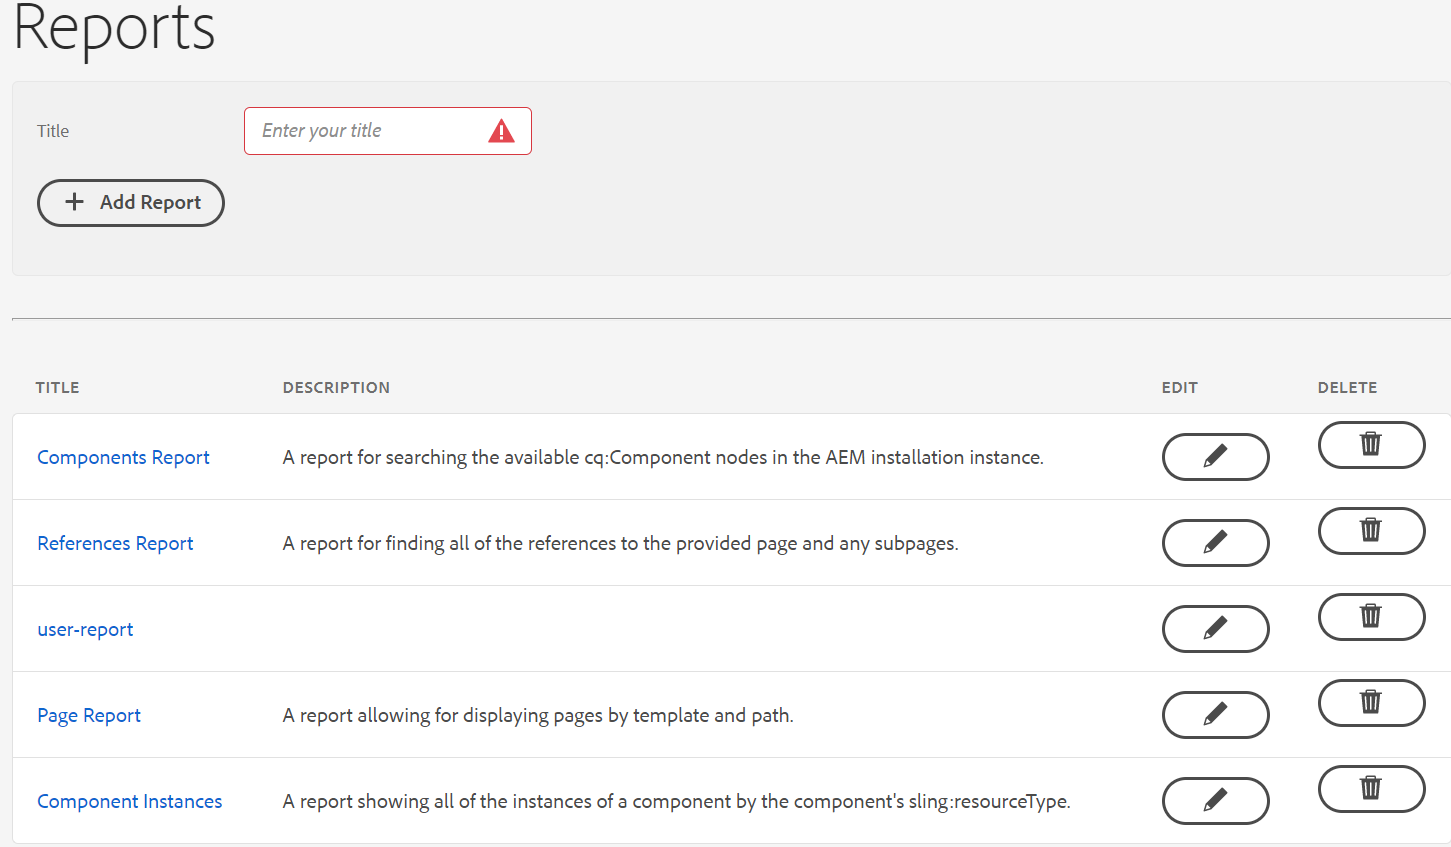
Add a new Report with the name “user-report” (I am generating this in AEM as Cloud Author instance with the latest — 4.8.0 ACS AEM Commons package)

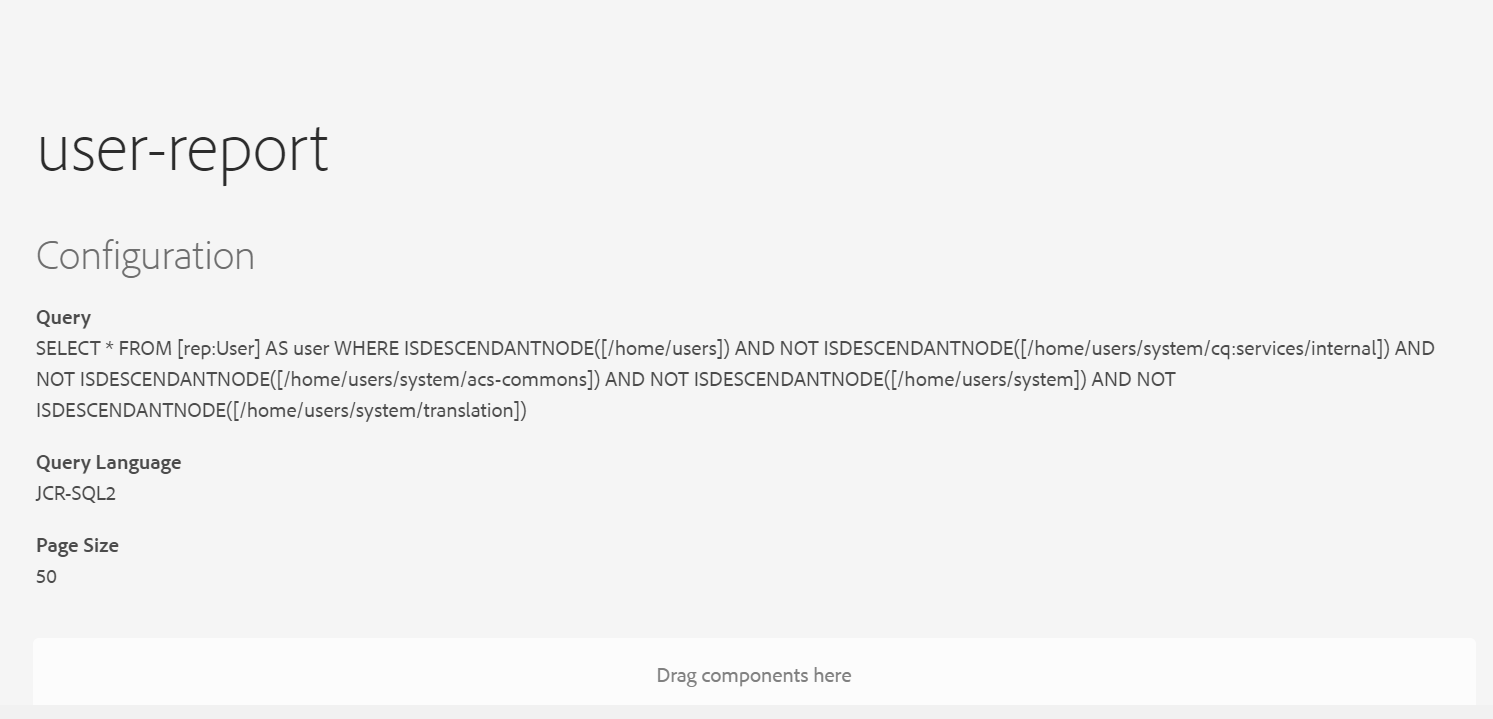
Edit the report and add the “JCR Query Report configuration” component in the Configuration section.
Query — this excludes the system-specific users, modify the query based on your requirement to fetch the report for different scenarios.
SELECT * FROM [rep:User] AS user WHERE ISDESCENDANTNODE([/home/users]) AND NOT ISDESCENDANTNODE([/home/users/system/cq:services/internal]) AND NOT ISDESCENDANTNODE([/home/users/system/acs-commons]) AND NOT ISDESCENDANTNODE([/home/users/system]) AND NOT ISDESCENDANTNODE([/home/users/system/translation])Query Language — JCR SQL2
Page Size -50

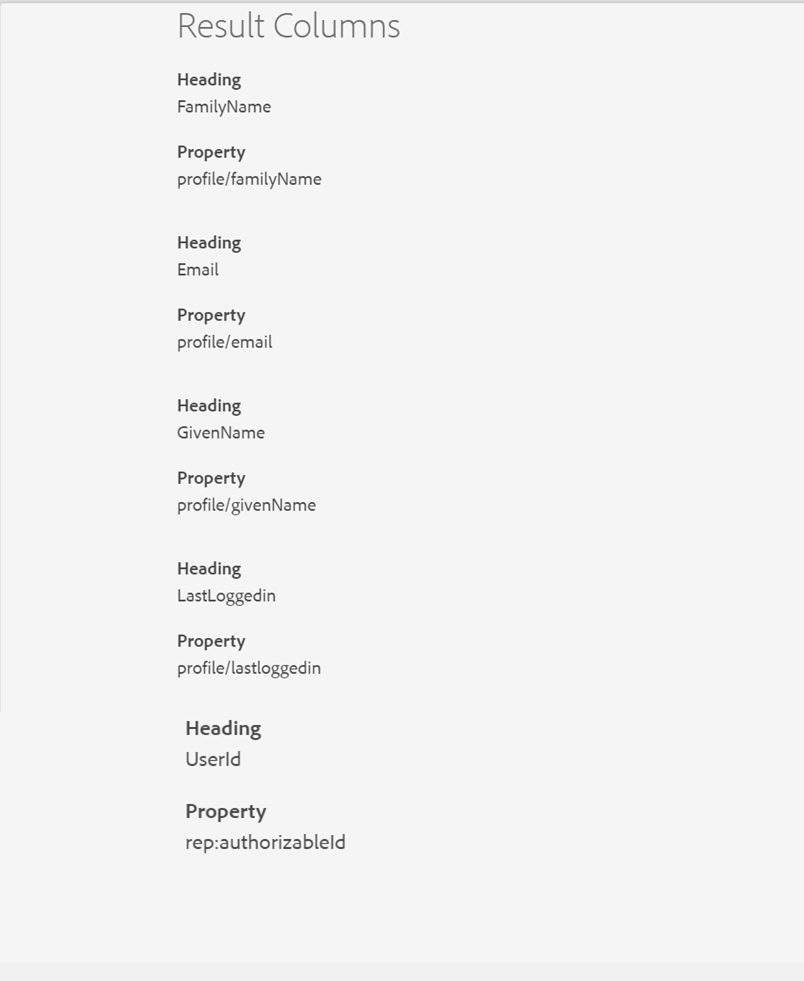
Now configure the required fields including “lastloggedin” under Result Columns with component Type “ACS Commons Report Builder Text Column”

Now open the report and click on “Execute Report”, the report can be downloaded as a CSV file if required — the report now includes the last login timestamp of the users.

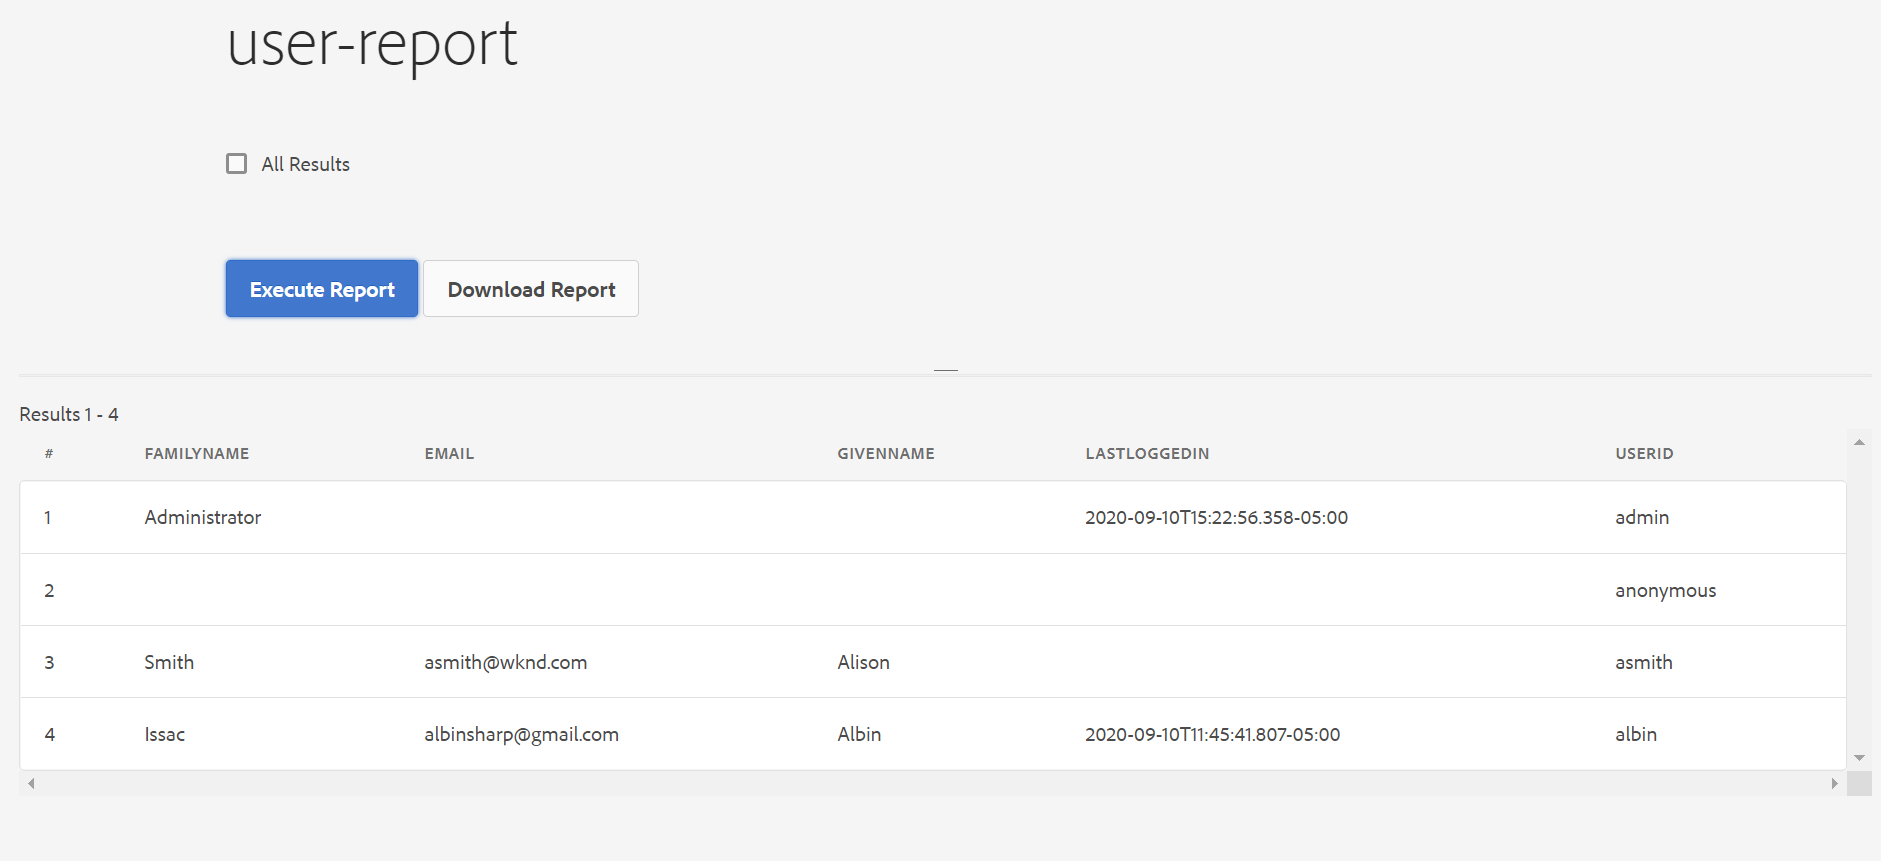
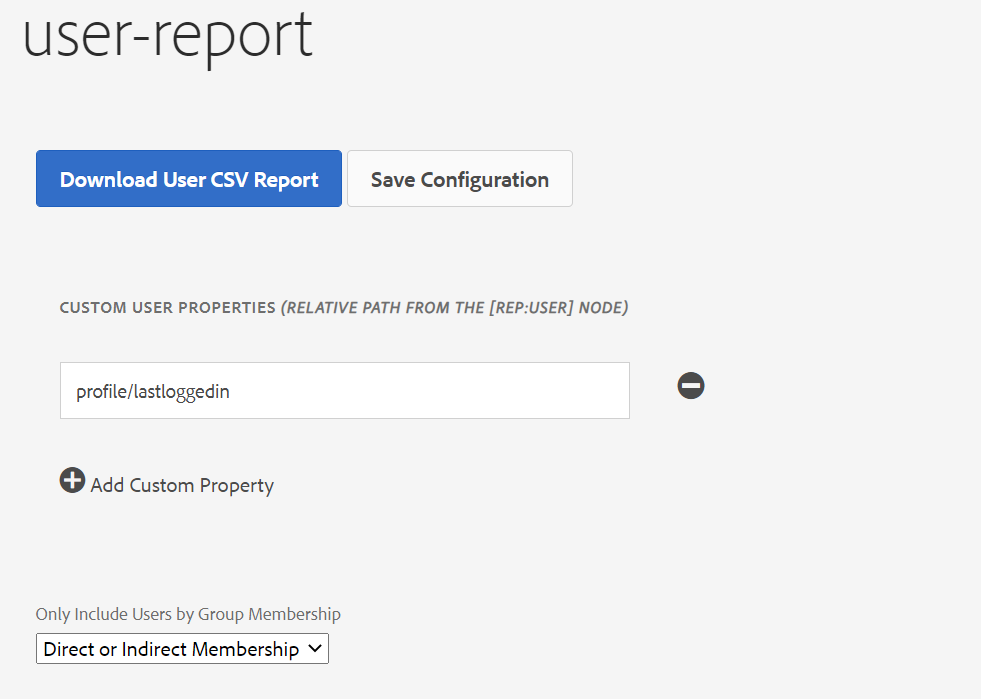
The same report can also be generated through Tools →ACS AEM Commons →User to CSV Exporter, this report includes the additional details like “group names” but includes all the users in the system, the report can be downloaded as a CSV file.

Even the query builder can be used to identify the user’s login to the system within a specific time( the parameters can be modified to fetch the data for different scenarios)
p.hits=selective
p.limit=-1
path=/home/users
type=rep:User
1_relativedaterange.property=profile/lastloggedin
1__relativedaterange.lowerBound=-1M
orderby=@profile/lastloggedin
p.properties=profile/lastloggedin profile/givenName profile/familyName profile/email rep:authorizableId
The 1__relativedaterange.lowerBound value can be changed based on your requirement to 1s 2m 3h 4d 5w 1M 1y
http://localhost:4502/bin/querybuilder.json?1_relativedaterange.lowerBound=-1M&1_relativedaterange.property=profile%2flastloggedin&orderby=%40profile%2flastloggedin&p.hits=selective&p.limit=-1&p.properties=profile%2flastloggedin%20profile%2fgivenName%20profile%2ffamilyName%20profile%2femail%20rep%3aauthorizableId&path=%2fhome%2fusers&type=rep%3aUserThis will provide the JSON with user details who log in to the system for the last one month.
{
  "success": true,
  "results": 2,
  "total": 2,
  "more": false,
  "offset": 0,
  "hits": [
    {
      "rep:authorizableId": "albin",
      "profile": {
        "lastloggedin": "2020-09-10T22:15:41.807+05:30",
        "givenName": "Albin",
        "familyName": "Issac",
        "email": "[email protected]"
      }
    },
    {
      "rep:authorizableId": "admin",
      "profile": {
        "lastloggedin": "2020-09-11T01:52:56.358+05:30",
        "familyName": "Administrator"
      }
    }
  ]
}
The Custom AuthenticationInfoPostProcessor can be modified even to add other scenarios e.g capturing the number of times the user login to the system.


