Social Login with Google OAuth2— Adobe Experience Manager (AEM)
Social login is the ability to present the option for a site visitor to sign in with their social accounts like Facebook, Twitter, LinkedIn and etc. AEM supports OOTB Facebook and Twitter Social logins but Google login is not supported OOTB and need to build custom Provider to support the log in flow for websites.
AEM internally uses the scribejava module to support the Social login flows, scribejava supports multiple providers and both OAuth 1.0 and OAuth 2.0 protocols.
This tutorial explains the steps and the customization required to support the Google login in AEM as Cloud version, the same should work with minimal change for other AEM versions.
Prerequisites
- Google Account
- AEM as Cloud Publisher
- WKND Sample Website
- Git Terminal
- Maven
- Google Login Flow
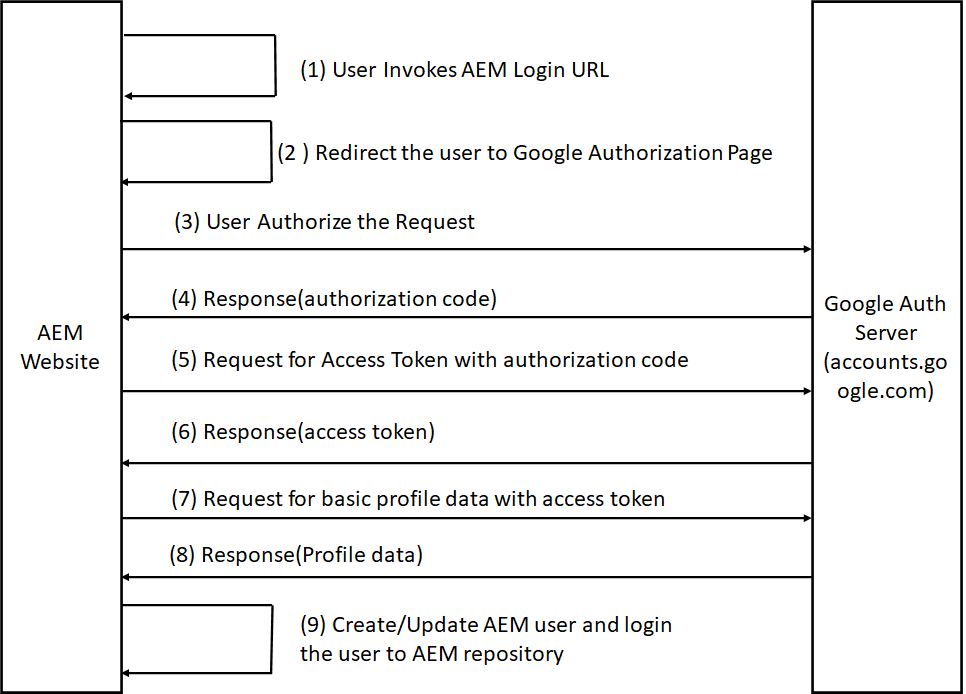
AEM Login URL
http://localhost:4503/j_security_check?configid=google
Auth Page URL
Access Token URL(POST)
Steps
- Create Project in Google Developers Console
- Setup Custom Google OAuth Provider
- Configure Service User
- Configure OAuth Application and Provider
- Enable OAuth Authentication
- Test the Login Flow
- Encapsulated Token Support
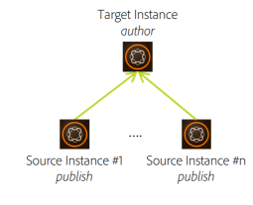
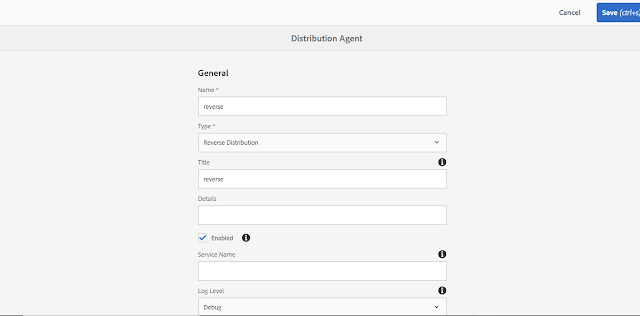
- Sling Distribution user’s synchronization
Create Project in Google Developers Console
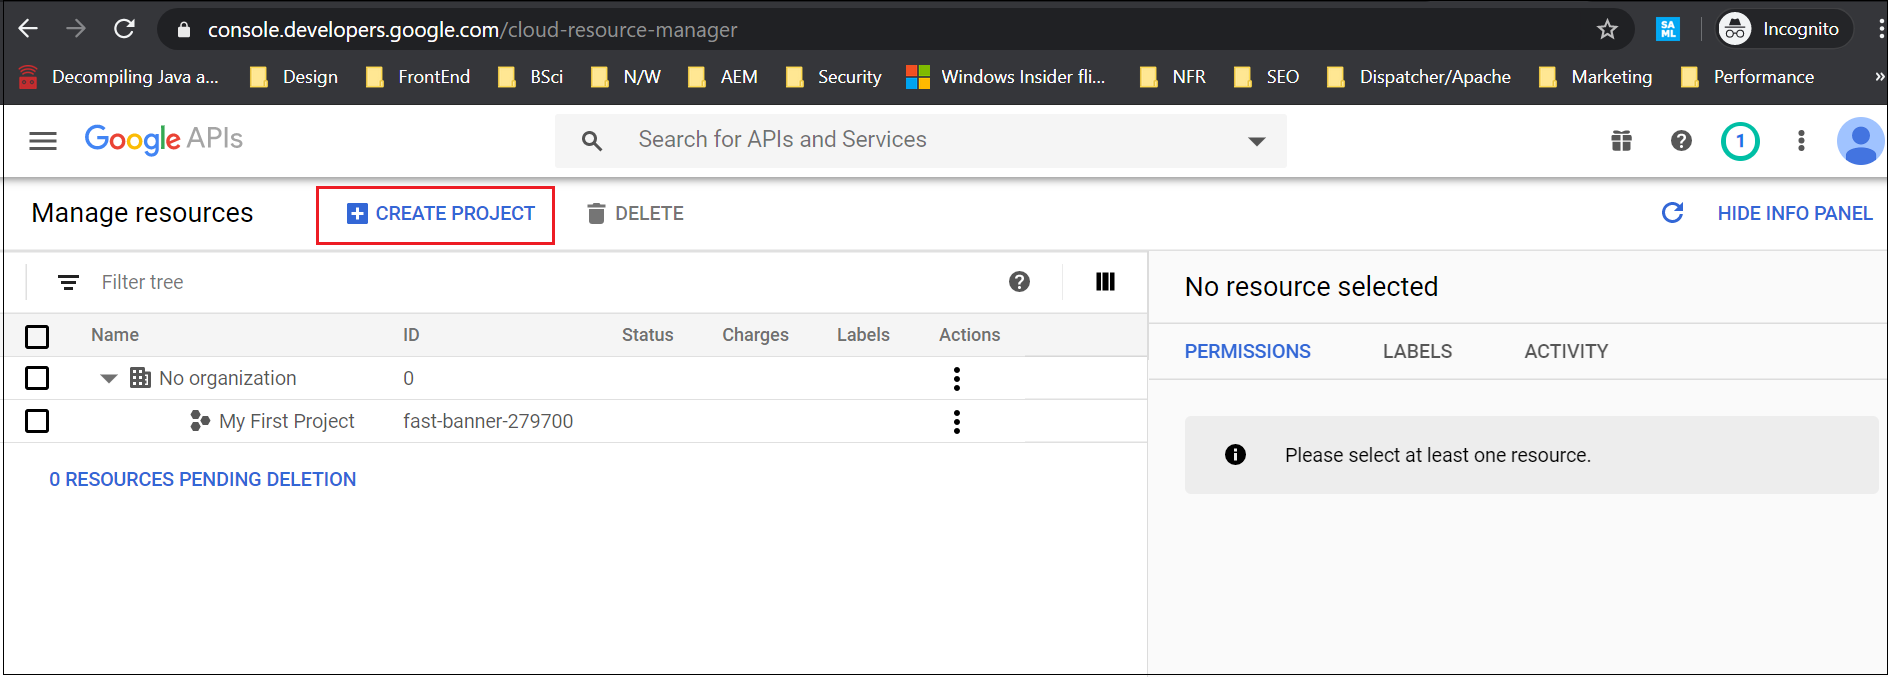
Click on “Create Project”
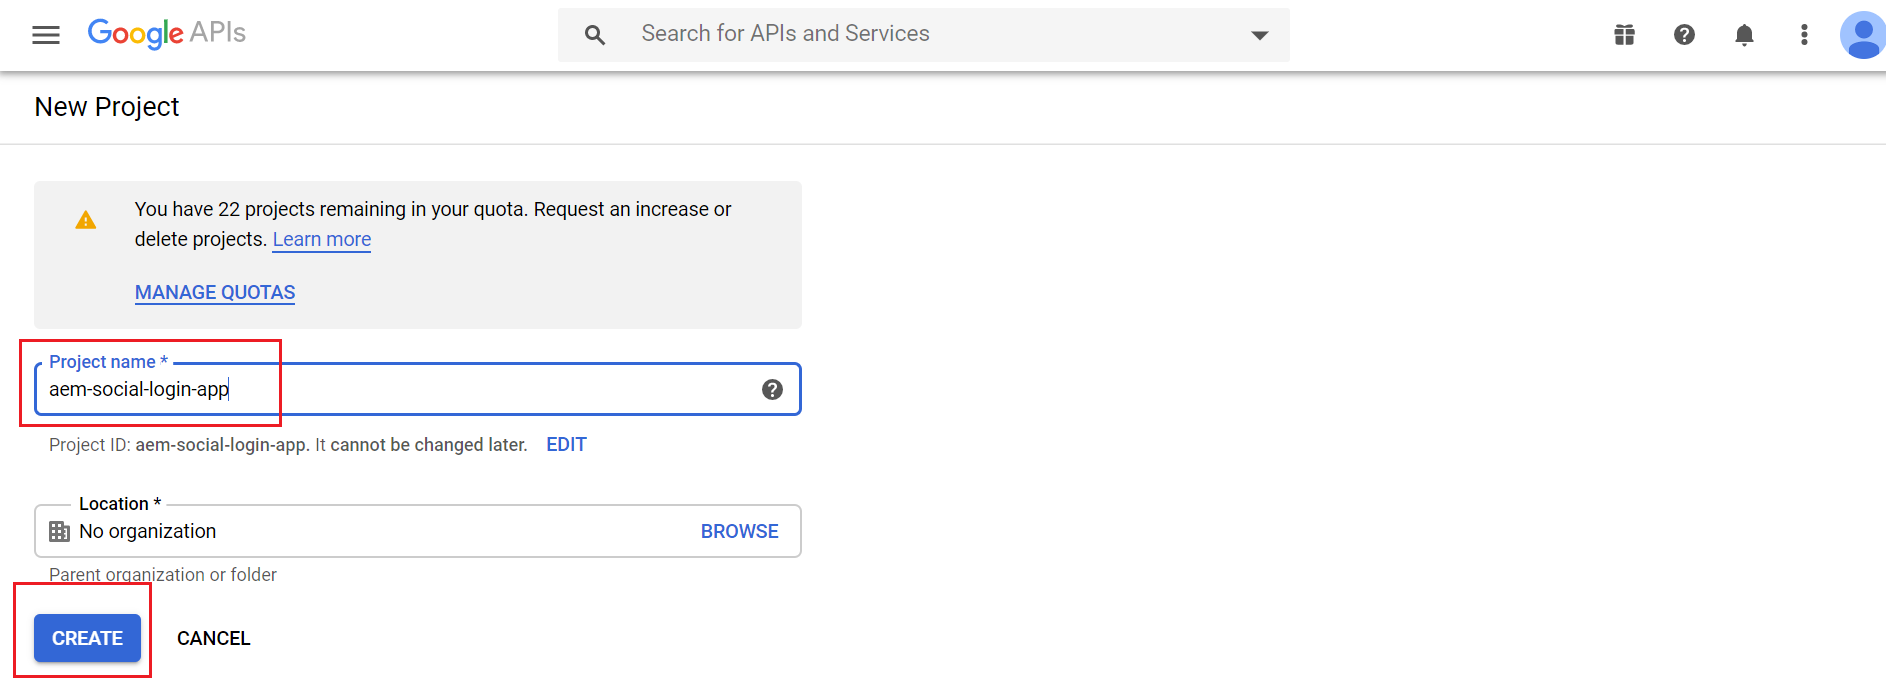
Enter a project name and click on Create
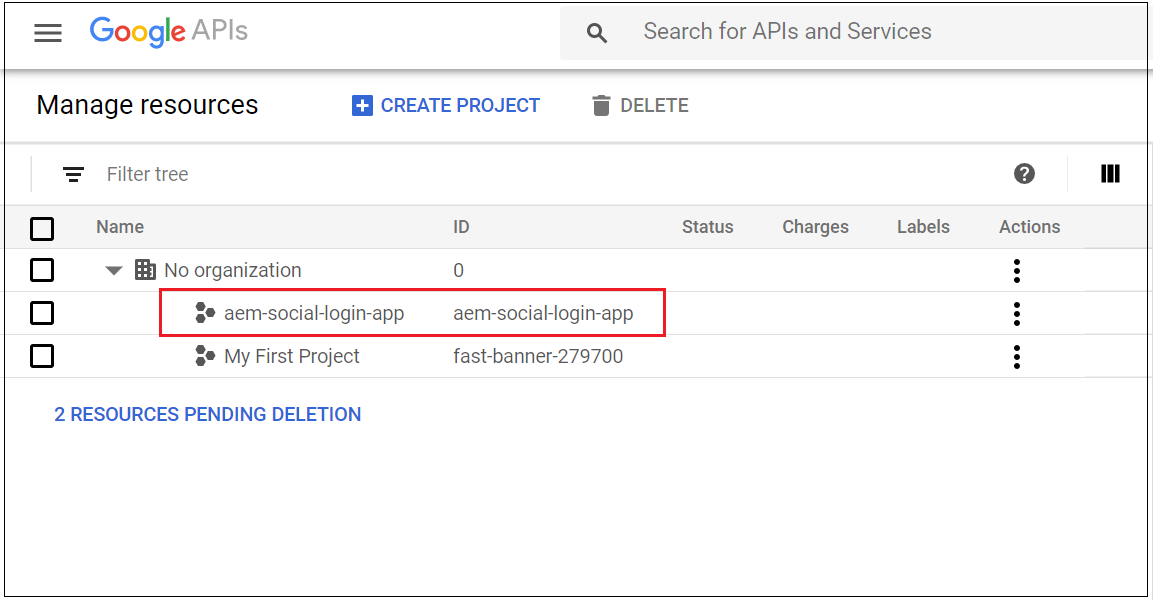
The project is created now
Let us now configure the OAuth client, access settings
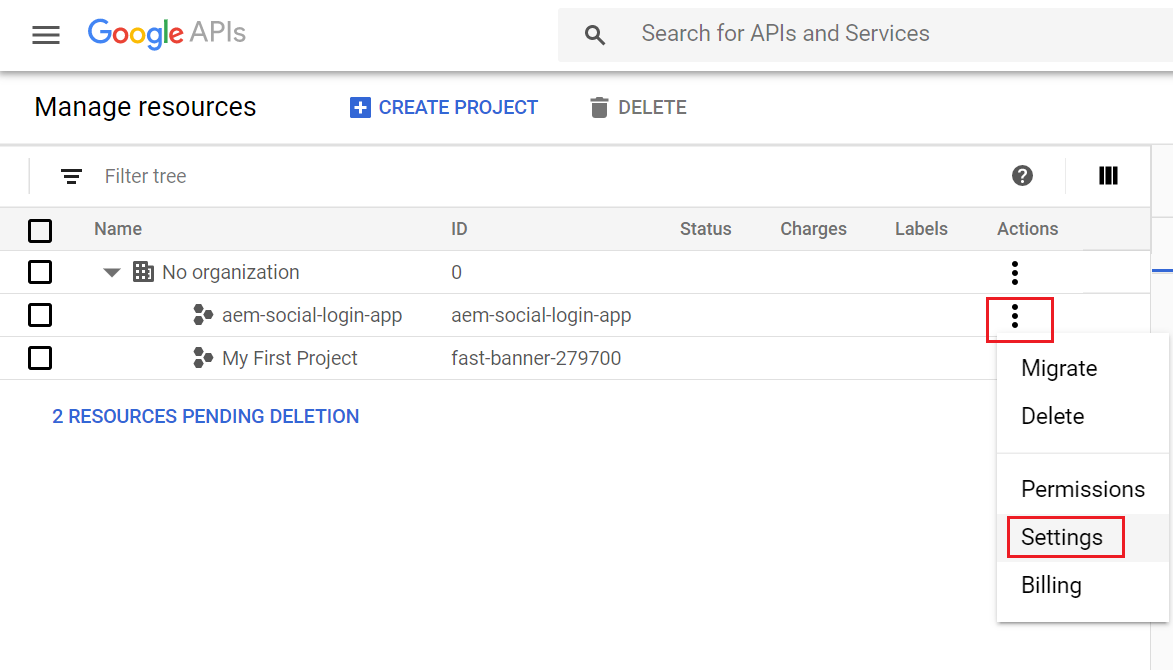
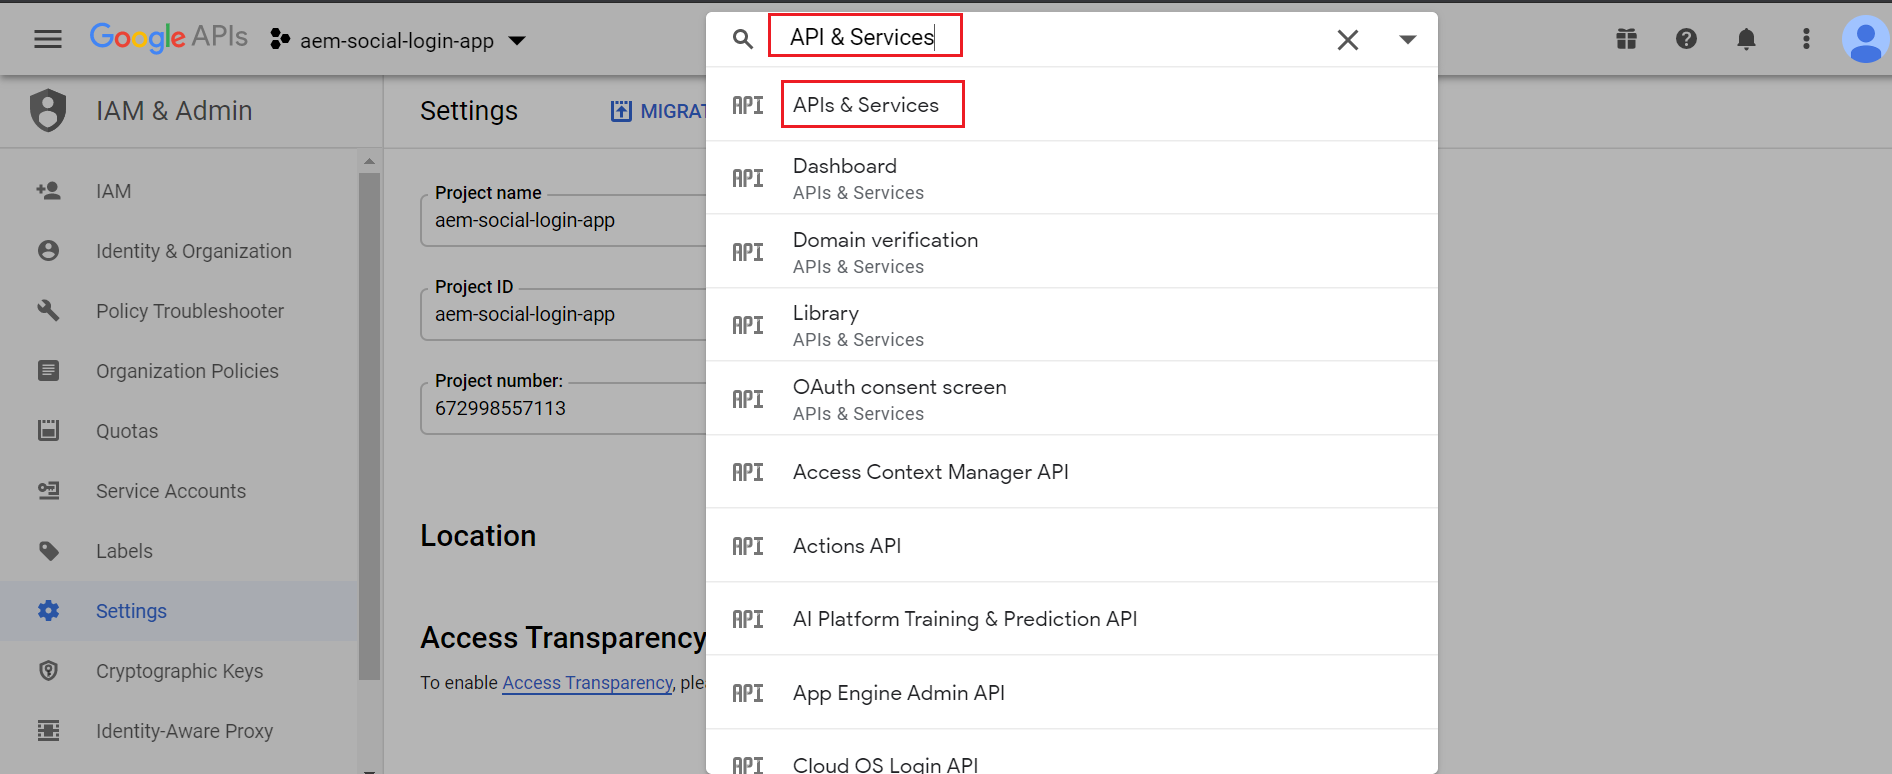
Search for “API & Services”, click on “APIs & Services”
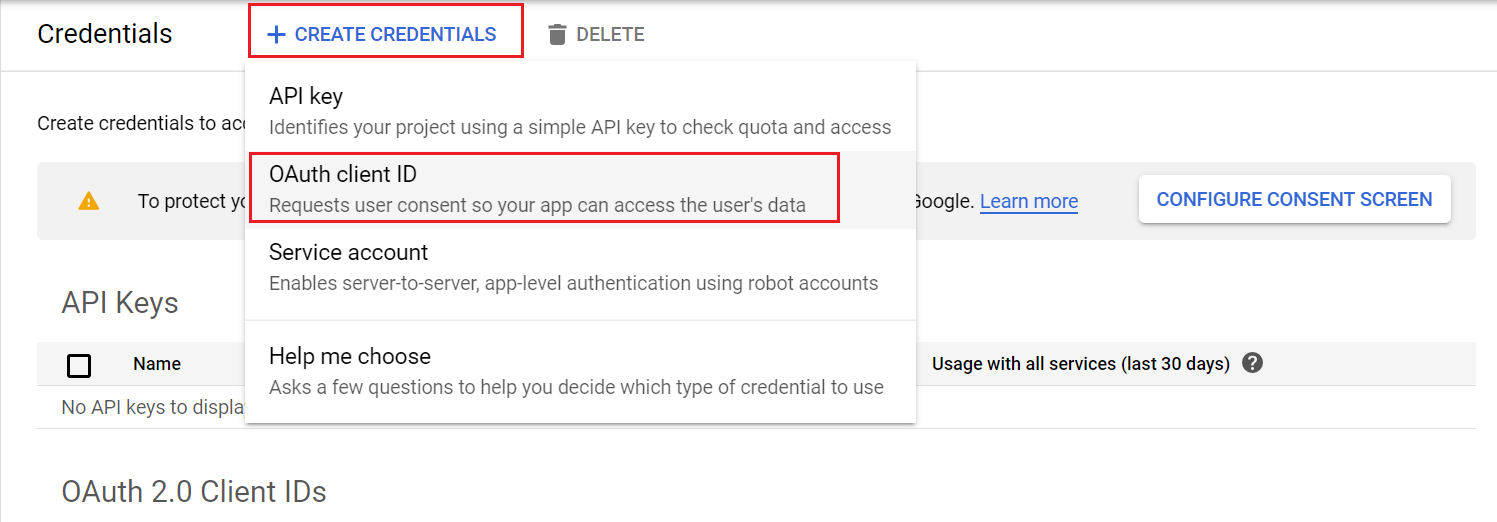
Click on Credentials

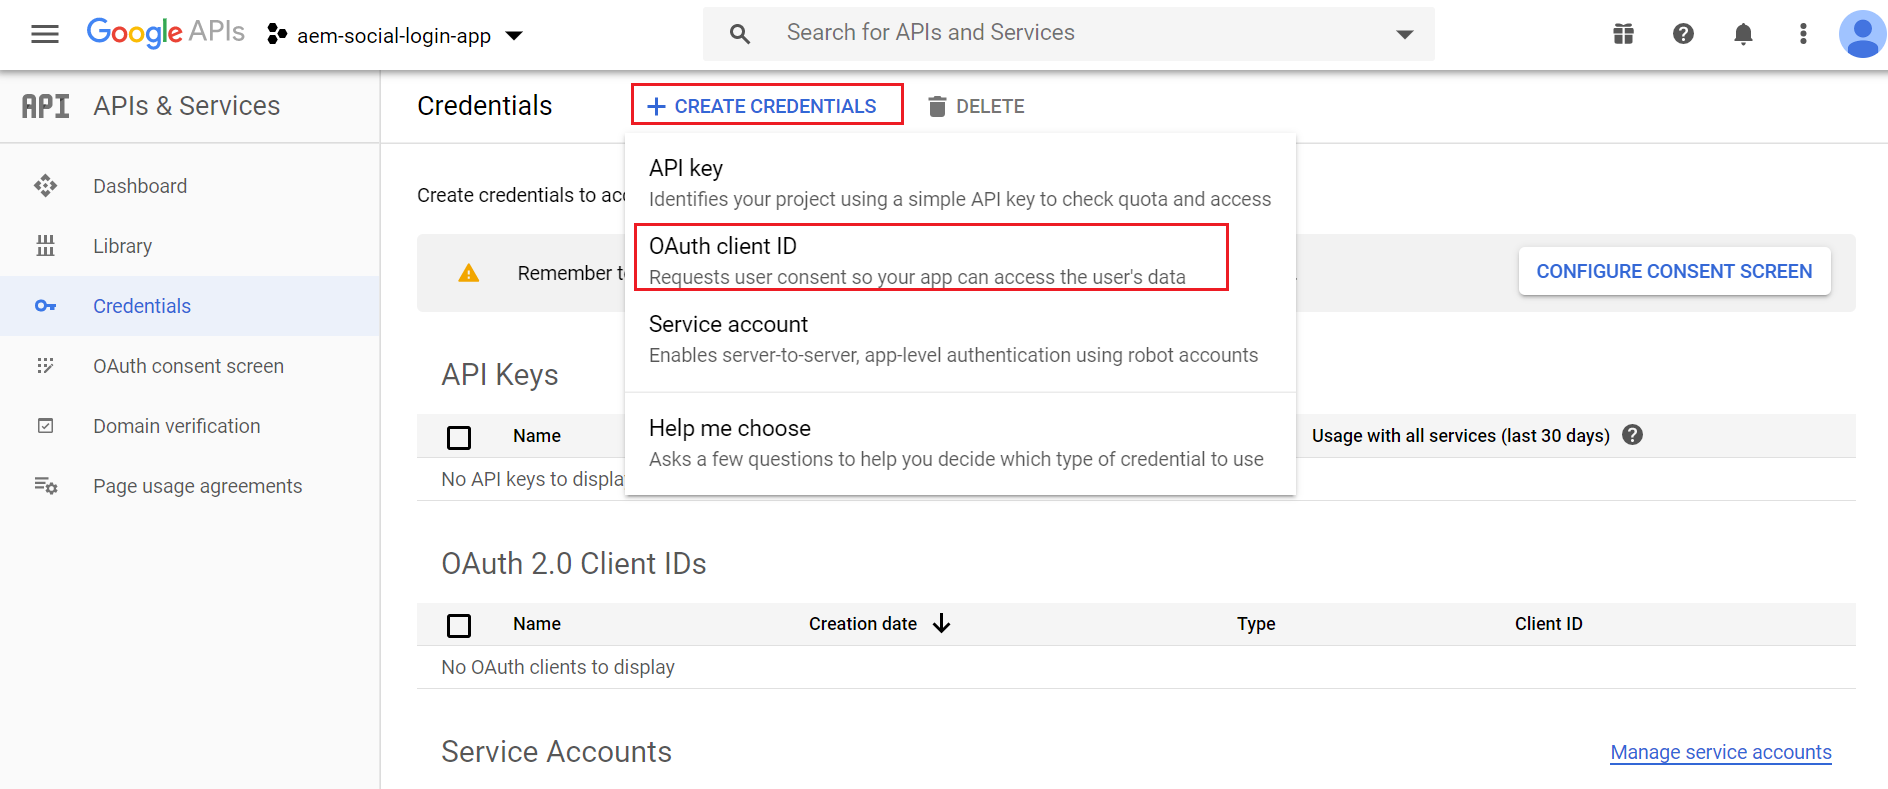
Click on “Create Credentials” then OAuth client ID
The Consent Screen should be configured to initiate the OAuth client id configurations

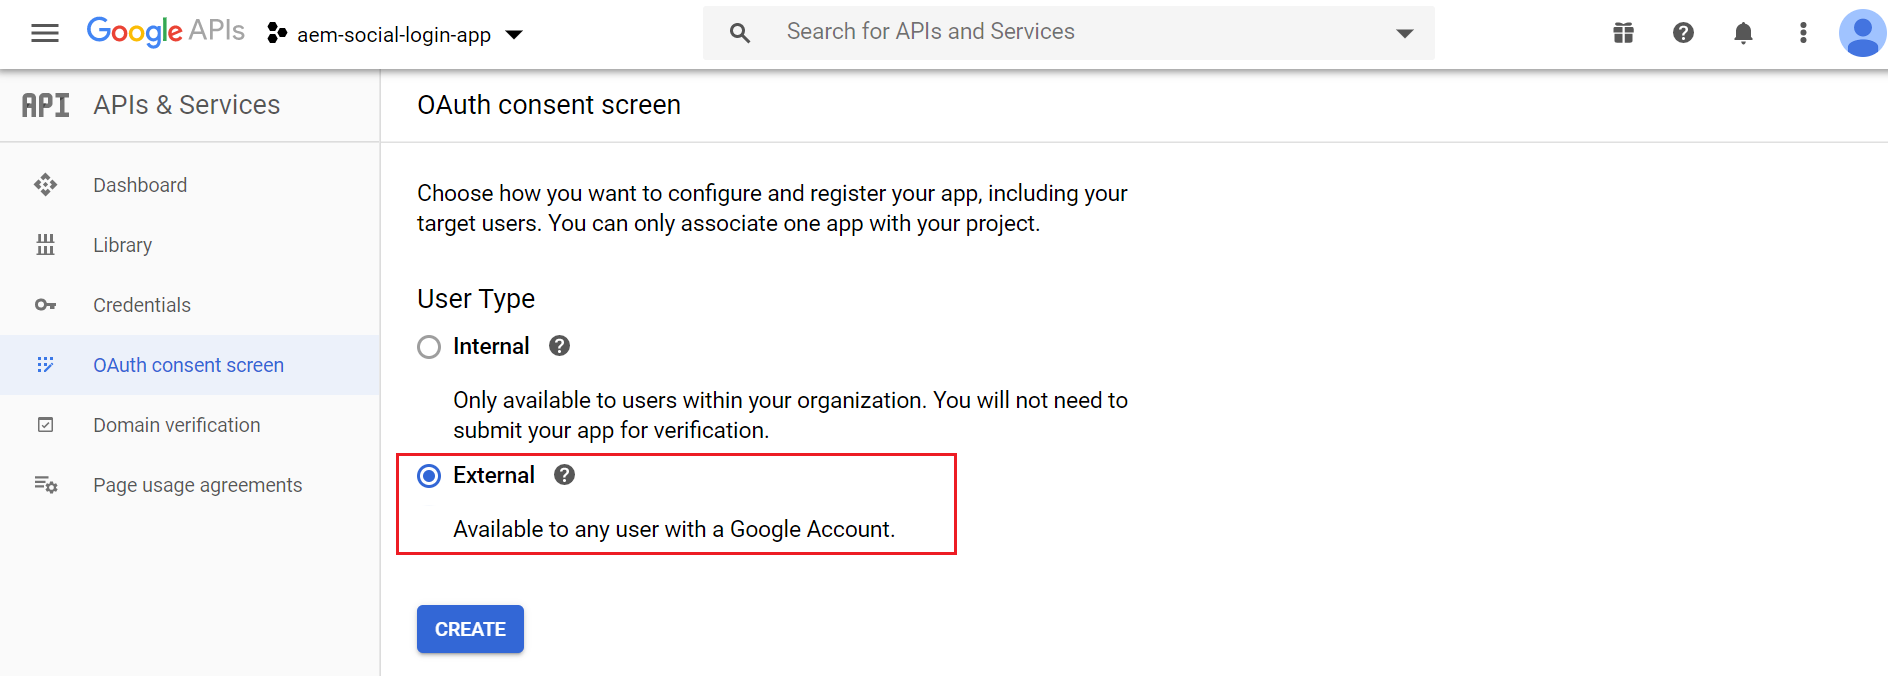
Select User Type as “Internal” or “External” based on your requirement — “Internal” is only available for G-Suite users
Enter the application name, Application Logo and Support Email
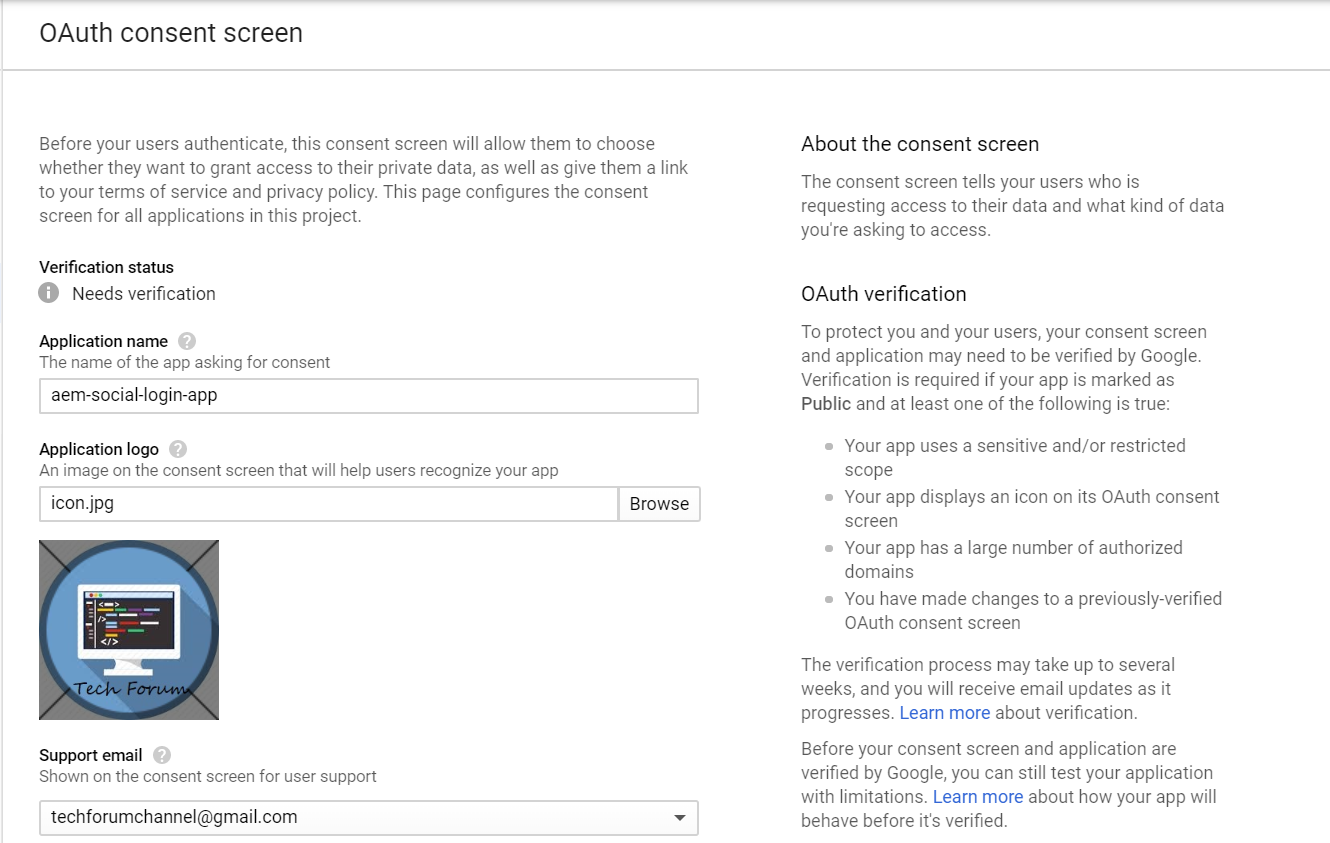
The scopes “email”, “profile” and “openid” are added by default, “profile” scope is enough for basic authentication.
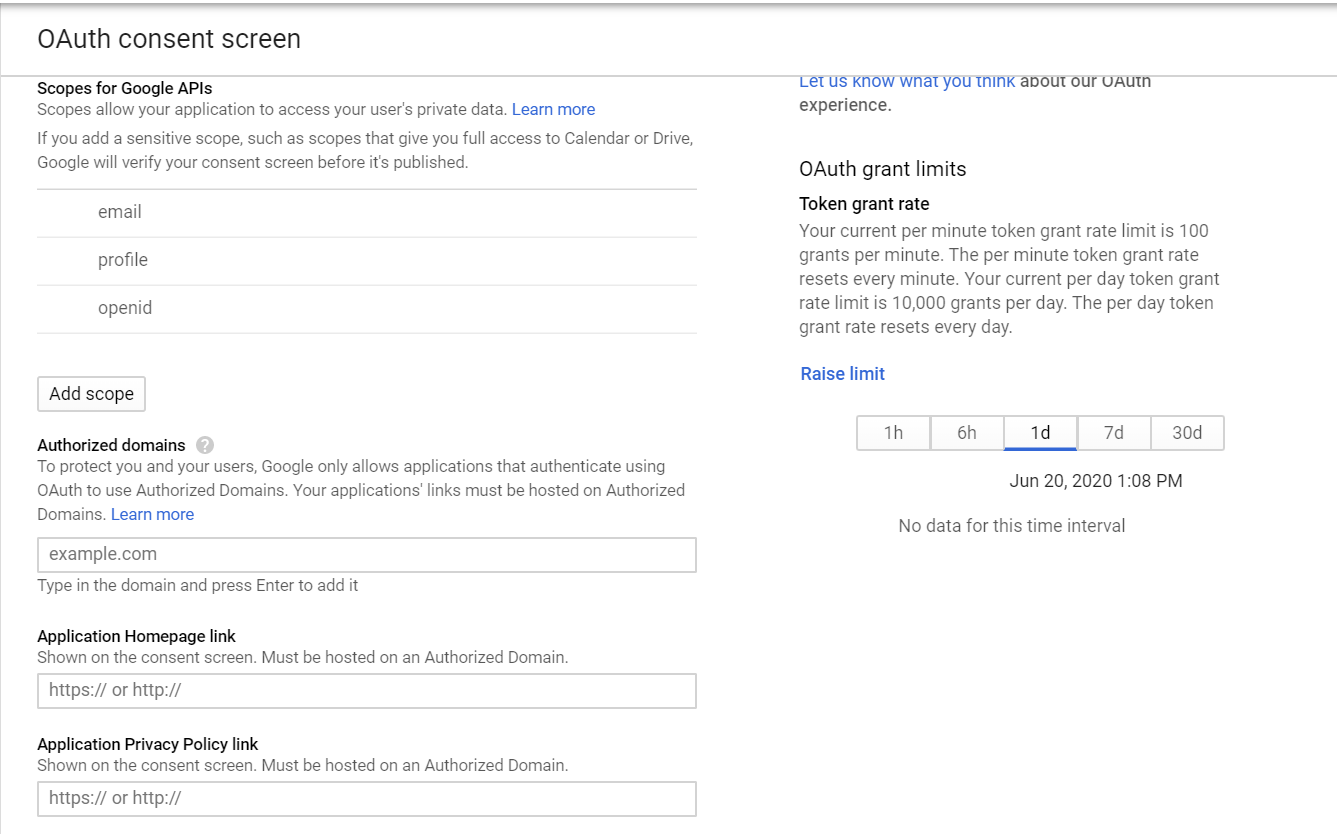
Save the configurations now
Now again click on “Create Credentials” → OAuth client ID
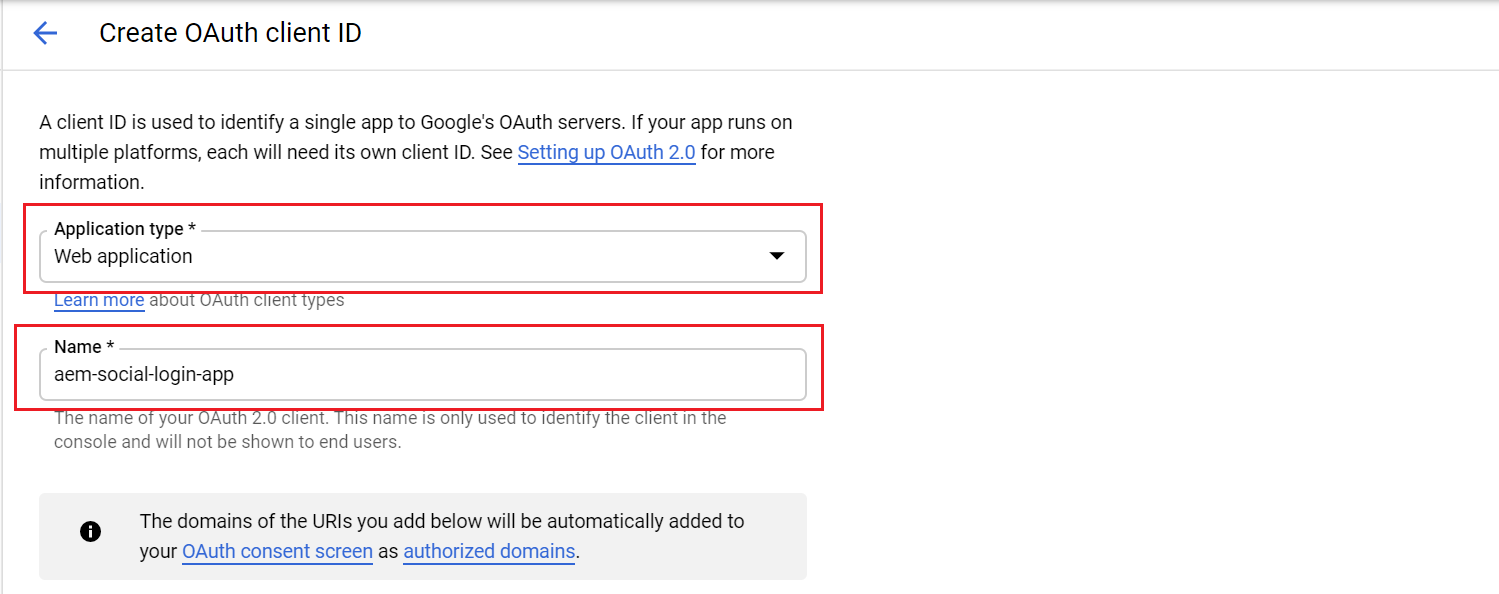
Select the application type “Web Application” and enter application name
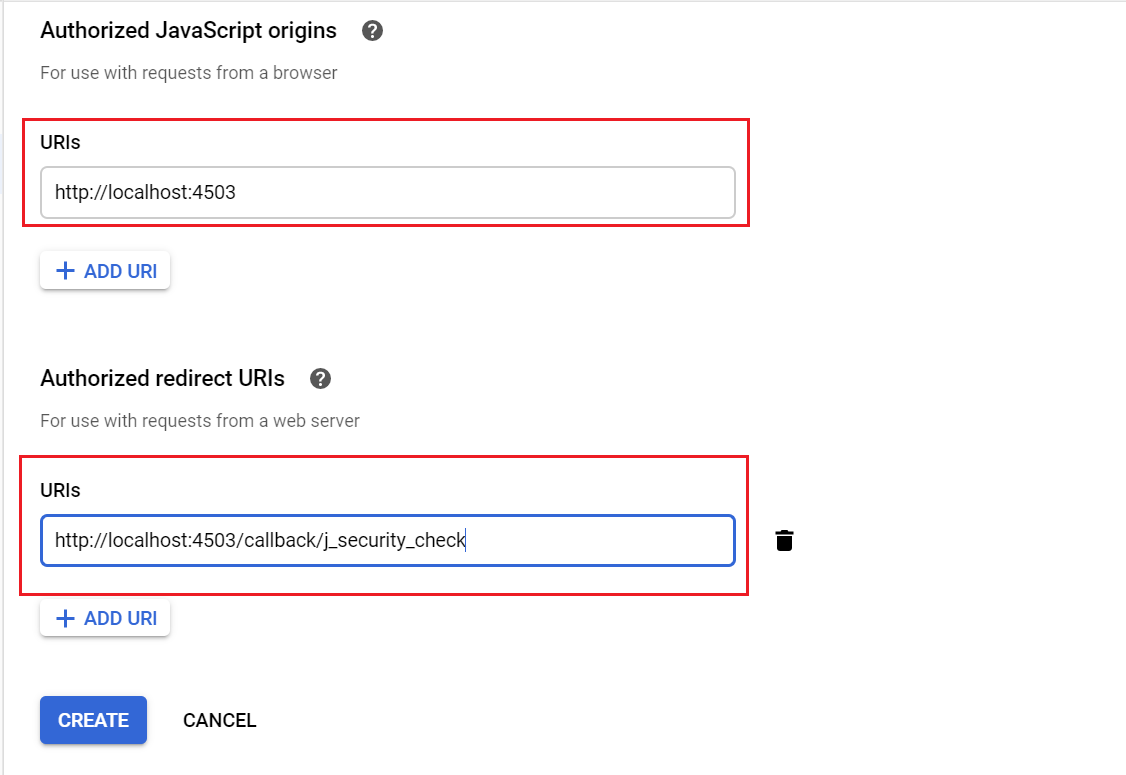
“Authorized Javascript origins”— the URL initiate the login, i am going with localhost for demo
“Authorized redirect URI’s” — the URL to be invoked on successful login,http://localhost:4503/callback/j_security_check (use the valid domain for real authentication)
Click on Create button
OAuth client is created now, copy the Client ID and Client Secret — these values required to enable the OAuth Authentication handler in AEM.
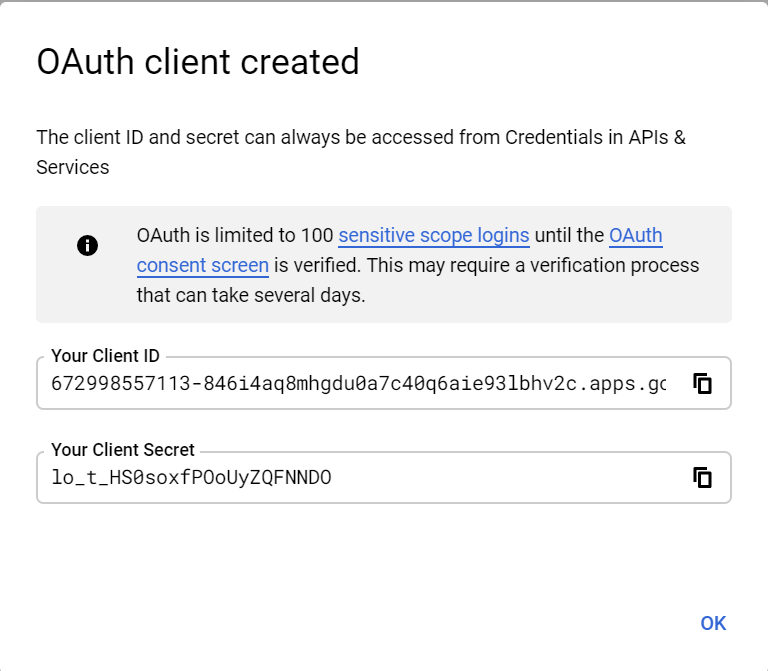
To use the client in production, the OAuth Consent Screen should be submitted for approval.
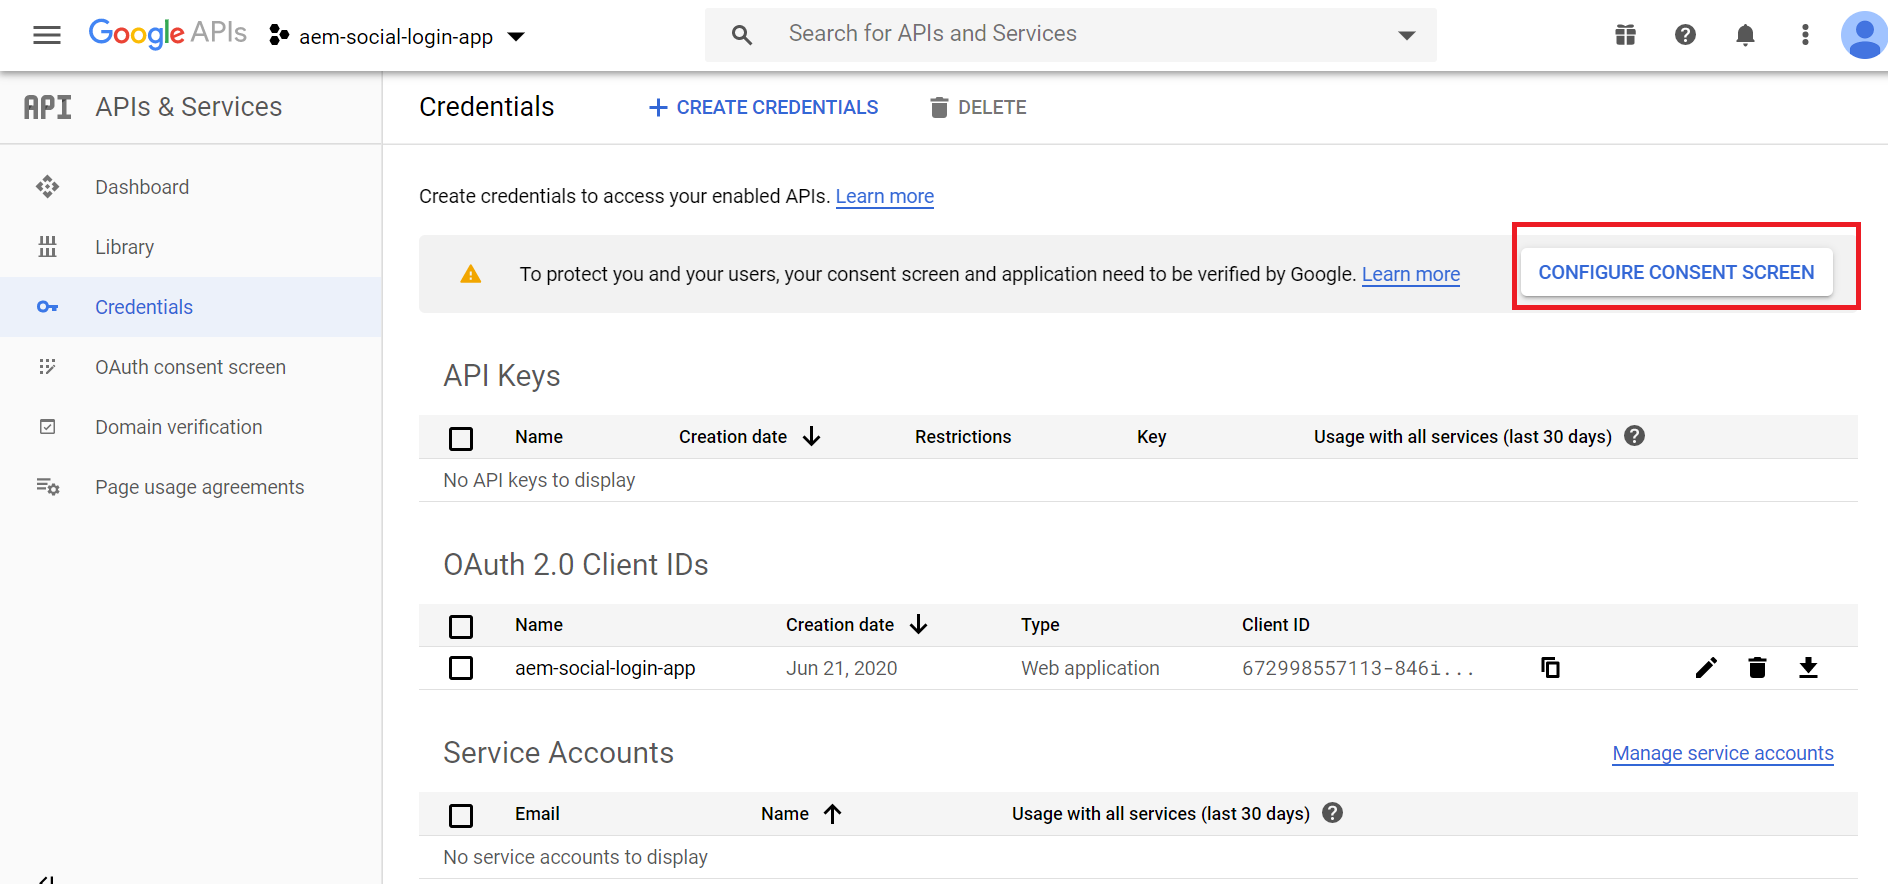
Click on “Configure Consent Screen” again
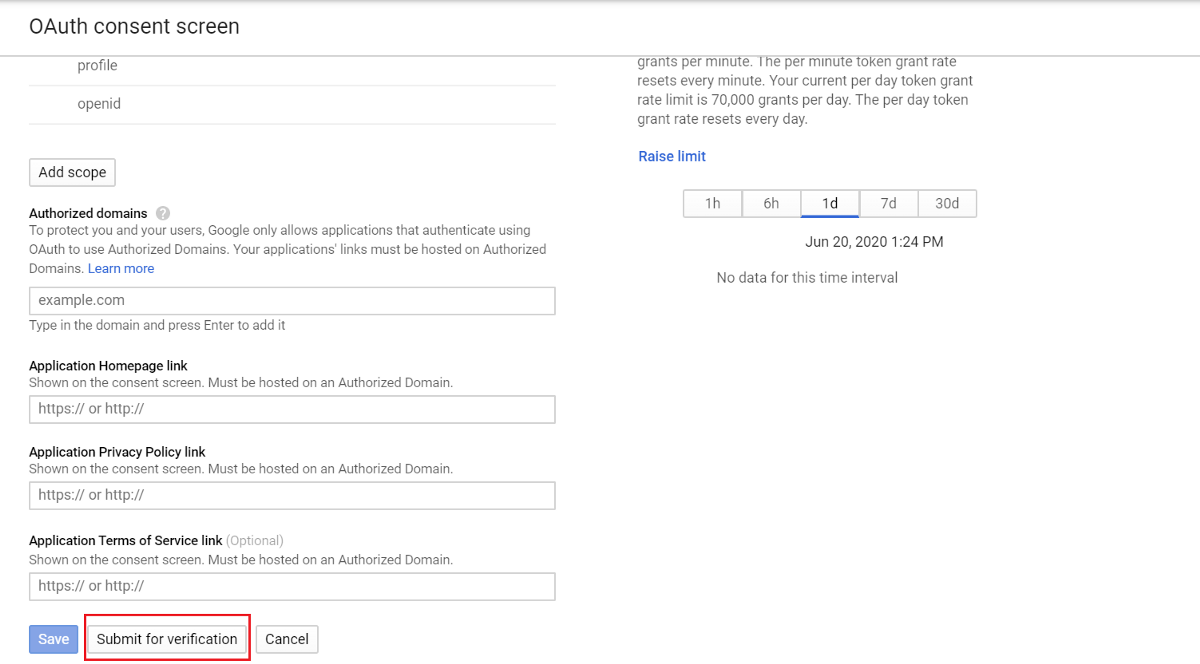
Enter the required values, “Authorized domains”, “Application Home Page Link”, “Application Privacy Policy Link” and submit for approval
The approval may takes days or weeks, meanwhile the project can be used for development
Google Project is ready for use now to test the login in flow
Configure Service User
Enable the service user with required permissions to manage the users in the system, you can use one of the existing service users with required access, I thought of defining new service user(oauth-google-service — name referred in GoogleOAuth2ProviderImpl.java, change the name if required)
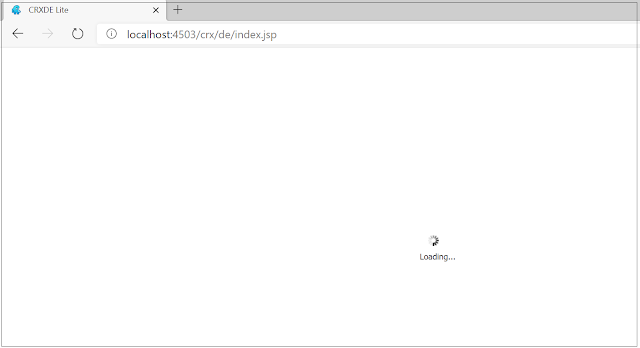
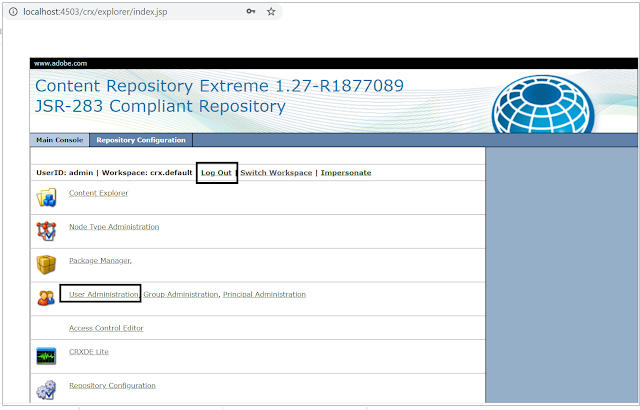
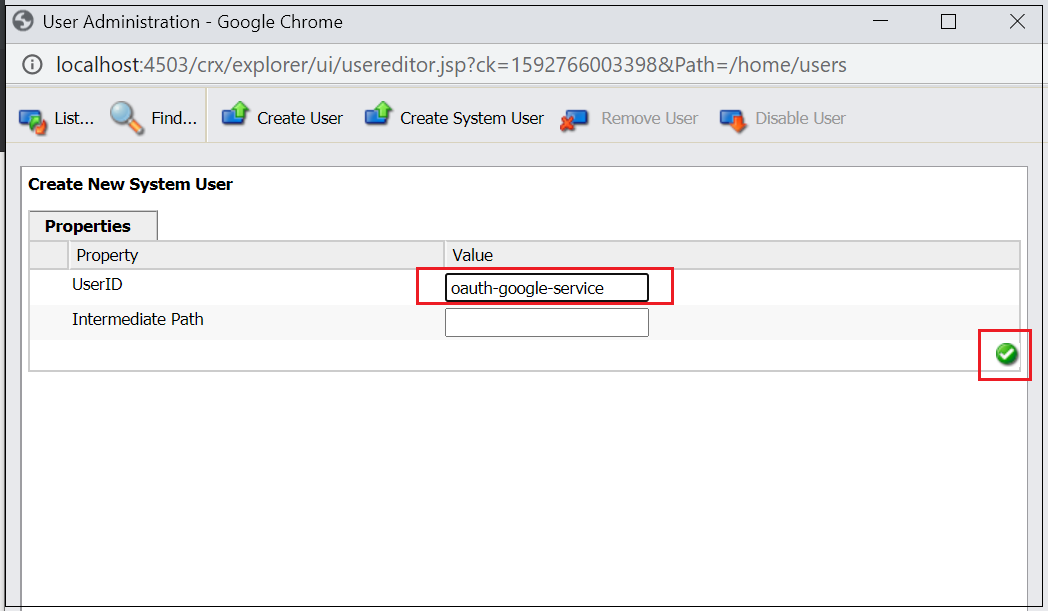
Create a system user with name oauth-google-service, navigate to http://localhost:4503/crx/explorer/index.jsp and login as an admin user and click on user administration
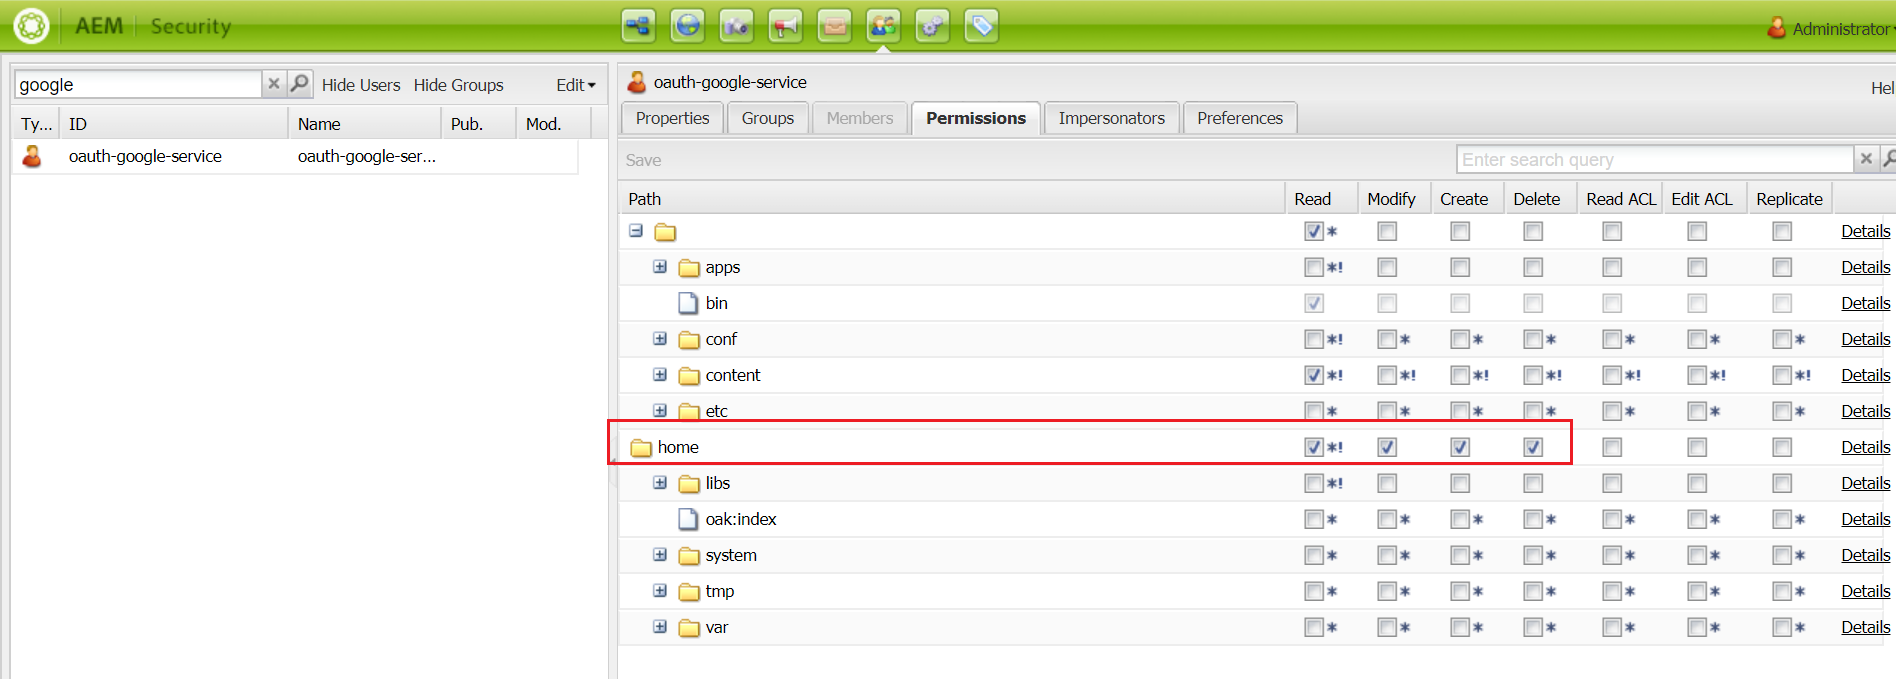
Now enable the required permissions for the user, navigate to http://localhost:4503/useradmin(somehow I am still comfortable with useradmin UI for permission management)
Now enable the service user mapping for provider bundle — add an entry into Apache Sling Service User Mapper Service Amendment google.oauth.provider:oauth-google-service=oauth-google-service

Setup Custom Google OAuth Provider
As mentioned earlier AEM won’t support Google authentication OOTB, define a new provider to support the authentication with Google.
The custom Google Provider can be downloaded from — https://github.com/techforum-repo/bundles/tree/master/google-oauth-provider
GoogleOAuth2ProviderImpl.java — Provider class to support the Google authentication
GoogleOAuth2Api.java — API class extended from default scribe DefaultApi20 to support Google OAuth 2.0 API integration
GoogleOauth2ServiceImpl.java — Service class to get the Access Token from Google service response
The provider bundle enabled with aem-sdk-api jar for AEM as Cloud Service, the other AEM versions can use the same bundle by changing aem-sdk-api to uber jar.
Clone the repository — git clone https://github.com/techforum-repo/bundles.git
Deploy google-oauth-provider bundle — change the directory to bundles\google-oauth-provider and execute mvn clean install -PautoInstallBundle -Daem.port=4503
Here I am going to enable the authentication for publisher websites, change the port number and deploy to Author if required.
After the successful deployment, you should able to see the Google provider in config manager.
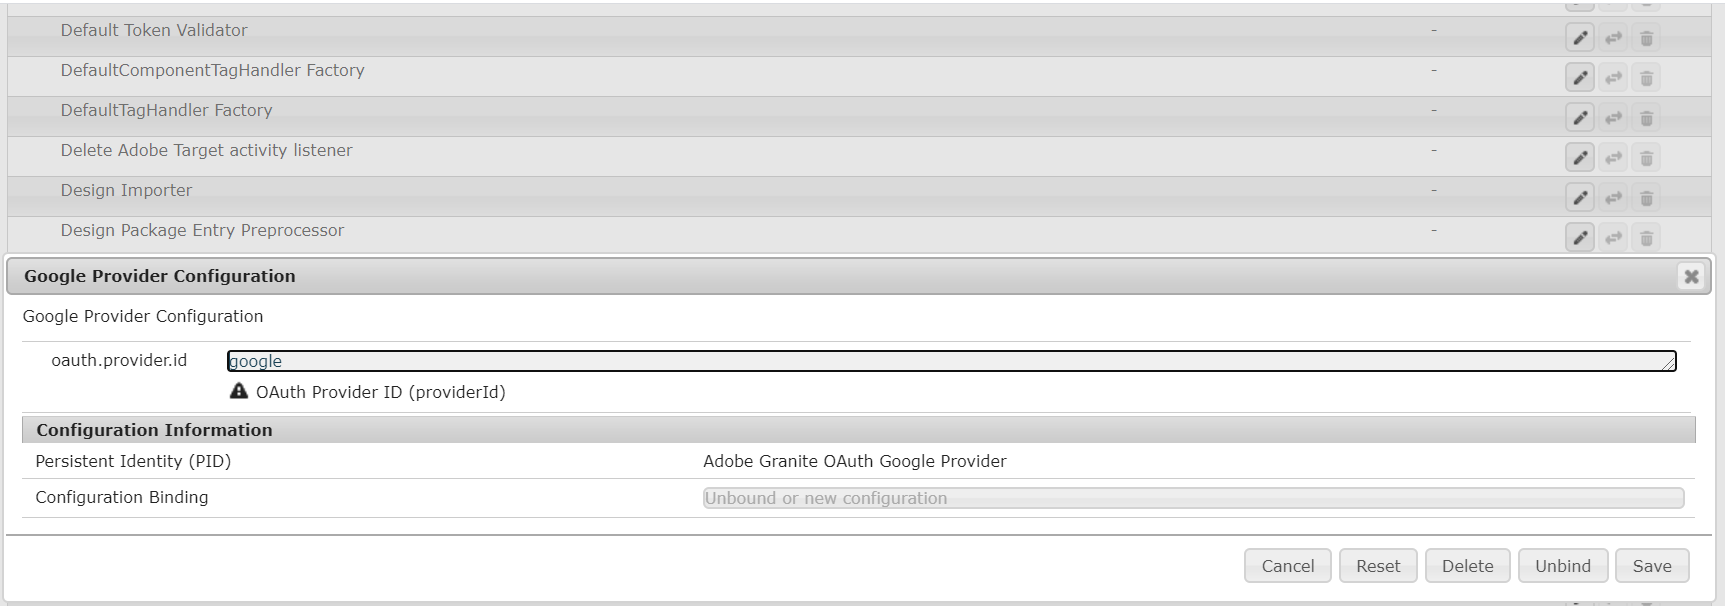
The oauth.provider.id can be changed but the same value should b e used while configuring “Adobe Granite OAuth Application and Provider”.
Configure OAuth Application and Provider
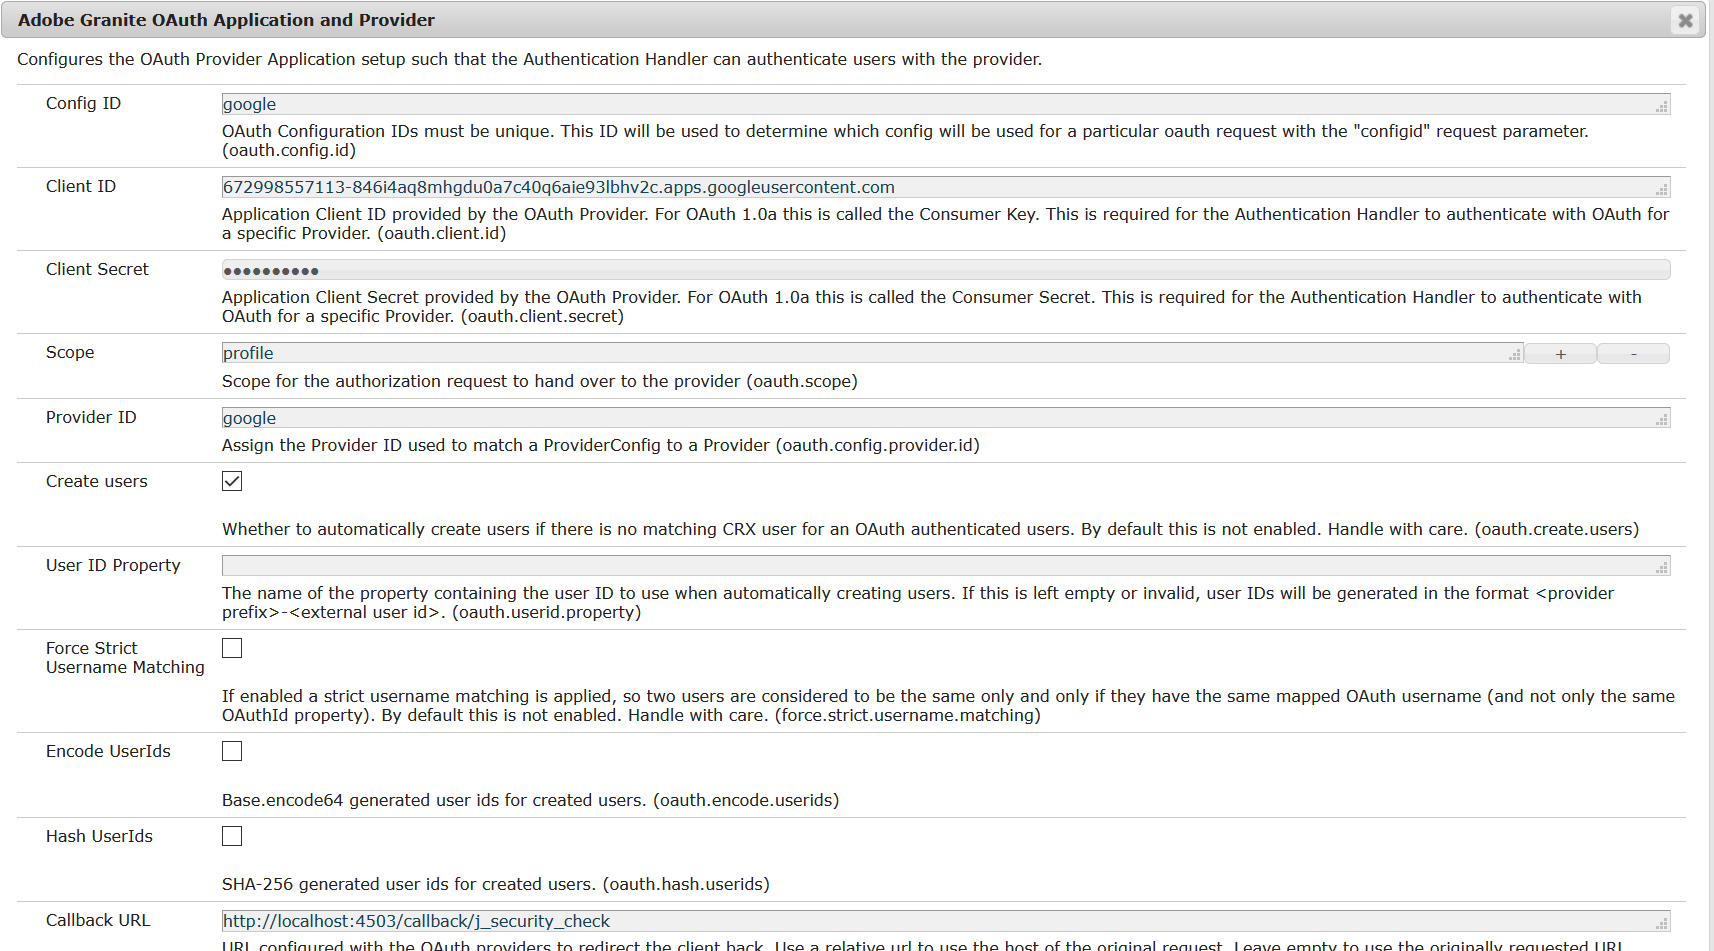
Let us now enable the “Adobe Granite OAuth Application and Provider” for Google
Config ID — Enter a unique value, this value should be used while invoking the AEM login URL
Client ID — Copy the Client ID value from Google OAuth Client
Client Secret — Copy the Client Secret value from Google OAuth Client
Scope —”profile”
Provider ID — google
Create users — Select the check box to create AEM users for Google profiles
Callback URL — the same value configured in Google OAuth Client (http://localhost:4503/callback/j_security_check)
Enable OAuth Authentication
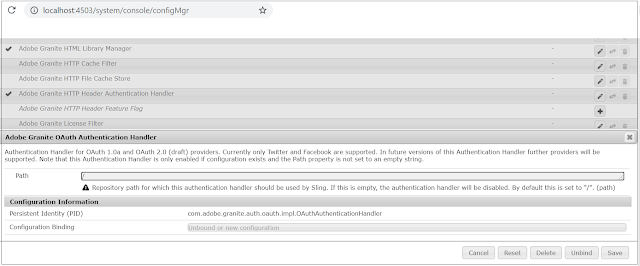
By default, “Adobe Granite OAuth Authentication Handler” is not enabled by default, the handler can be enabled by opening and saving without doing any changes.
Test the Login Flow
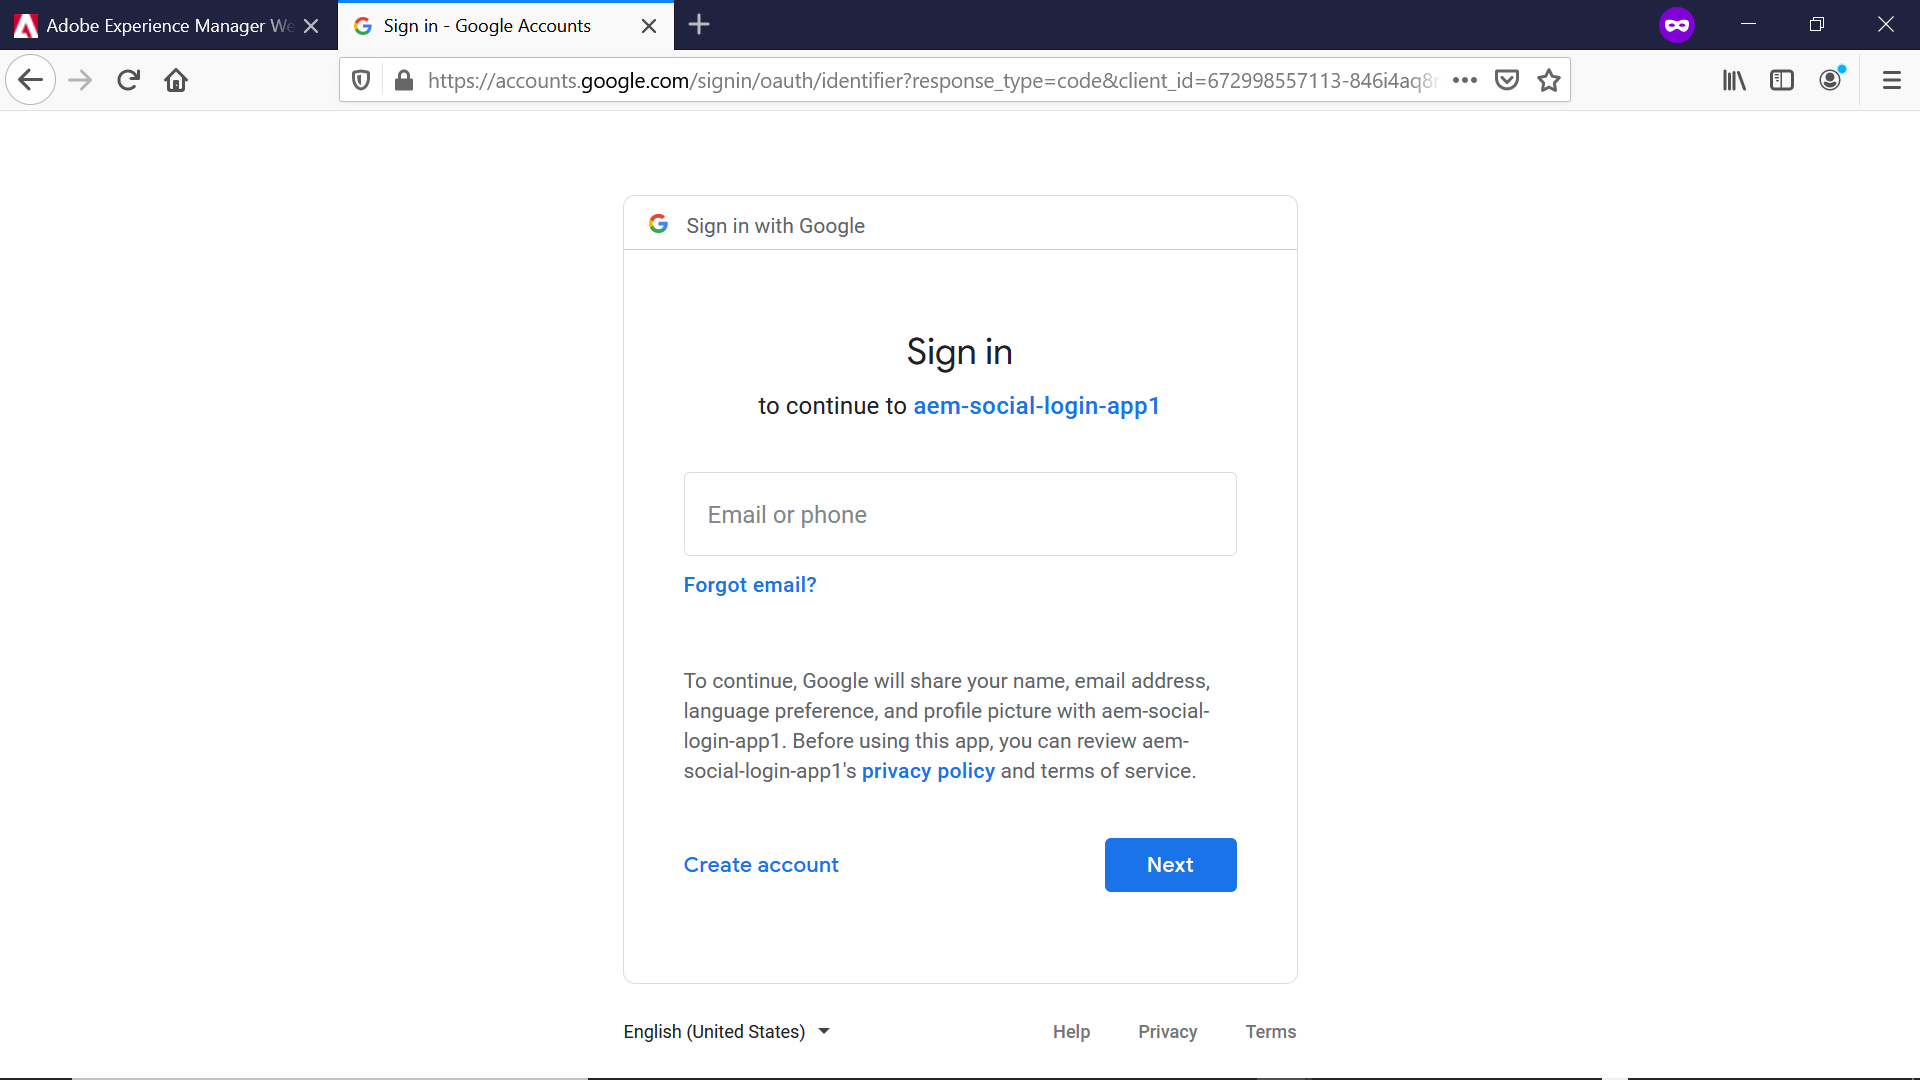
Now the configurations are ready, let us initiate the login — access http://localhost:4503/j_security_check?configid=google from browser(in real scenario you can enable a link or button pointing to this URL). This will take the user to Google Sign-in screen
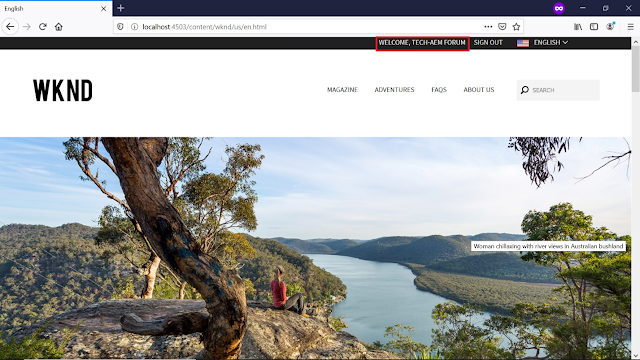
Now you will be logged in to WKND website after successful login from Google Sign in page
The user profile is created in AEM
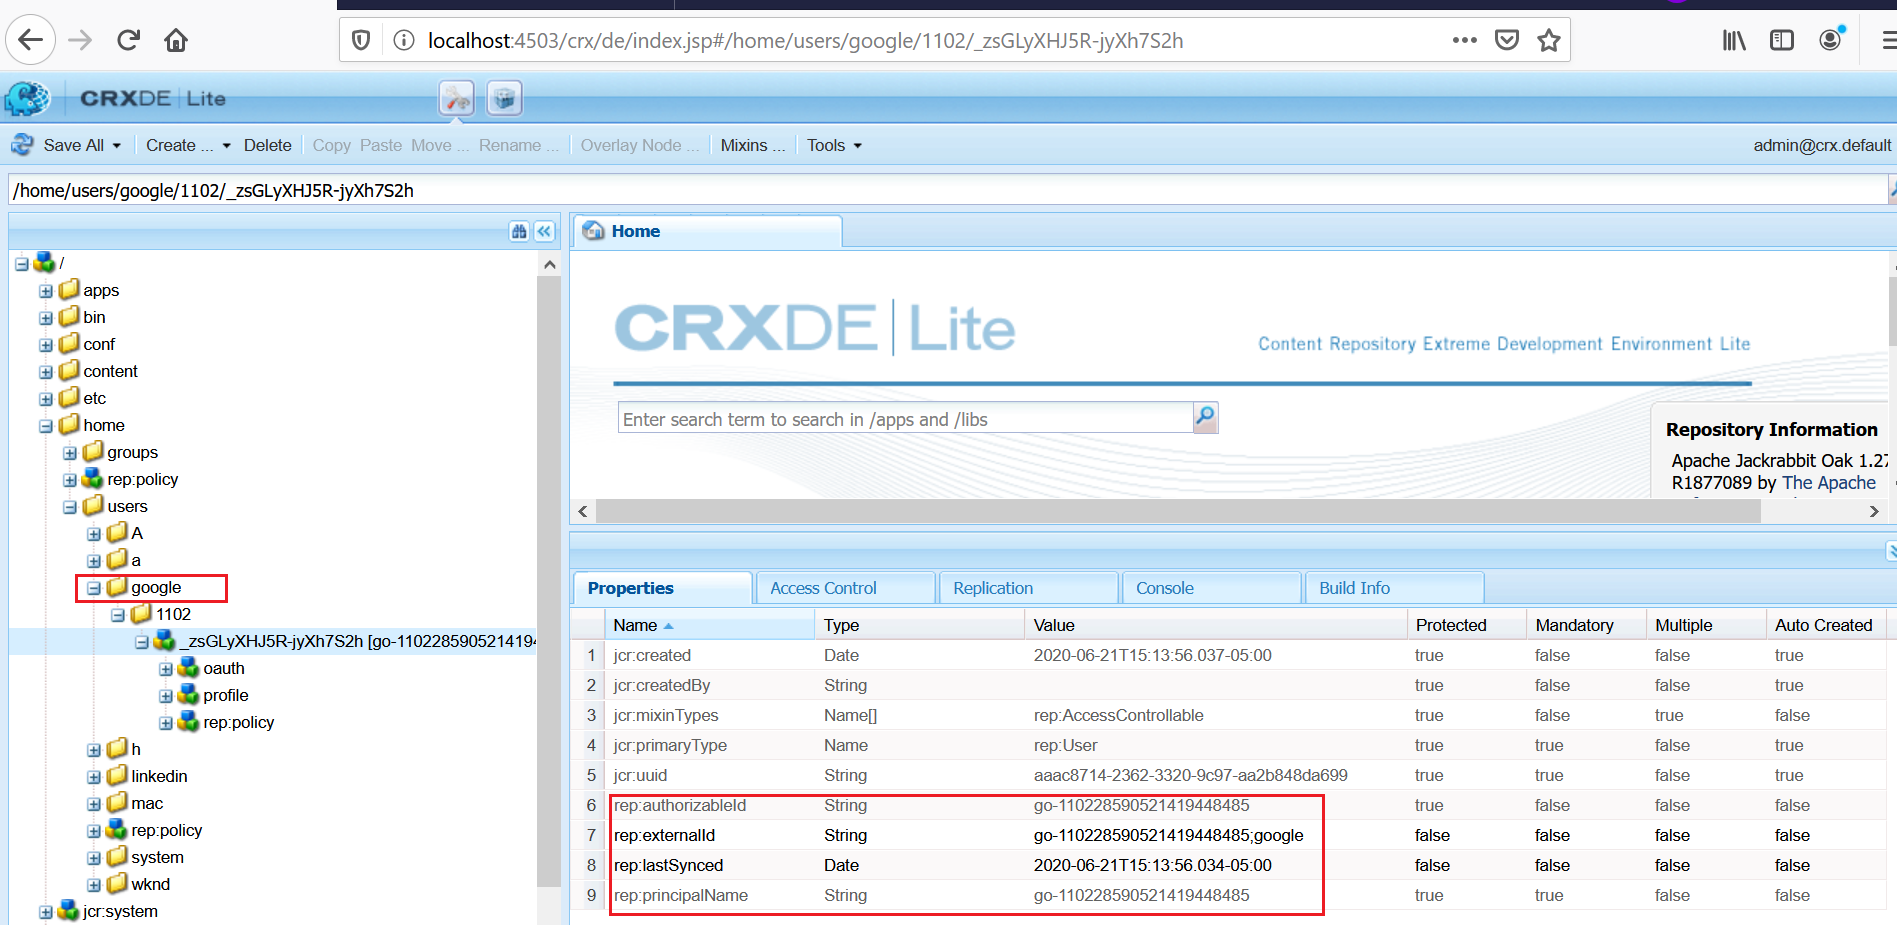
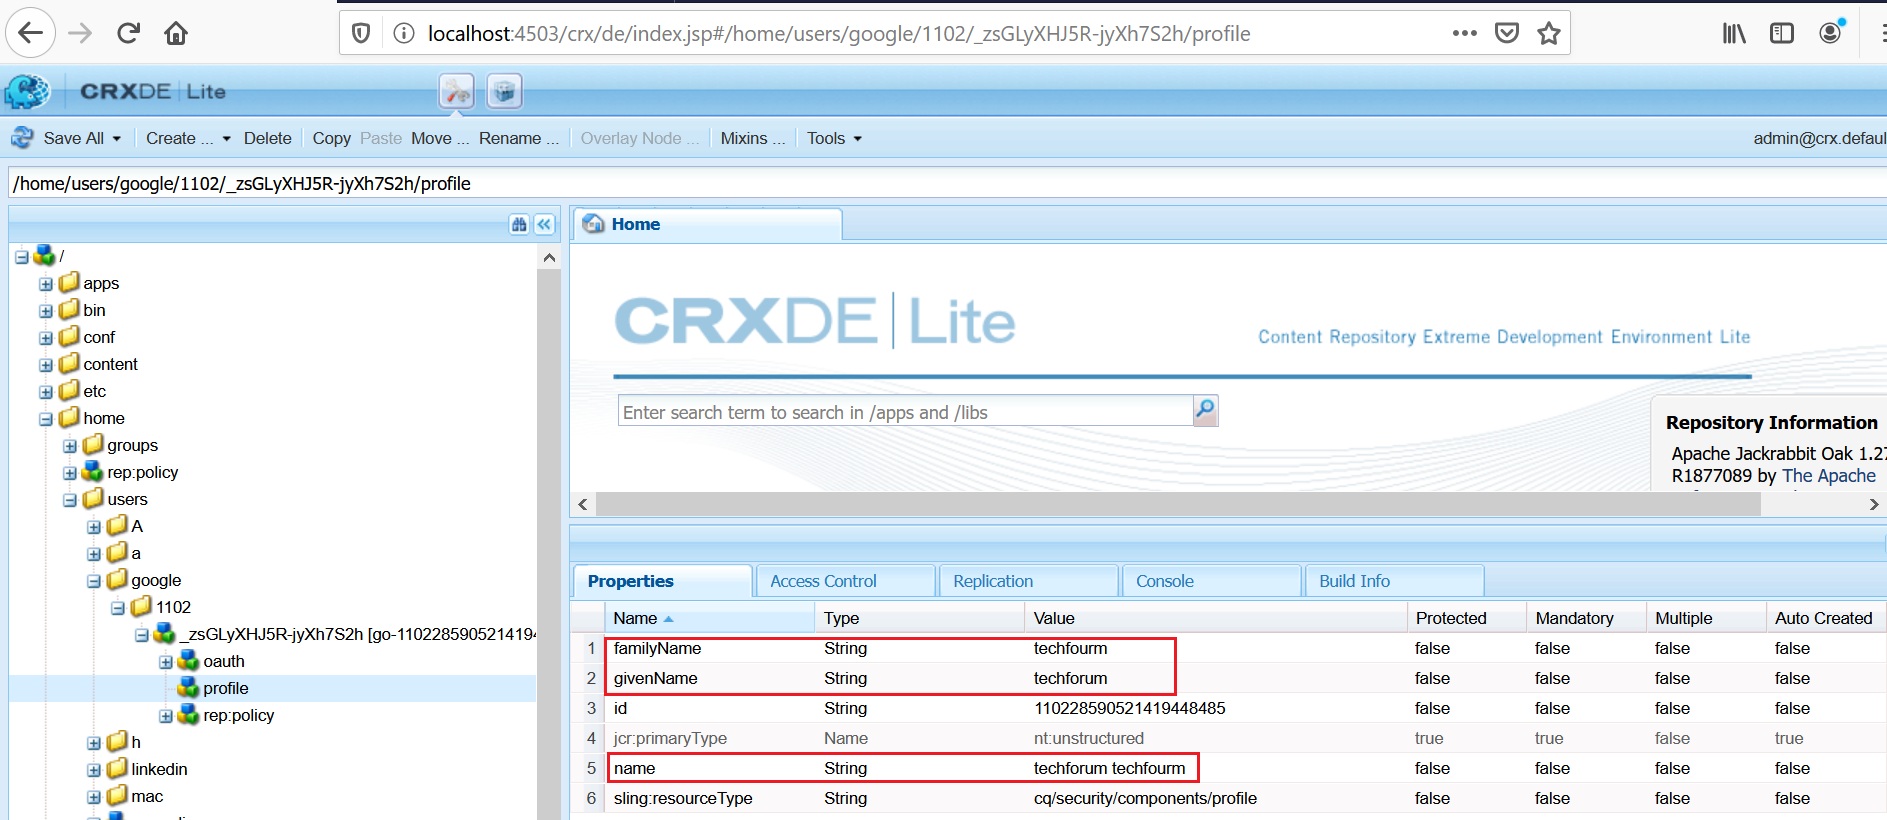
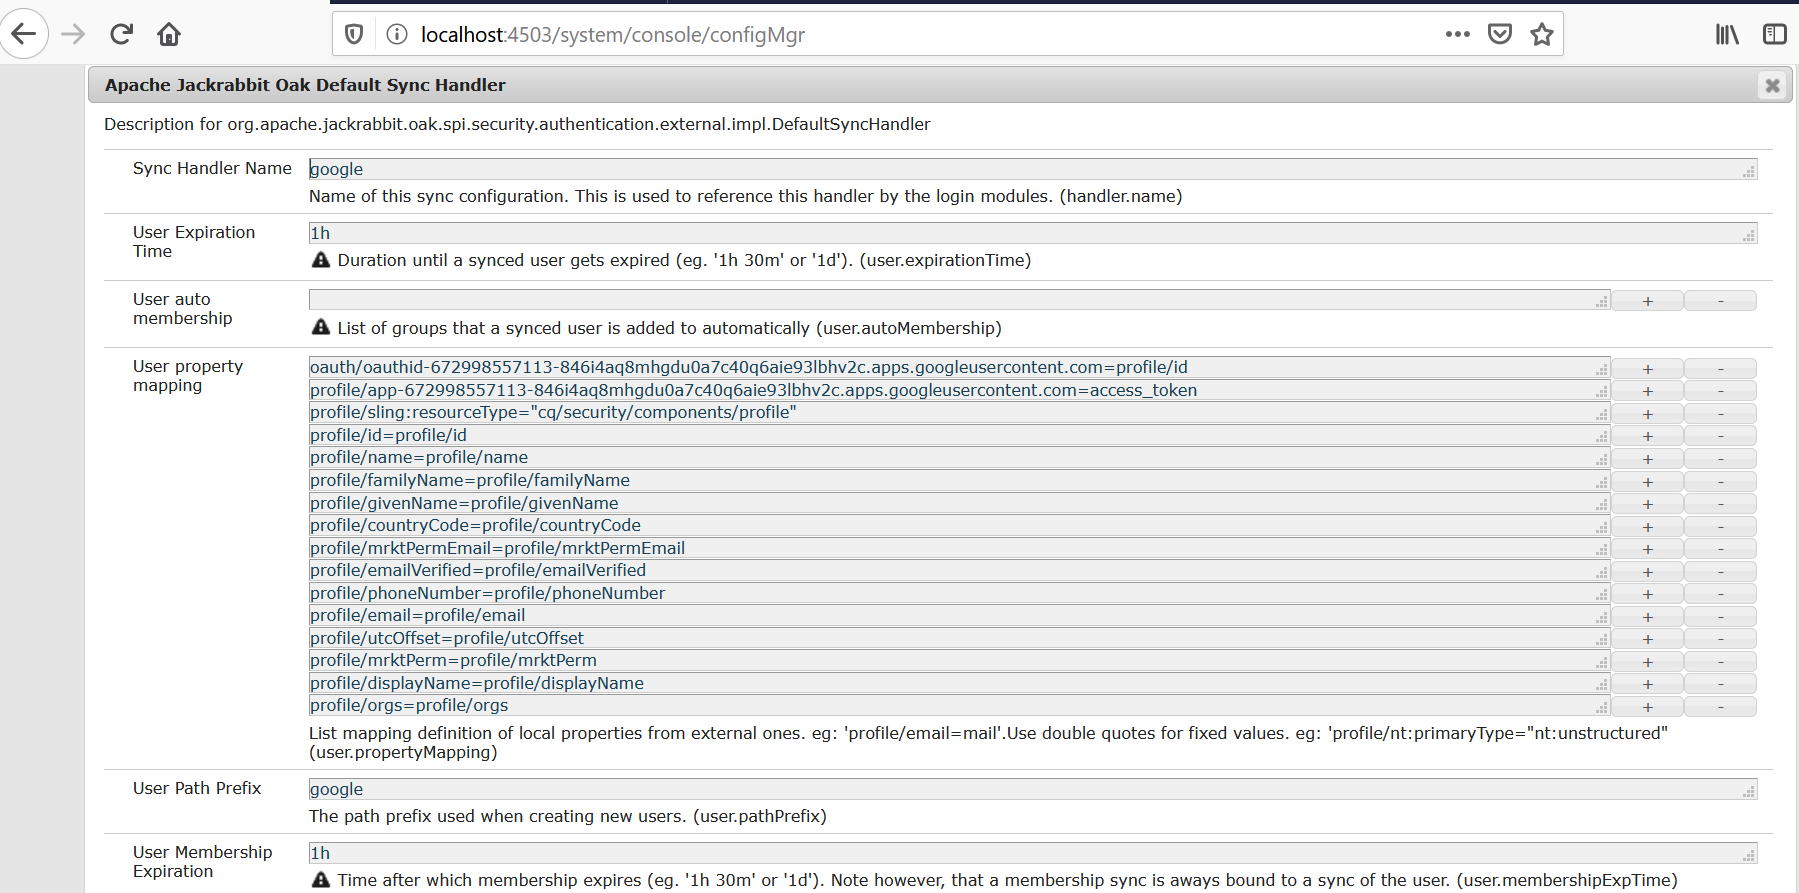
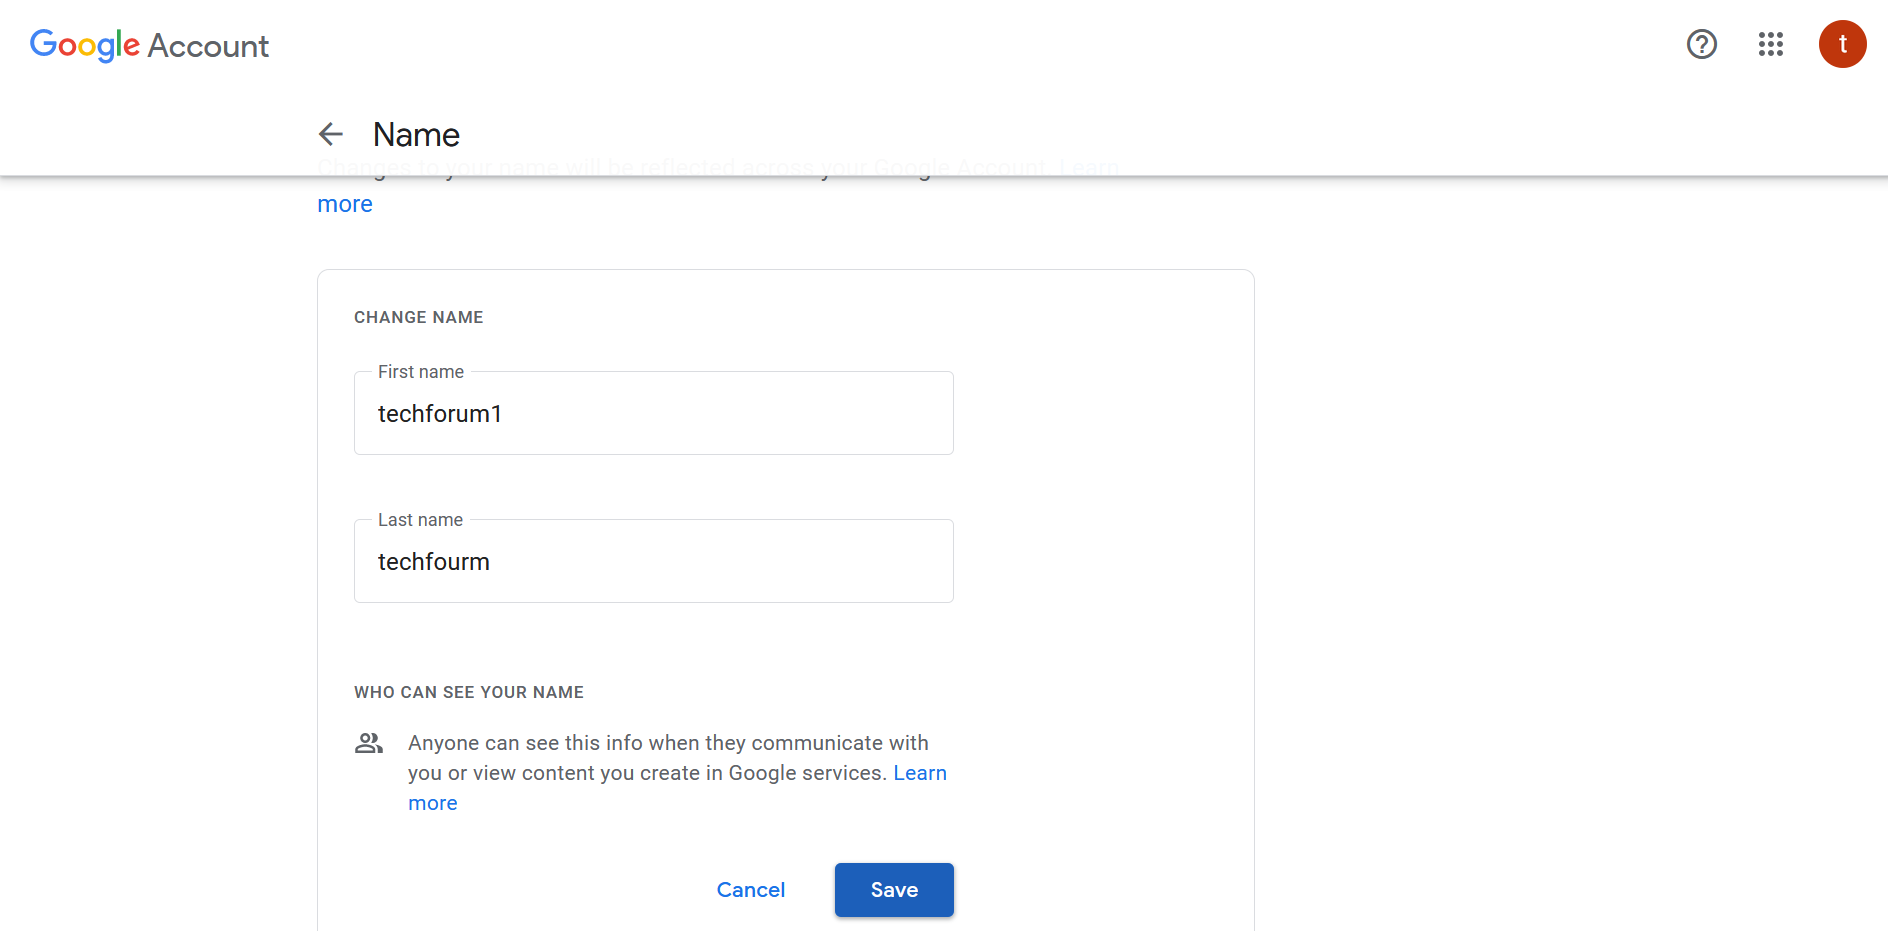
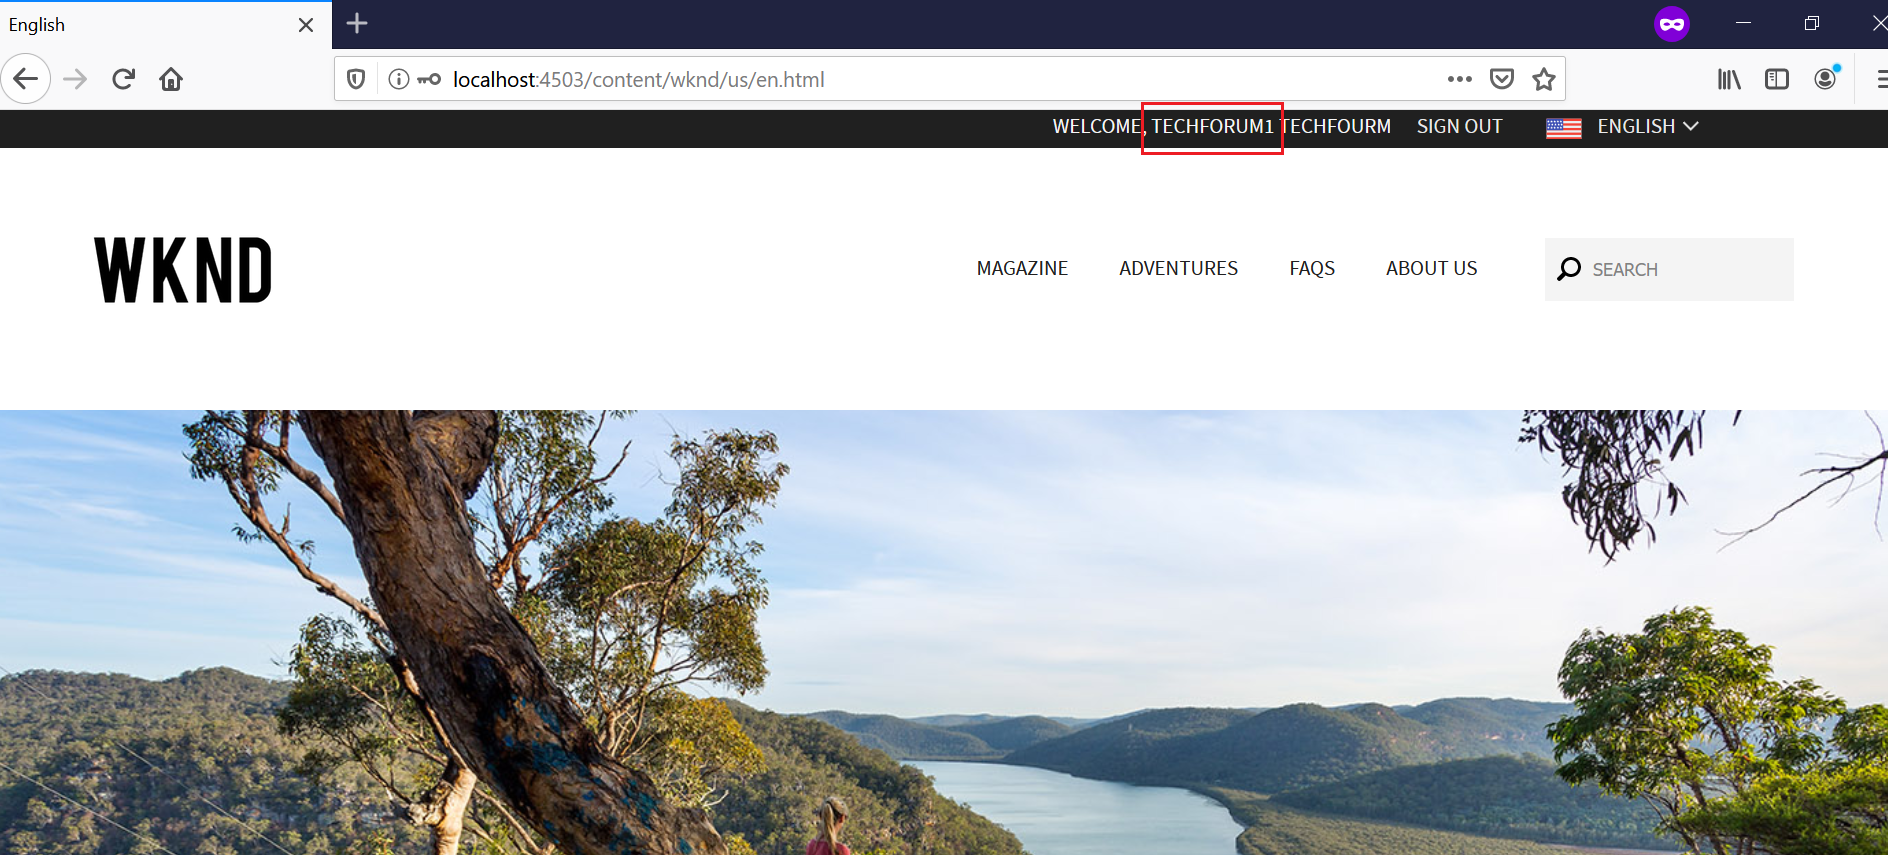
Whenever the profile data is changed (e.g family_name and given_name) in Google account the same will be reflected to AEM in subsequent login based on the “Apache Jackrabbit Oak Default Sync Handler” configuration.
AEM creates “Apache Jackrabbit Oak Default Sync Handler” configuration specific to each OAuth provider implementations.
The sync handler syncs the user profile data between the external authentication system and AEM repository.
The user profile data is synced based on the User Expiration Time setting, the user data will get synced on the subsequent login after the synced user data expired(default is 1 hr)
Modify the configurations based on the requirement.
Encapsulated Token Support
By default the authentication token is persisted in the repository under user’s profile. That means the authentication mechanism is stateful. Encapsulated Token is the way to configure stateless authentication. It ensures that the cookie can be validated without having to access the repository but the still the user should available in all the publishers for farm configuration.
Refer https://docs.adobe.com/content/help/en/experience-manager-65/administering/security/encapsulated-token.html#StatelessAuthenticationwiththeEncapsulatedToken for more details on Encapsulated Token Support
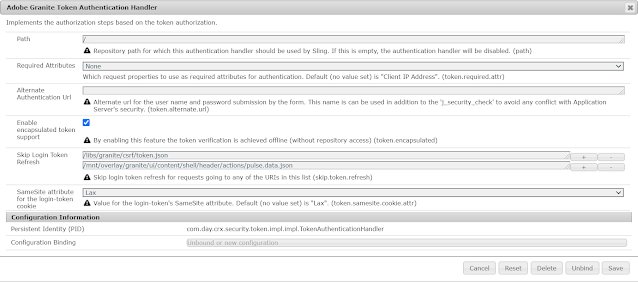
Enable the Encapsulated Token Support in “Adobe Granite Token Authentication Handler”
Sling Distribution user’s synchronization
The users created in a publisher should be synced to all the other publishers in the farm to support the seamless authentication. I am not finding good reference document to explain the user sync in AEM as Cloud(AEM Communities features are not enabled in AEM as Cloud Service, the user sync was enabled through the community components for other AEM version), planning to cover the user sync in another tutorial.
Conclusion
This tutorial is mainly focused on enabling the authenticate the website users through Google account but the same solution can be used with small changes to support different providers. Feel free to give your feed back and changes on the provider bundle.
