Saturday, December 15, 2018

How to include a dynamic custom script to websites through Adobe Launch - Adobe Experience Manager(AEM)


Launch, by Adobe is a next-generation tag management system that unifies the client-side marketing ecosystem by empowering developers to build integrations on a robust, extensible platform that partners, clients, and the broader industry can build on and contribute to.

Adobe Launch is the upgraded version of Adobe’s Dynamic Tag Manager (DTM), Adobe’s Dynamic Tag Manager (DTM) will be replaced by Adobe Launch (It doesn’t mean the platform will be shut down anytime soon).

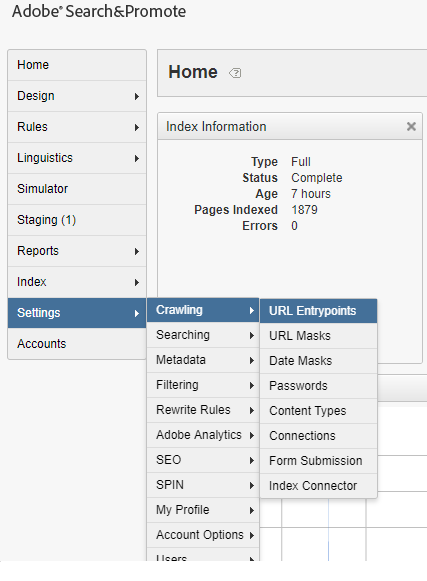
This post explains the approach to use Adobe Launch to include the dynamic scripts as part of Adobe Experience Manager (AEM) websites, the same steps can be followed to include the scripts into the websites hosted on a different platform.
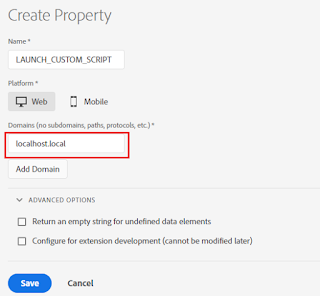
Define Property:


A property, or web property, is a collection of rules, data elements, configured extensions, environments, and libraries.

Log in to Adobe Launch and create new property- LAUNCH_CUSTOM_SCRIPT, specify the domain as localhost.local for localhost testing and Save the Property(add the other website domains where this script need to be enabled).
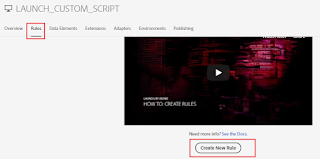

Define New Rule:


The launch is a rule-based system. It looks for user interaction and associated data. When the criteria outlined in your rules are met, the rule triggers the extension, script, or HTML you identified.

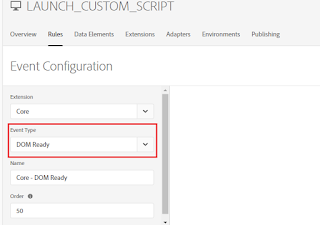
Create a new rule and configure the Event Type as “DOM Ready”, the event is what you want the rule to look for, this is defined by choosing an event, any applicable conditions, and any exceptions


Configure the Action — When the criteria outlined in your rules are met and conditions are satisfied, the actions you define are executed in order.

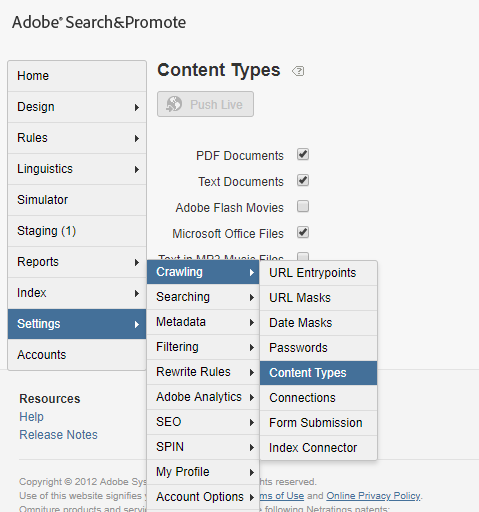
Select the Action Type as “Custom Code”, Select Language as “JavaScript”


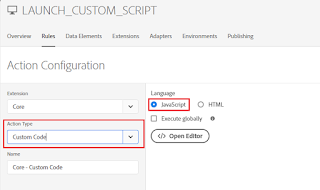
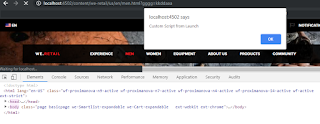
Define the required script in the “Script Editor”, I am just enabling some sample script to display an alert on page load but you can insert the required custom script.


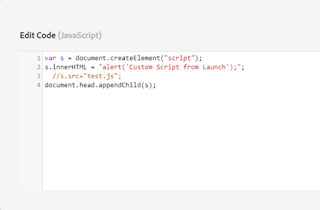
var s = document.createElement("script");
s.innerHTML = "alert('Custom Script from GTM');"; // add the custom script content
//s.src="test.js";// specify the script file instead of script content
document.head.appendChild(s);

Adding multi-line script — example

s.innerHTML = "document.onreadystatechange = function(){ "+
"if(document.readyState=='loaded' || document.readyState=='complete') "+
"alert('test');"+
"}";

Approval Workflow:


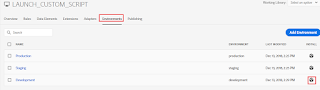
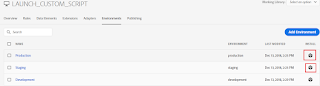
New properties are created with three environments: one Development, one Staging, and one Production. This is enough to run the publishing workflow. If desired, you may add additional Development environments. This is most common on larger teams with multiple developers working on different projects at the same time.

The approval flow is going to be like below for the properties


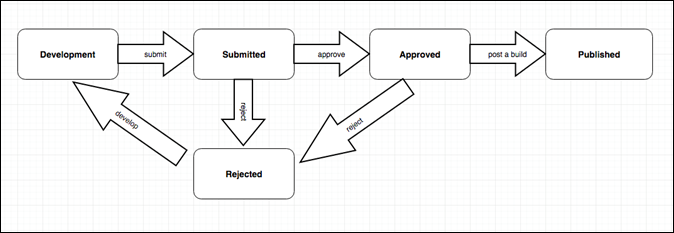
Different Launch artifacts can exist in each Environment. This allows you to test different Libraries in different environments as you push them through your Workflow.

Extensions, rules, and data elements are building blocks. When you want to make your application do something, these building blocks are added to a Library. This Library is then built to produce the actual artifacts that are used by your application.

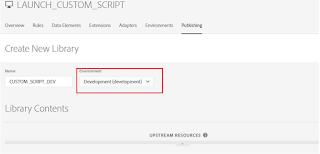
When you create a Library, you must assign it to an Environment. Each Environment corresponds to a different state in the Publishing workflow.

Publish the change to the Development environment:


“Add New Library” to apply the changes to Development Environment


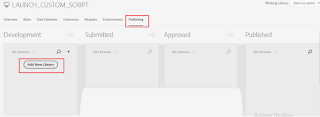
Select the Environment value as Development


Add Specific Resource or All changed Resources to Library for Deployment to Development environment (to deploy the latest change to the Development environment, remove the current version from Library and add the latest version)


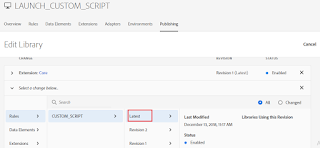
Select the Resource (CUSTOM_SCRIPT rule) Version (Latest) and Create New Revision and finally Save the Library.


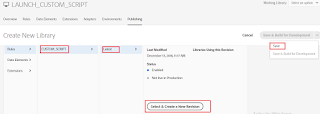
Click on Apply Updates and Continue (this is required only for the first time)


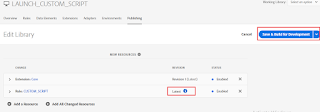
Build the library for Development


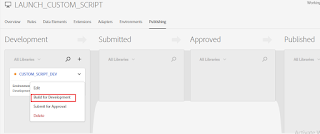
Now the changes are deployed to Development Environment


To apply the new changes (latest pending changes) to the Development environment, remove the current version from the Library (My case Revision 2)


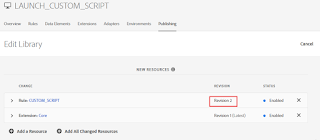
Add the latest resource version and Click on Select&Create New Revision


Click on Save & Build for Development


Now the latest rule change is deployed to Development Environment

For testing the Property in a Development environment, install the Development script to the AEM(Adobe Experience Manager) website header.


(Multiple Development Environment can be added for testing)

Copy the script to clipboard


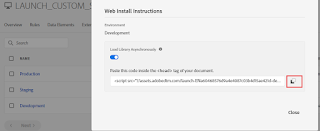
Add the script to the head section of the website pages (The script can be added through Adobe IO integration for AEM, I am directly enabling the script through CRXDE for demo)


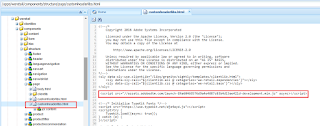
Now the script is inserted into the website pages, the alert box is displayed on every page load


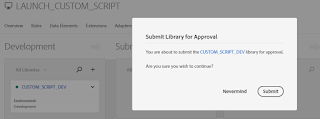
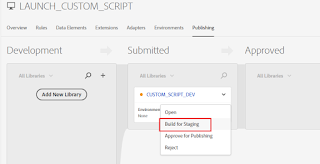
Publish the changes to Stage and Prod environments:
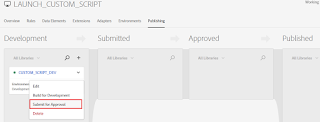

Click on Submit for Approval on Library


Click on Submit


Click on Build for Stage


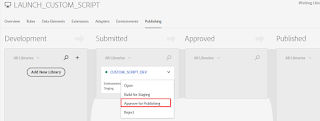
Now the changes are deployed to Stage

Click on Approve for Publishing to publish the changes to Production Environment
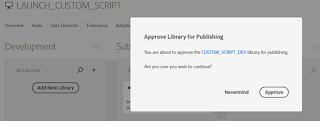

Click on Approve


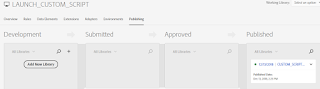
Build & Publish to Production
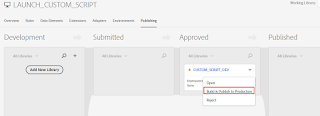

Click on Publish


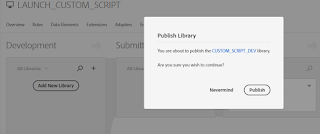
Now the changes are published to the Production environment.


Configure the Stage and Production environment scripts to corresponding Website(AEM) environments(Stage and Prod)


Add New Library and follow the process explained above to send the additional changes to Development to Production Environments


How to include dynamic custom script to websites through GTM(Google Tag Manager) - Adobe Experience Manager(AEM)

How to include dynamic custom script to websites through GTM(Google Tag Manager) - Adobe Experience Manager(AEM)


Google Tag Manager is a tag management system that allows you to quickly and easily update tracking codes and related code fragments collectively known as "tags" on your website or mobile app. Once a small segment of Tag Manager code has been added to your project, you can easily configure and deploy your tag configurations from a web-based user interface without the need to deploy additional code in most cases. This reduces errors and frees you from having to involve a developer every time you need to make changes.

This post explains the approach to use Google Tag Manager(GTM) to include the dynamic scripts as part of Adobe Experience Manager(AEM) websites.


Create a free google tag manager account if one is not available

tagmanager-GTM


Install the GTM header and body scripts to the AEM website

tagmanager-GTM


tagmanager-GTM


Copy the head script to the header file and body script to body footer(start of body section)

tagmanager-GTM

tagmanager-GTM

tagmanager-GTM


Thursday, December 6, 2018

How to use Attribute Loader in Adobe Search and Promote

How to use Attribute Loader in Adobe Search and Promote


This tutorial explains the details on how to use Attribute Loader in Adobe Search and Promote.

Attribute loader help us to provide additional meta data to the URL’s crawled from website.

For example, the PDF’s document crawled from the website will not have any additional metadata specified but the additional metadata can be loaded through Attribute Loader.

e.g while crawling the pdf document from website it will be possible to provide only pdf URL and file name but will not be able to provide the additional details like title, description etc, these additional metadatas can be provided via Attribute Loader.

The values will be merged during indexing through primary key value.

PDF URL Crawled from website — https://www.example.com/test/Albin.pdf

Additional Meta Data-

url- https://www.example.com/test/Albin.pdf(primary key)
Tittle — test PDF
Description — test PDF

The Attribute Loader is executed before actual indexing and the metadata data values are merged based on the primary key during indexing.

Adobe-search&promote-attribute-loader

Attribute Loader option is available under Settings → Metadata →Attribute Loader

Adobe-search&promote-attribute-loader

Add new Attribute Loader definition

Adobe-search&promote-attribute-loader

Sample Feed XML with additional meta data , the data should be available through any one of the following channel — HTTP(S),FTP, sFTP and File

The meta data for each PDF document is represented by Item tag in the XML data

<attributes xmlns:xs=”http://www.w3.org/2001/XMLSchema" version=”2.0">

<channel>

<title>Attribute Loader Feed</title>

<Item>

<title>test PDF1</title>

<desc>test PDF1</desc>

<url>https://www.example.com/test/Albin1.pdf</url>

</Item>

<Item>

<title>test PDF2</title>

<desc>test PDF2</desc>

<url>https://www.example.com/test/Albin2.pdf</url>

</Item>

</channel>

</attributes>

Enter the Feed details to the Attribute Loader

Adobe-search&promote-attribute-loader

Map the Feed data fields to the Adobe S&P meta data definitions, specify a primary key to map the attribute loader data with the data crawled from other channels e.g website. Here the PDF URL is considered as a primary key, the URL is available through both website and Attribute Loader feed.

The Attribute Loader data is merged to the document based on the primary key during the indexing.

Adobe-search&promote-attribute-loader

The Attribute Loader data can be previewed after configuration, to preview the Attribute Loader Data — Click on Load Attribute Loader Data then Start Load

Adobe-search&promote-attribute-loader

Click on Start Load, this will show the preview of the data loaded from the feed

Adobe-search&promote-attribute-loader

Make sure the Content-Types for the required document types(e.g application/pdf) are selected to enable the crawler to crawl those document types from website — the documents for those the Content Types enabled will be crawled from the website

The Content Types can be enabled from Settings → Crawling →Content Types

Adobe-search&promote-attribute-loader

Configure the URL entrypoint — website URL from where the documents should be crawled and the URL mask — the matching URL that should be considered for crawling.

Settings →Crawling →URL Entrypoints

Adobe-search&promote-attribute-loader

The URL mask can be enabled from Settings →Crawling →URL Masks

Adobe-search&promote-attribute-loader

Sample URL

https://www.example.com/home.html

<html>

<body>

<a href=”https://www.example.com/test/Albin1.pdf">test1 pdf

<a href=”https://www.example.com/test/Albin2.pdf">test2 pdf

</body>

</html>

Run the live index by configuring the website URL entrypoint that has the reference to PDF documents, now the search result displays the metadata provided by Attribute Loader for PDF documents

The Attribute Loader is not enabled by default, this should be enabled in S&P account by your Adobe account representative or by Adobe Support.

The attribute loaders add the capability to provide additional meta data to the documents crawled through a channel that is enabled with limited data.


Tuesday, December 4, 2018

How to use Index Connector in Adobe Search and Promote

How to use Index Connector in Adobe Search and Promote


This tutorial explains the details on how to use Index Connector in Adobe Search and Promote.


Index Connector


Index Connector enable us to define additional input sources for indexing XML pages or any kind of feed.

Search and Promote allows us to add the website URL’s as an entry point to crawl the pages for indexing, the URL’s also can be crawled and indexed through Index Connector.(the URL entry points and Index Connectors can be defined together for crawling and indexing)

For example, the Index Connector can be used to index the large number of product data from eCommerce systems to reduce the crawling and indexing time. Index Connector approach provides better crawling/indexing performance.

A XML data feed consists of records corresponds to the individual documents that can be added to the index

A text data feed contains new-line-delimited records corresponds to the individual documents that can be added to the index

Mapping can be enabled to map the feed data to the metadata fields in the resulting index

Multiple protocols can be used to connect to the input feed sources from Index Connector — HTTP(S)/FTP/SFTP/FILE


The IndexConnector is not enabled by default in S&P account, the same should be enabled by Adobe S&P account team.

Define Index Connector


After enabling the Index Connector to the account, the same can be accessed from Settings →Crawling →Index Connector


As a first step add a Index Connector


Sample product feed file(XML)

<feed xmlns:xs=”http://www.w3.org/2001/XMLSchema" version=”2.0">
<channel>
<title>Product Feed</title>
<Item>
<title>
<![CDATA[product-title]]>
</title>
<pubDate>05/09/2011</pubDate>
<pubYear>2011</pubYear>
<description>
<![CDATA[<p>product description</p>]]>
</description>
<productType>Research</productType>
<category>
<![CDATA[Financial Planning|Financial Planners|Research]]>
</category>
<ProductId>123</ProductId>
<imageUrl>/content/dam/Images/product/123.jpg</imageUrl>
</Item>
<Item>
<title>
<![CDATA[product-title]]>
</title>
<pubDate>05/09/2011</pubDate>
<pubYear>2011</pubYear>
<description>
<![CDATA[<p>product description</p>]]>
</description>
<productType>Research</productType>
<category>
<![CDATA[Financial Planning|Financial Planners|Research]]>
</category>
<ProductId>1234</ProductId>
<imageUrl>/content/dam/Images/product/1234.jpg</imageUrl>
</Item>
<Item>
<link>https:/www.example.com/product-title/p/12345</link>
<title>
<![CDATA[product-title]]>
</title>
<pubDate>05/09/2011</pubDate>
<pubYear>2011</pubYear>
<description>
<![CDATA[<p>product description</p>]]>
</description>
<productType>Research</productType>
<category>
<![CDATA[Financial Planning|Financial Planners|Research]]>
</category>
<ProductId>12345</ProductId>
<imageUrl>/content/dam/Images/product/12345.jpg</imageUrl>
</Item>
</channel>
</feed>

The feed file is available through HTTP(S) URL — www.example.com/product/feed.xml, the Index Connector can also access the feed through FTP, SFTP and FILE protocol’s.

Enter a name for the Index Connector

Select Type as Feed

Select Enabled

Configure Host Address and File Path

Select the appropriate Protocol

Configure the Timeout and Retries as required

Itemtag — tag represents the individual records


Enable the mapping for the fields from feed file to metadata defined, define a primary key value that will identify each record uniquely.


The configurations can be previewed before adding the Index Connector, click on Preview button


The Index Connector configuration is now ready, enable the Index Connector as URL entry point for crawling and indexing Setting → Crawling → URL Entrypoints


Select the Index Connector defined in the above step from the drop down “ — Add Index Connector Configurations — “


Now the configurations are ready, run a full live index so the new records will be reflected in the search result.

The Index Connector will provide the easy option to index the documents from feed data, this provides better performance during crawling and indexing. The Index connector can be used to index large volume of data for eCommerce systems.