Tuesday, January 12, 2021

Different Approaches to Block Non-Prod URL’s from search indexing

One of the major SEO concerns while working on the website is blocking the non-production URLs appearing from search engines result(index), the search engines can index the non-prod URL if those URL’s are by mistake linked from live URL’s or exposed through any other external links. The indexing of non-prod URL can cause duplicate content issues that also impact the ranking of live URL’s, the end-user may access the non-production URL instead of the Live URL. This can sometimes lead to a compliance issue if the content bound to compliance and non-live content is exposed to the end-user.

In this tutorial let us discuss the details on how to block the non-prod URLs appearing from search engines.

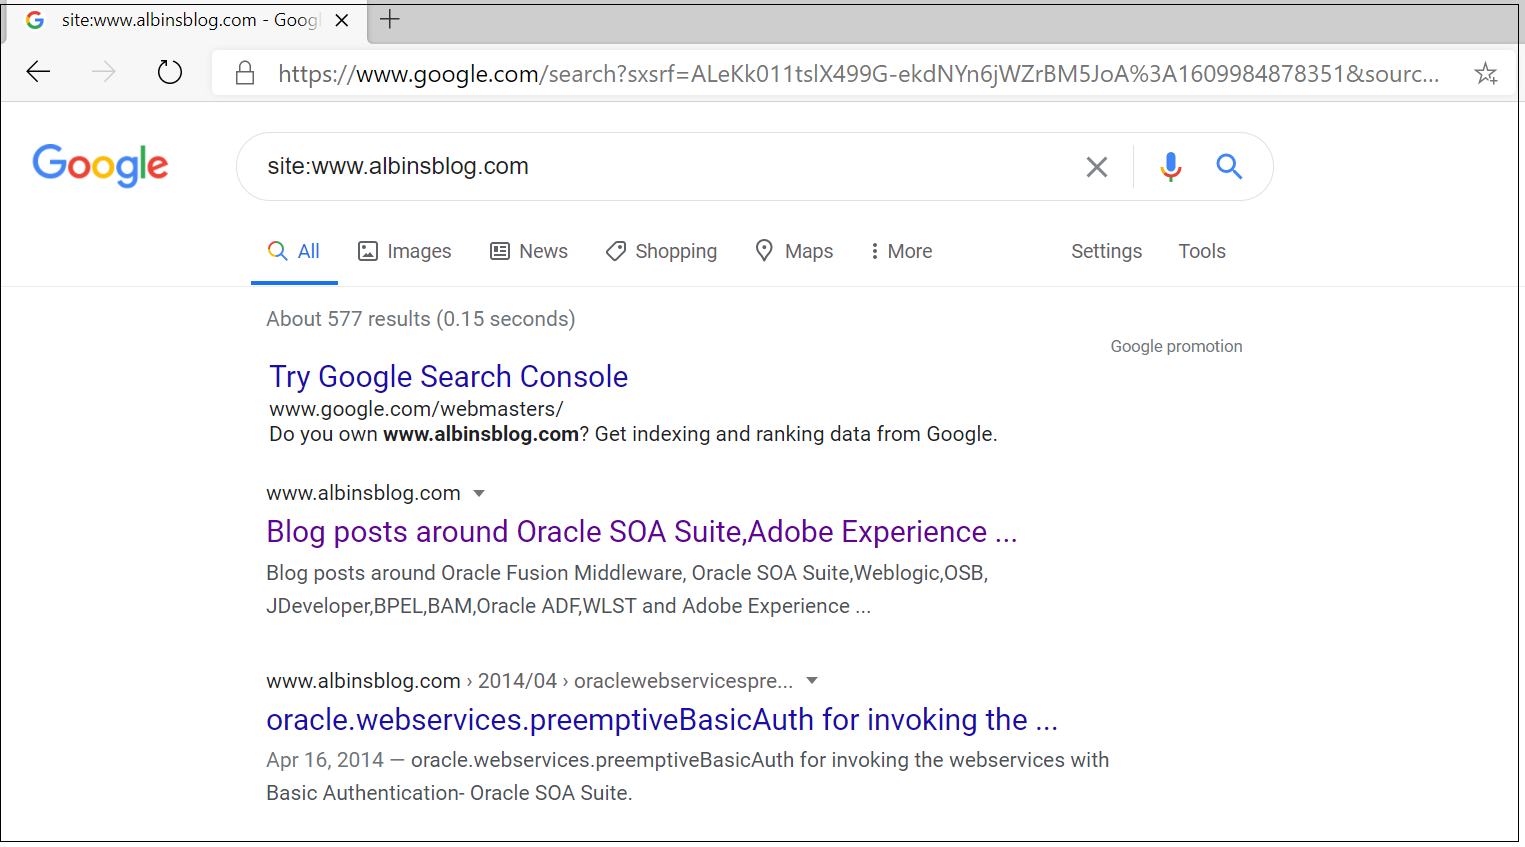
You can search for site:<domainname> e.g site:www.albinsblog.com to identify whether the specific domain is indexed by the search engine, also you can use some of the third party SEO tools to identify the URL’s indexed in search engines.

Image for post

Let us now see some of the options to block search engines from indexing non-production URL.

HTTP Basic Authentication:

Server-side HTTP Basic Authentication for domains block the search engines from crawling and indexing the domain content. Enable HTTP basic authentication in the web server for the non-prod domains so that the non-prod domains will be blocked for search engines but the live content will be indexed as expected.

Basic Authentication for Apache 2.4 Virtualhost

<Location />
AuthType Basic
AuthBasicProvider file
AuthUserFile /etc/httpd/conf.d/.htpasswd
#create the user through htpasswd, htpasswd -c /etc/httpd/conf.d/.htpasswd testuser
AuthName "Authentication Required"
Require valid-user
</Location>

If the same configuration is shared for different environments, enable the authentication based on the condition(e.g based on an ENV_TYPE environment variable or based on the incoming domain value)

<Location />  <If "'${ENV_TYPE}' =~ m#(dev|uat|stage)#">  
AuthType Basic
AuthBasicProvider file
AuthUserFile /etc/httpd/conf.d/.htpasswd
AuthName "Authentication Required"
Require valid-user
</If>
<Else>
Require all granted
</Else>
</Location>

The basic authentication will create challenge while performance testing the websites in stage or other environments(part of a pipeline or outside ) mainly on the caching behavior — the basic authentications enabled websites are skipped from caching, the workaround is disabling the basic authentication whenever the performance testing is executed in the environment(or execute the testing with basic authentication but the test result will not reflect the live behavior).

IP Restriction:

IP restriction helps you to allow only the known IPs to access the non-production URLs, whitelist the known IP ranges so that the external search engines will not have access to crawl/index the non-production websites but the intended users will be able to access the non-prod websites for testing.

The IP restriction can be enabled in load balancer or web server, the webserver will give more control and flexibility to modify the restrictions whenever required by the development team.

IP restriction configuration for Apache 2.4 Virtualhost

<Location />
<RequireAny>
Require ip xxx.xx.0.0/24
</RequireAny>
</Location>

If the same configuration is shared for different environments, enable the IP restriction based on the condition(e.g based on an ENV_TYPE environment variable or based on the incoming domain value)

<Location />
<If "'${ENV_TYPE}' =~ m#(dev|uat|stage)#">
<RequireAny>
Require ip xxx.xx.0.0/24
Require ip xxx.18.0.0/24
</RequireAny>
</If>
</Location>

The main challenge of IP whitelisting is enabling the Whitelist rules while working with distributed teams and the dynamic IP’s involved to access the servers.

Robots Meta Tag:

The robots metatag in the page source can help to keep the non-production URL’s out of the search engine index, enable the required robots meta tag in the page source, you need to apply the required custom logic to enable the meta tag only for non-prod environments.

<meta name="robots" content="noindex, nofollow, noarchive, nosnippet, nocache" />

noindex — Do not show this page in search results.

nofollow — Do not follow the links on this page.

noarchive — Do not show a cached link in search results.

nosnippet — Do not show a text snippet or video preview in the search results for this page

nocache — Same as noarchive, but only used by MSN/Live.

The challenge with this approach is the robots metatag can be applied only for HTML resources, not for different assets — pdf, png, jpg and etc also compare to the above two approaches the search engines should crawl all the individual pages to identify the pages are not enabled for indexing.

Robots Meta Tag HTTP header:

The X-Robots-Tag in the HTTP response header can help to keep the non-production URL’s out of the search engine index, the response header can be enabled for both HTML documents and other assets. Better to add this header to the response of all non-prod resources through webserver e.g Apache.

Configuration for Apache Virtualhost

Header set X-Robots-Tag “noindex, nofollow, noarchive, nosnippet, nocache”

If the same configuration is shared for different environments, enable the header based on the condition(e.g based on an ENV_TYPE environment variable or based on the incoming domain value)

<Location />
<If "'${ENV_TYPE}' =~ m#(dev|uat|stage)#">
Header set X-Robots-Tag "noindex, nofollow, noarchive, nosnippet, nocache"
</if>
</Location>

This approach is very easy to manage compared to enabling the metatag in the page source, the search engines should crawl all the individual pages to identify the pages that are not enabled for indexing.

Robots TXT:

Robots.txt file gives the instruction to search engines not to crawl the websites through Disallow tags but this will not ensure the pages are excluded from the index. The pages blocked by robots.txt can still appear in the index if the page is linked from external sources.

Enable a simple robots.txt in the root of every non-prod websites to block the search engines crawling the non-production URL’s(ensure the same Disallow rules are not enabled for live sites by mistake otherwise it will impact the live site indexing)

User-agent: *
Disallow: /

This approach can be used along with Robots metatag or HTTP header to block the search engines crawling the website content after removing them from the index — if the page is already in the index that should be removed first from the index before blocking the crawling through robots.txt otherwise search engine will not able to crawl and see the metatag or header enabled to the pages.

URL Removal:

The Search engine URL Removal tool can be used to remove the already indexed URL from the search engine(also from cache) if something indexed that shouldn't be indexing e.g non-prod URL.

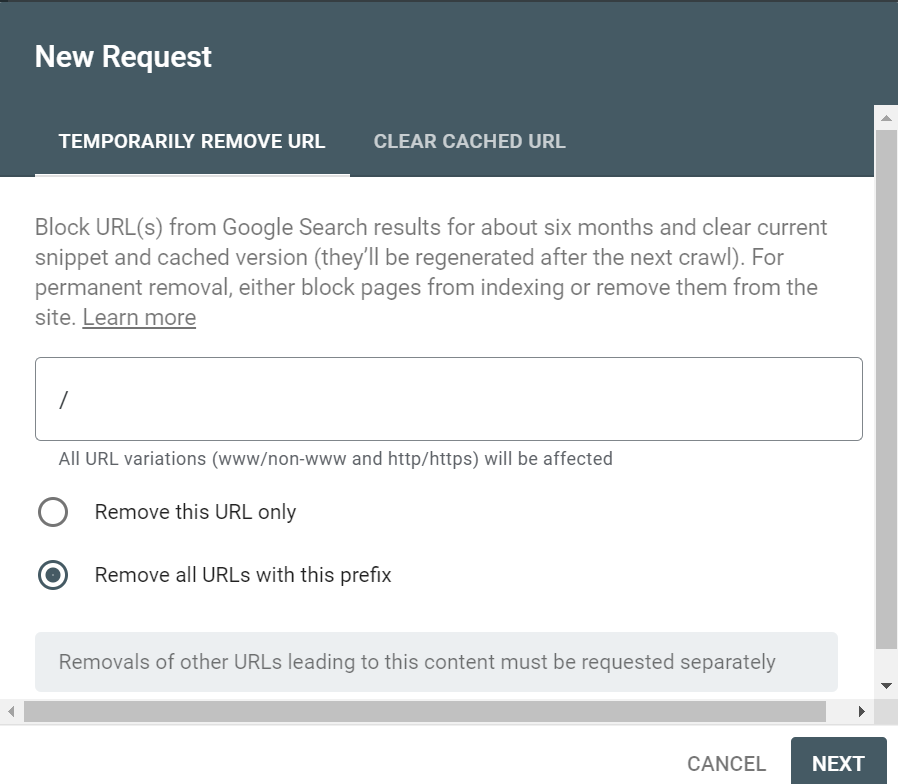
The Removals tool enables you to temporarily block pages from Google Search results on sites that you own. When a page’s URL is requested for removal, the request is temporary and persists for at least 90 days, meanwhile, anyone of the approach discussed above should be enabled to block the search engines completely from crawling and re-indexing the pages again.

Either specific URL, specific section, or the complete site can be removed from the indexing(the site property should be owner can only perform this activity), for google, this can be performed through google search console

Image for post

The authentication and IP restriction will be the most promising approach to keep non-production URLs safer from search engines, in case these two approaches do not work for your case try enabling Robots Meta Tag HTTP header (use robots metatag if required) from webserver for non-prod domains along with robots.txt blocking the crawling.


Tuesday, December 15, 2020

AEM Dispatcher Configurations — symlinks

This summary is not available. Please click here to view the post.


Friday, December 11, 2020

Sync External Git Repository to Cloud Manager Repository

This summary is not available. Please click here to view the post.


Saturday, December 5, 2020

Cloud Manager Notifications to Collaboration Channels — Microsoft Teams

Cloud Manager enables customers to manage their custom code deployments on their AEM-managed cloud environments with manageable pipeline automation and complete flexibility for the timing or frequency of their deployment.

The Cloud Manager CI/CD pipeline executes series of steps to build and deploy the code to AMS and AEM as Cloud AEM platforms, refer to the below video to understand the basics of Cloud Manager.


Cloud manager exposes APIs to interact with the CM settings and to manage the pipeline also emits different events on pipeline execution.

The Adobe I/O along with custom webhooks can be used to receive the appropriate events from Cloud Manager and take the required action. Also, the Cloud Manager APIs can be invoked through Adobe I/O to perform different operations on Cloud Manager.

One of the important requirements while working with Cloud Manager is notifying the developer on the status of pipeline execution, the individual developers can subscribe to the email notification as required but there is no default option to send the notifications to group email or another collaboration channel.

Most of the teams like the notification to the Collaboration Channels e.g Microsoft Teams, the Adobe I/O along with CM API, Events, and Microsoft Teams Webhook can be used to send the Cloud Manager Notification to the Microsoft Teams Channel.

The Microsoft teams or other Collobrarion Tools helps to enable the webhooks(POST with JSON data), the webhook can be used to send the notification to the specific channel.

The notification can be managed through a custom webhook or Adobe I/O runtime, Adobe I/O runtime expects two Webhook services to receive the events(due to this the Collaboration Channel Webhook can’t be directly used in Adobe I/O Notification)
  • GET service to receive the challenge request and respond to the challenge
  • POST service to receive the different event details

The signature validation is performed as part of the POST service to ensure the request is posted only from Adobe I/O and to protect from security issues.


Some of the additional overheads we discussed e.g GET service to handle challenge and signature validation as part of the POST service can be avoided by using Adobe I/O runtime to communicate with the external webhooks.

We can use one of the below option to send the Cloud Manager notifications to the Collaboration Channels e.g. Microsoft Teams
  • Enable the Notification through Custom Webhooks hosted on Node JS — Refer Cloud Manager API and Cloud Manager API Tutorial. Somehow the step7-teams.js was failing to create the JWT token with the RS256 algorithm, to fix the issue updated step7-teams.js to use “jsonwebtoken” instead of “jsrsasign” module.
  • Enable the Notification through Adobe I/O Runtime — Refer Cloud Manager Meets Jenkins
  • Enable the Notification through Custom Webhooks hosted on AEM

Let us now see the details on how to enable the custom webhooks in AEM to send the Cloud Manager pipeline notifications to the Microsoft Teams channel, the same steps can be reused with minimal changes to send the notification to other tools e.g. Slack.


You can get all the required additional data by invoking the CM APIs’s, the Event JSON will have the URLs to get the execution details, execution details subsequently will have the URLs to get the program details, pipeline details, step details, logs, etc(Explore the input JSON’s to get the required details).


Enable Webhook for Teams Channel:


As a first step, let us register the webhooks for the Microsoft Teams channel.
Define a Channel to receive the CM pipeline notifications, Go to the Teams Channel for which the Webhook should be enabled, and click on the three dots in the upper right corner then click on Connectors.


Configure an “Incoming Webhook”


Enter a name and click on create, if required upload a custom image to display on incoming messages.


Copy the webhook URL and click on Done


Enable Adobe I/O Configurations:


Let us enable the required configurations in Adobe I/O, log in to console.adobe.io

Create a new project, edit the project and provide a custom name if required


Add Cloud Manager API to the Project


Now “Generate a key pair”


This will download a “config.zip” with a public certificate and private key(need to be configured in the AEM Service)

Assign the Cloud manager role to enable the required permissions to the API — “Cloud Manager-Developer Role” should be enough to perform the API operations.


Add Cloud Manager Events to the project


Subscribe to the required Events — I am subscribing only for “Pipeline Execution Started”, current AEM service is enabled to handle only this start event.


Enter the AEM service URL (/bin/cmnotification) — I am using ngrok to expose AEM URL externally for demo(use AEM external service URL)


Now the Adobe I/O configuration is ready, let us enable the service in AEM.

Enable Custom Webhook in AEM:


I am enabling the below servlet to accept the requests from Adobe I/O
  • GET Service to support challenge service
  • POST service to accept the Event details

Post Service:
  • Validate the Signature of the incoming request
  • Parse the Event Data
  • Generate signed(private key) JWT bearer token
  • Request for Accesses token with the JWT bearer token
  • Invoke API to receive the execution details based on the execution URL in the Event Data
  • Invoke the API to receive the pipeline details based on the pipeline URL in the Execution details(different URL's from the execution details can be used to fetch different data)
  • Notify teams channel with Teams Channel Webhook


Configure the below values into the servlet(the values can be modified through the OSGI console)

The required values can be retrieved from the Adobe I/O console


ORGANIZATION_ID
TECHNICAL_ACCOUNT_EMAIL
TECHNICAL_ACCOUNT_ID
API_KEY(CLIENT_ID)
CLIENT_SECRET
TEAMS_WEBHOOK — The Webhook URL enabled in Teams


The AEM bundle can be downloaded from here https://github.com/techforum-repo/bundles/tree/master/CMNotificationHandler

Copy the private.key file(from the config.zip file downloaded earlier) to the bundle under /META-INF/resources/keys.

Deploy the bundle to the AEM server (mvn clean install -PautoInstallBundle -Daem.port=4503)

Now the webhook service is ready

Initiate a pipeline from Cloud Manager Portal that will trigger the notification to the Teams Channel.


Currently, the notification will be sent only when the pipeline is started, extend the bundle to support different events and to fetch the additional details from different endpoints — the URL’s can be taken from the JSON response of the parent APIs. This will helps us to receive the notification into the team's channel on pipeline events. This approach may add some additional overhead to the AEM server but not required to maintain any additional platforms, Adobe I/O approach needs the license to the Adobe I/O platform.

Feel free to provide your comments.


Friday, December 4, 2020

init failed:Error: not supported argument while generating JWT token with jsrsasign - Node JS

I was getting "init failed:Error: not supported argument" error while trying to generate the JWT Token with RS256 algorithm through "jsrsasign" npm module.


const jsrsasign = require('jsrsasign')

const fs = require('fs');

const EXPIRATION = 60 * 60 // 1 hour

  const header = {

    'alg': 'RS256',

    'typ': 'JWT'

  }

  const payload = {

    'exp': Math.round(new Date().getTime() / 1000) + EXPIRATION,

    'iss': 'test',

    'sub': 'test',

    'aud': 'test',

    'custom-prop': 'test'

  }  

  const privateKey = fs.readFileSync('privateKeyfile.key); 

  const jwtToken = jsrsasign.jws.JWS.sign('RS256', JSON.stringify(header), JSON.stringify(payload), JSON.stringify(privateKey))


But the JWT token generation was successful with the HS256 algorithm


const jsrsasign = require('jsrsasign')

const fs = require('fs');

const EXPIRATION = 60 * 60 // 1 hour

  const header = {

    'alg': 'HS256',

    'typ': 'JWT'

  }

  const payload = {

    'exp': Math.round(new Date().getTime() / 1000) + EXPIRATION,

    'iss': 'test',

    'sub': 'test',

    'aud': 'test',

    'custom-prop': 'test'

  }  

  const privateKey = fs.readFileSync('privateKeyfile.key); 

  const jwtToken = jsrsasign.jws.JWS.sign('HS256', JSON.stringify(header), JSON.stringify(payload), JSON.stringify(privateKey))


To support the RS256 algorithm, changed the "jsrsasign" to  "jsonwebtoken" module.


const jwt = require('jsonwebtoken');

const fs = require('fs');

const EXPIRATION = 60 * 60 // 1 hour

const header = {

    'alg': 'HS256',

    'typ': 'JWT'

 }

  const payload = {

    'exp': Math.round(new Date().getTime() / 1000) + EXPIRATION,

    'iss': 'test',

    'sub': 'test',

    'aud': 'test',

    'custom_attr': 'test'

  }  

const privateKey = fs.readFileSync(process.env.PRIVATE_KEY); 

const jwtToken=jwt.sign(JSON.stringify(payload), privateKey,{ 'algorithm': 'RS256' });


The JWT token generation with the RS256 algorithm was successful after switching to "jsonwebtoken" module