Tuesday, February 22, 2022

Website Structure in AEM — Multi-Site Manager(MSM)

 In this post let us explore how to use MSM concepts to structure websites in AEM.

The site structure is driven by multiple factors, set up a site structure that meets your goals

  • Multiregional, multilingual needs
  • Content re-use/Duplicate Content/Content Velocity
  • Content distribution
  • Translations(automation third-party translation connectors )
  • Access Control/Governance(Who manages the global/local websites and content)
  • Create a consistent fluid look among sites

Multiple site structures can be enabled based on the above factors, some of the important structures are

  • Individual websites
  • Multinational Site
  • Multilingual Site
  • Multinational and Multilingual
  • Multi-departmental Site

Country Based Standalone Websites- The site1, Site2, and site3 are independent and have no relationship between them, if required multiple languages can be supported through language copy(let us understand more about language copy later in the post). Even in some cases separate apps for different websites — e.g separate code modules, components, templates, etc based on the nature of the website.

Region-Based Structure — manage the content at the global level and different region levels, this will enable the region-based teams to enable the local content at the same time reuse the global content.

Multi-National/Multi-Lingual Websites — the language masters(unpunished pages) help to manage the pages for all supported languages, en is the global master and other languages created as a language copy from en. The live copies through blueprint can be used to define country-specific websites, the content is easily managed through language masters and rolled out to individual sites, the inheritance can be broken whenever required.

The AEM MSM(Multiple Site Manager) can be used to enable the required site structure and enable the content reuse. Let us see some of the important concepts on MSM.

MSM(Multi-Site Manager) — MSM enables you to use the same site content in multiple locations. MSM enables a set of tools to manage sites that share the same content. MSM defines the relationship between content, enforces a common base structure and common content across multiple sites. MSM maximizes the reusability of the content but at the same allows the individual websites to localize the required content.

Blueprint — A source template for multiple pages, defined from a site or set of pages. Blueprint configuration identifies an existing website that you want to use as the source for one or more live copy pages. Blueprint configurations enable you to push content changes to live copies. In AEM as a Cloud Service, every live copy source is enabled as a Blueprint, it means no need to create the separate BluePrint Configurations. Refer to the following links for more details — https://github.com/adobe/aem-enablement/blob/master/AEMAsACloudService/02_MSM_Improvements/README.md (AEM 6.5.12.0 now backports this AEM as a Cloud feature — refer to https://experienceleague.adobe.com/docs/experience-manager-65/release-notes/release-notes.html)

Live Copy — A site created from Blueprint, even the live copies can be directly created from another website without a blueprint. The live relationship is maintained between master pages and live copy pages. The live copies inherit content from the master, which means anytime the content changes from master can be rolled out/synced to live copy pages. The relationship(inheritance) between the master pages and the local pages can be canceled based on the need to enable the local content.

Language Copy — A Language Copy provides a way to create a copy of a site (or part of a site) that is specially designed for translation. There is no live relationship as established in the case of Live Copy. It is one time copy of the content. Please note there is no translation as part of the Language Copy Creation, some external translation vendors should be engaged for content translation but AEM enables the required frameworks to automate the translation process.

Rollout — The process Synchronizes from the source to the live copy, Can be triggered by an author (on a blueprint page) or by a system event (as defined by the rollout configuration).

Synchronize — A manual request for synchronization, made from the live copy pages. The changes from the master pages are synchronized to the live copy pages.

Let us now quickly see how to enable Multi-National/Multi-Lingual Websites(refer to the above diagram)through MSM structure.

(I have created a sample project through the latest AEM Arch type, and using local Cloud SDK for demo) — the same project will have the minimal templates and components enabled also the sample site structure, I am going to create a new multilingual/multinational website following the MSM framework and using the default template and components.

As a first step create a language master website structure(in our case en — /content/msmdemo/language-masters/en), create language-master and en pages under site root, also required child pages under en page.

The site structure should follow some of the below rules to enable MSM

  • The website has a root page.
  • The immediate child pages of the root are language branches of the website.
  • The root of each language branch has one or more child pages.

Now create the required languages-masters from en master under /content/msmdemo/language-masters, Create a language copy from en master e.g es, fr, etc — en is the global master and the content is translated to different language masters, the country-specific websites are created from language masters as a live copy.

Add the required pages from en master

Select the target language and enable the translation configurations — refer to the below posts for more details on translations

Now the language master setup is completed, let us create country-specific websites for supported languages.

As a first step, create the website root pages(country nodes) e.g /content/msmdemo/us, /content/msmdemo/fr, etc.

Create a live copy from the corresponding language masters to the target country folders.

Select the language master and select the destination(/content/msmdemo/us)

Enter Title, the name, select the required rollout configs then click on create

Repeat the same steps for all the languages supported for a specific country.

Now you should be able to roll out/sync changes from language masters. To perform 1 to many rollouts ( language masters to multiple live copies), select the language master associated with the live copies e.g /content/msmdemo/language-masters/en, select properties, select the Blueprint tab — Blueprint tab is visible only when the language masters are associated with at least one live copy.

Select the rollout config and roll out changes, the changes from language master will be sent to all the live copies(you should be able to select the required live copies). Even you should be able to see the live copy overview.

The rollout can also be initiated from references UI, select the live copy page e.g /content/msmdemo/us, and select References. Now you can roll out the changes to that specific live copy.

You can also compare the changes before rolling out.

Instead of rollout, you can sync the changes to the live copy pages.

Select the live copy page →Properties → Select Live Copy tab →Click on Synchronize

You should be able to Suspend — Suspending live copy inheritance for a page is a temporary action. Once suspended the Resume action becomes available, allowing you to reinstate the live relationship or Detach — Detach permanently removes the live relationship between a live copy and its source/blueprint page.

In AEM 6.5, you could only do one-to-one rollouts for a large site, using the synchronize button in the AEM Live Copy User Interface. In order to do a one-to-many rollout, you had to set up a blueprint configuration(AEM 6.5.12.0 now backports this AEM as a Cloud feature). AEM as a Cloud Service automatically makes any live copy source to a blueprint, select a page from the Blueprint site(source of the live copy, in our case language masters), open the page properties, click the Blueprint tab and click Rollout to all the selected live copies.

The MSM framework can be customized based on the business need e.g the rollout configurations can be customized to rollout/synchronize the required content and properties. While MSM supports a high degree of customization typically the best practice for the performance, reliability, and upgradeability of your website is to minimize customization.

MSM is one of the important features in AEM that helps you to manage multiple websites that share common content; helps the authors to quickly launch the website in different countries by reusing the content from existing websites. The Live Copy concept in the MSM framework helps to maintain the live relationship between different websites that helps the content authors to roll out the changes quickly across multiple websites. The MSM structure should be defined carefully considering different factors e.g Access Control/Governance, COntent Reuse, Website specific content, etc.

References:

https://experienceleague.adobe.com/docs/experience-manager-64/administering/introduction/msm.html?lang=en

https://experienceleague.adobe.com/docs/experience-manager-65/administering/introduction/msm-best-practices.html?lang=en

Saturday, February 5, 2022

How to Implement Experience Targeting in AEM using ContextHub?

 Content personalization in short means delivering the right content to the right person in real-time.

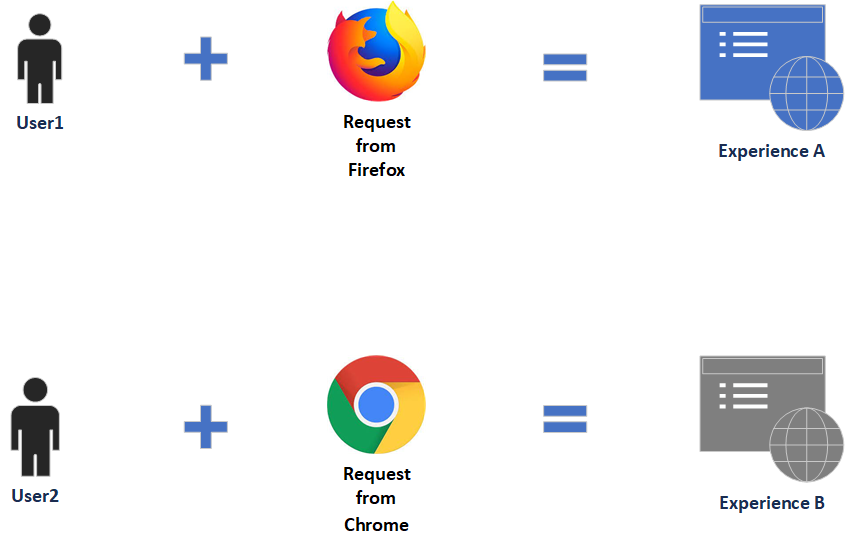
Simple experience targeting scenario, user1 requesting the content through Firefox receives Experience A and user2 requesting the content through Chrome receives Experience B. The experience can be decided based on different rules e.g gender, age location, etc, here we are seeing the simple scenario.

The targeting engine is the mechanism that drives the logic for targeted content. You can use either AEM or Adobe Target as the targeting engine, AEM provides a built-in targeting engine that processes page requests and determines the content to display. AEM as a targeting engine only supports Experience Targeting but Adobe Target should be used for A/B testing.

In this post, let us see how to use the AEM targeting engine to enable the experience targeting for a web page.

Setup ContextHub:

ContextHub is a framework for storing, manipulating, and presenting context data. The ContextHub Javascript API enables you to access stores to create, update, and delete data as necessary. To enable the ContextHub features and to link to the ContextHub JavaScript libraries, including the <contexthub> component in the <head> section of your web page.

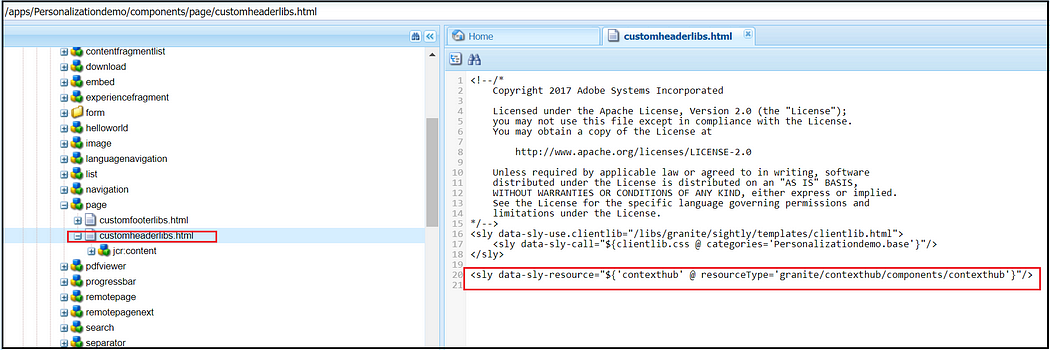
Add the below HTL code to the overridden customheaderlibs.html file of your page component(here the page component is extending from core page component — core/wcm/components/page/v2/page

<sly data-sly-resource="${'contexthub' @ resourceType='granite/contexthub/components/contexthub'}"/>

ContextHub includes a segmentation engine that manages segments and determines which segments are resolved for the current context.

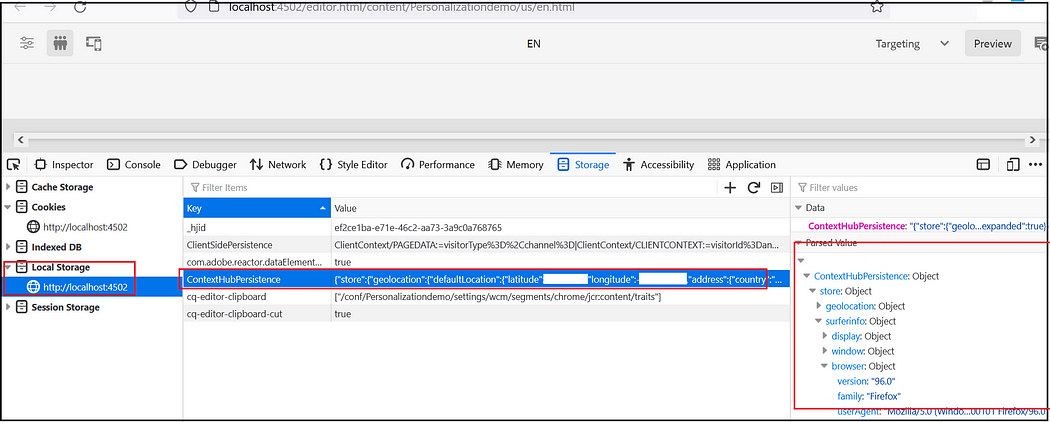
Once the ContextHub is enabled for the project client context data can be explored through the browser local storage.

Refer to https://experienceleague.adobe.com/docs/experience-manager-65/developing/personlization/contexthub.html for more details on ContextHub.

Configuration Browser — Enable ContextHub Segments:

Enable the ContextHub segments for your site under Configuration Browser. Tools → General → Configuration Browser → Select the project → Properties → Select ContextHub Segments, Save and Close

Configure Segment Path and ContextHub path:

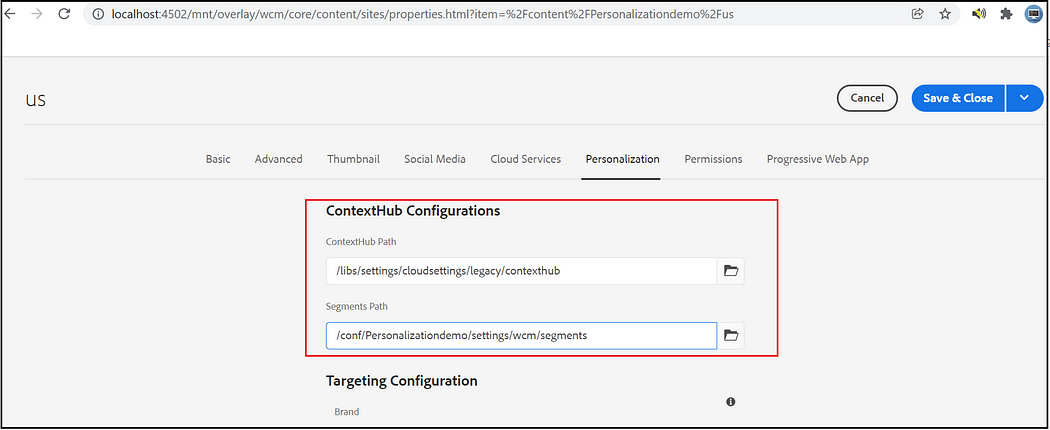
Assign Segment path and ContextHub path to your site root node, the default ContextHub path is /libs/settings/cloudsettings/legacy, segment path — /conf/<tenant>/settings/wcm/segments

Create Brand:

Create a Brand to manage the Audiences through Activities console, Tools →Personalization →Activities, Create Brand

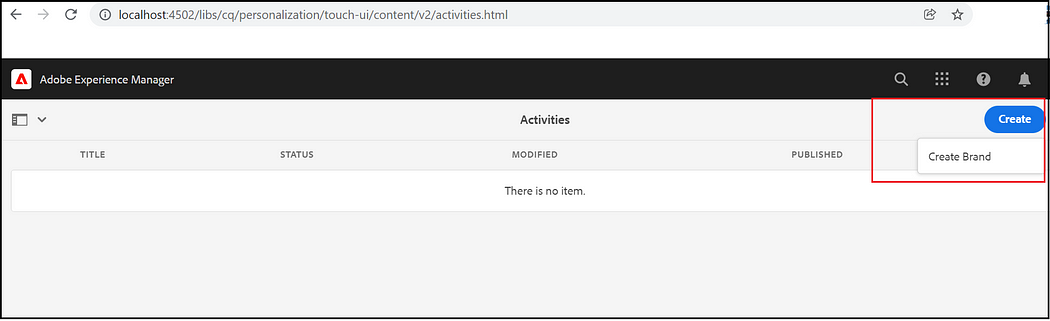
Select Brand Template, add a tile, and Create

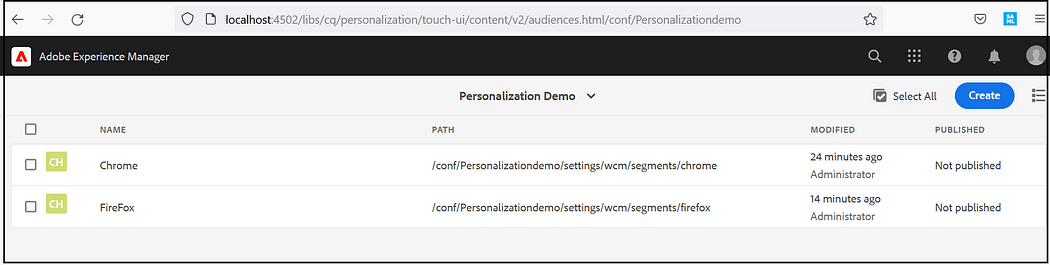
Create Audiences — Create ContextHub Segment:

An audience, called segment in ContextHub, is a class of visitors defined by specific criteria, which then determines who sees a targeted activity.

Create the required Audiences, Tools →Personalization →Audiences, Create ContextHub Segments under the corresponding project.

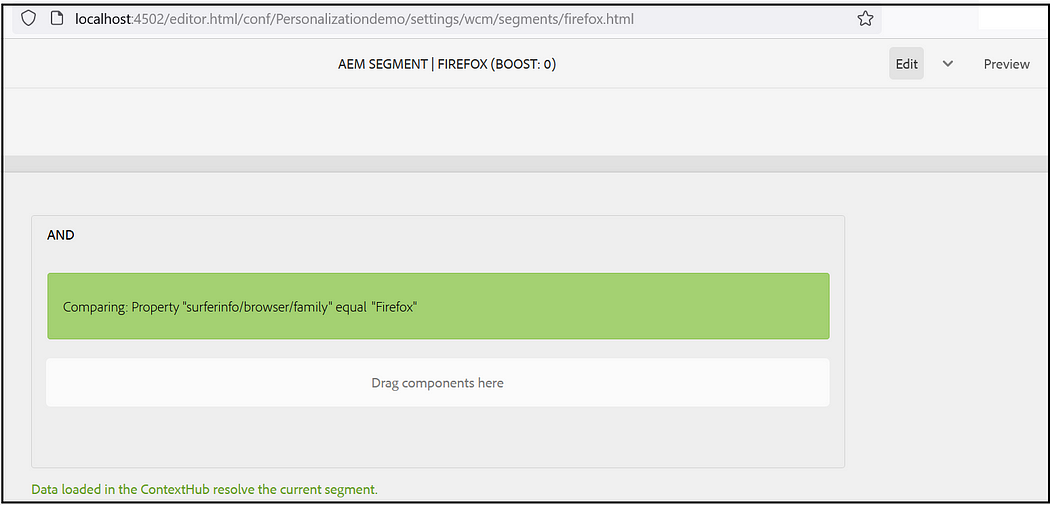
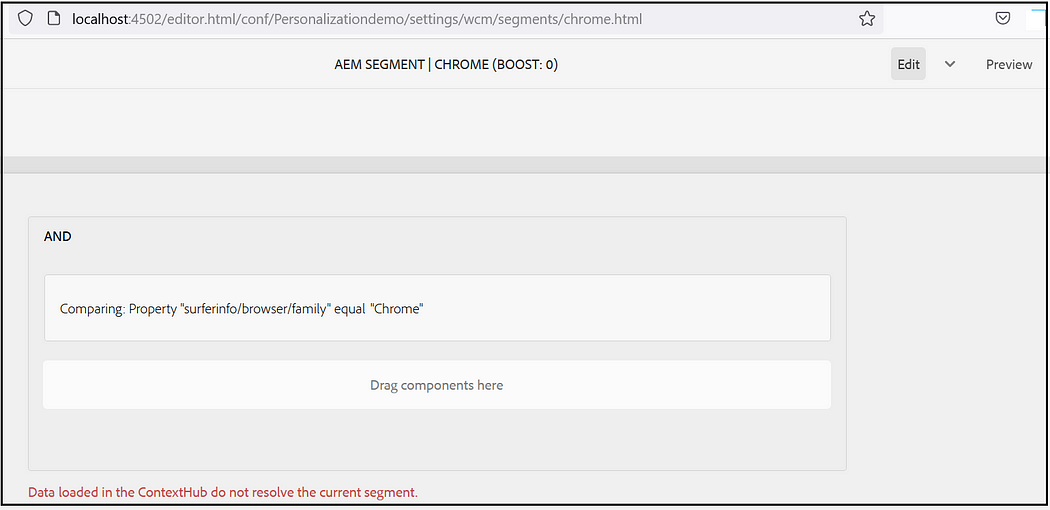
I am creating two Audiences, one for Chrome browsers and another one for Firefox with the simple conditions to check the browser from which the request coming. Specify the required boost factor, If there is more than one segment that gets resolved the one with a higher boost factor is selected.

Assign the segments to the audience, I am using “CONTEXTHUB SEGMENTATION: Comparision: Property — Value” with the simple conditions to check the browser name(complex rules can be enabled based on the use cases)
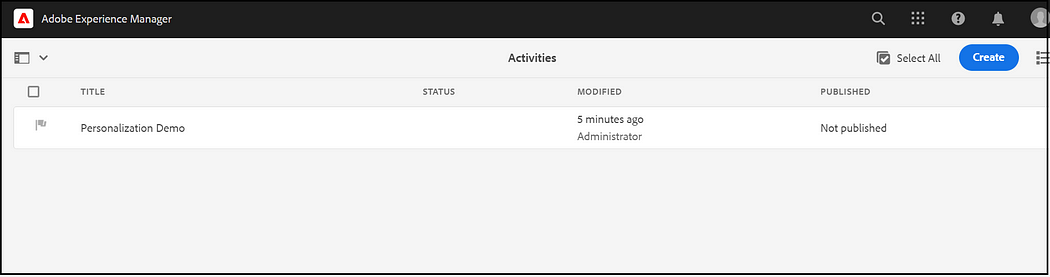
Create Activities:

Activities consist of audiences that you are targeting, and the period of time when the targeting is applied.

First Create an Area under Brand and create the Activity inside the Area, Tools →Personalization →Activities

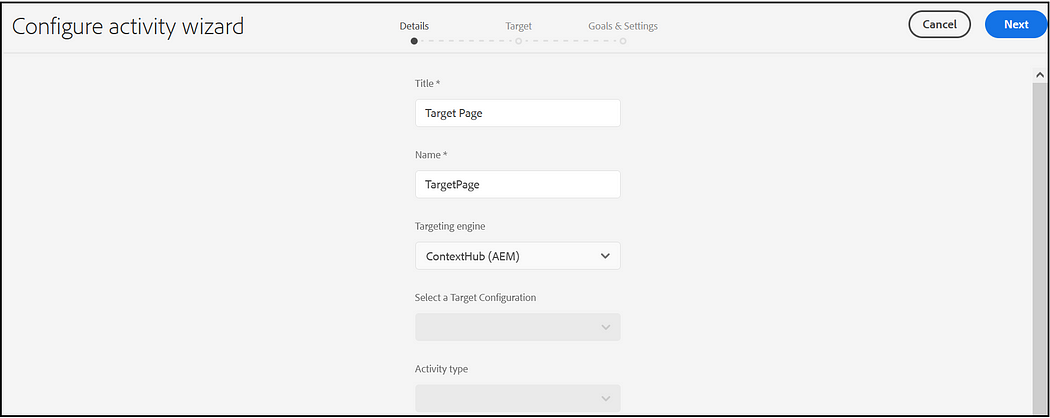
Enter Title, Name and select the Target Engine as ContextHub

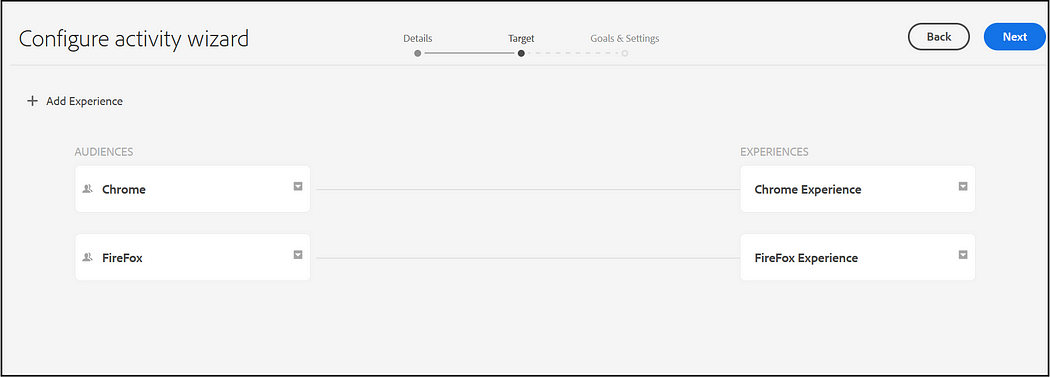
Add Experience for each audience

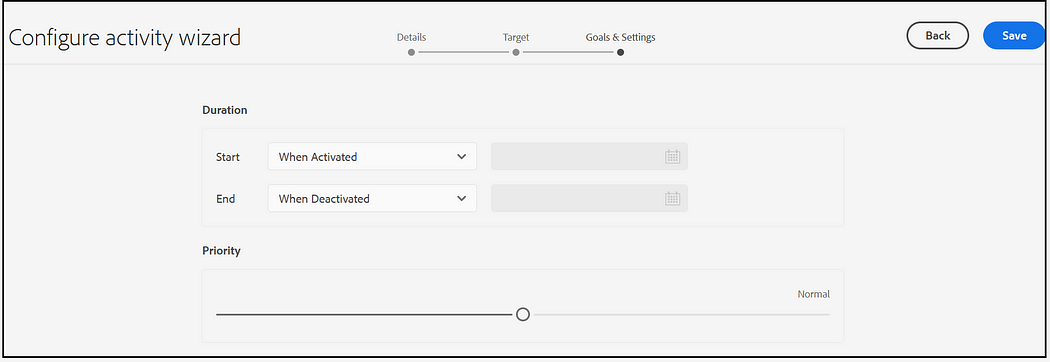
Set the Duration and Priority

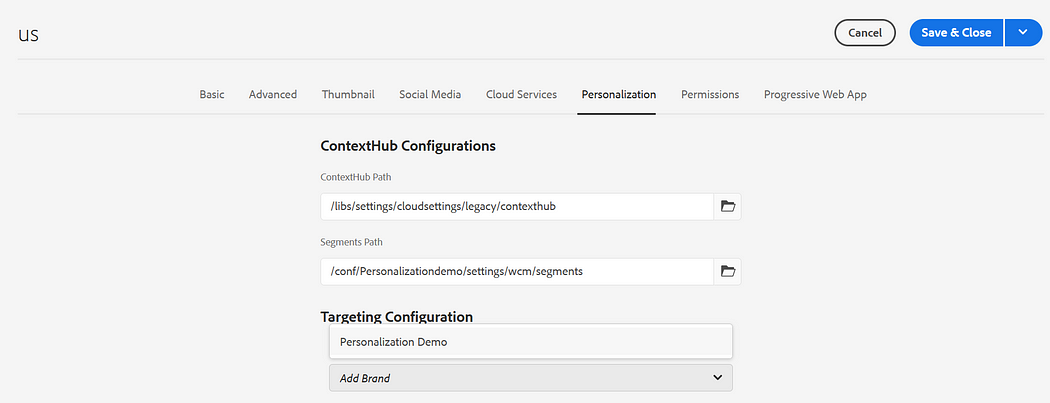
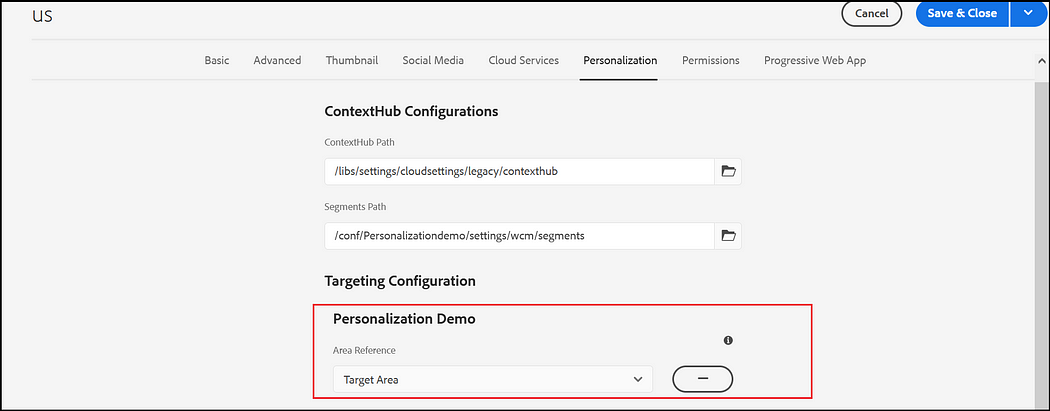
Enable Target Configuration:

Enable the Target Configuration — Brand, Area to the root page properties or to the specific page(you can configure more than one brand).

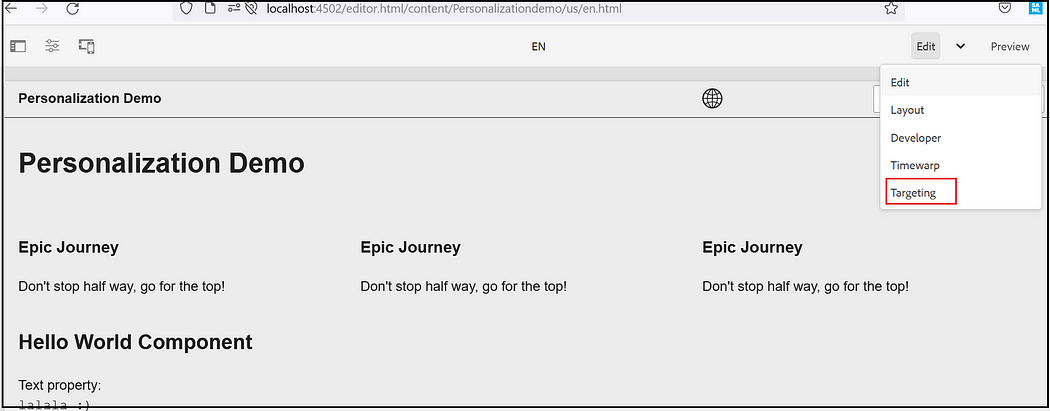
Author targeted content:

Author targeted content using the Targeting mode of AEM. Targeting mode provides tools for creating content for the experiences of your marketing activities.

Select Targeting Mode from the Dropdown

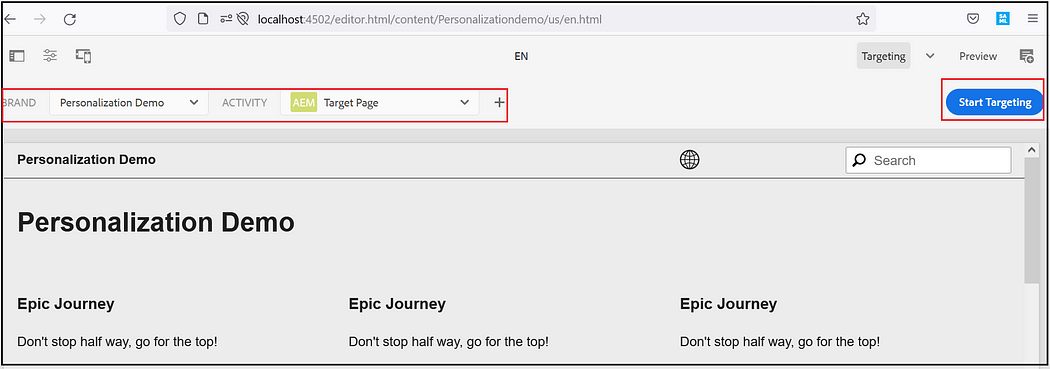
Select the Brand and Activity and click on Start Targeting.

On required components select the Target option

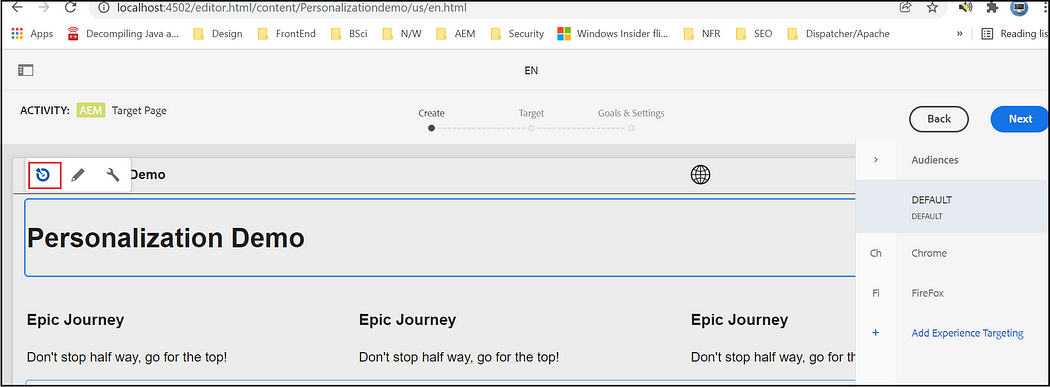
Now select the Audience and define the experience for the components, Default — Default experience, Chrome — the experience for the Chrome user, Firefox — the experience for the Firefox user. Select the corresponding audience and edit the component data.

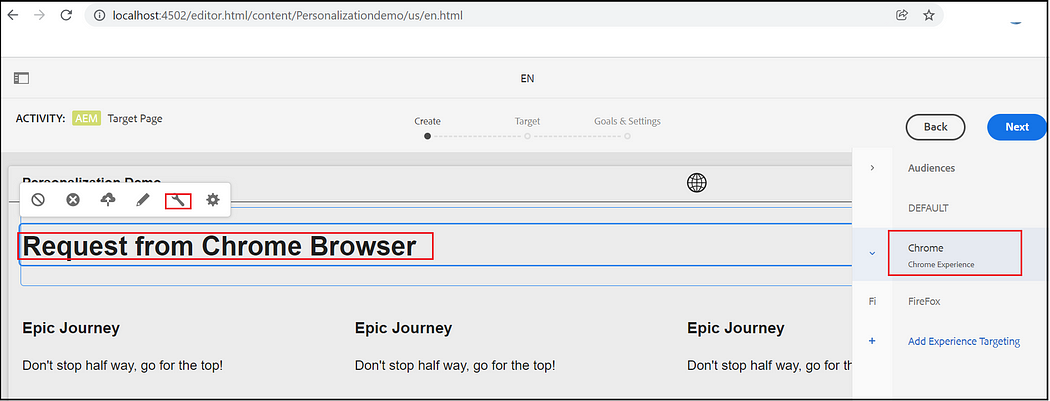
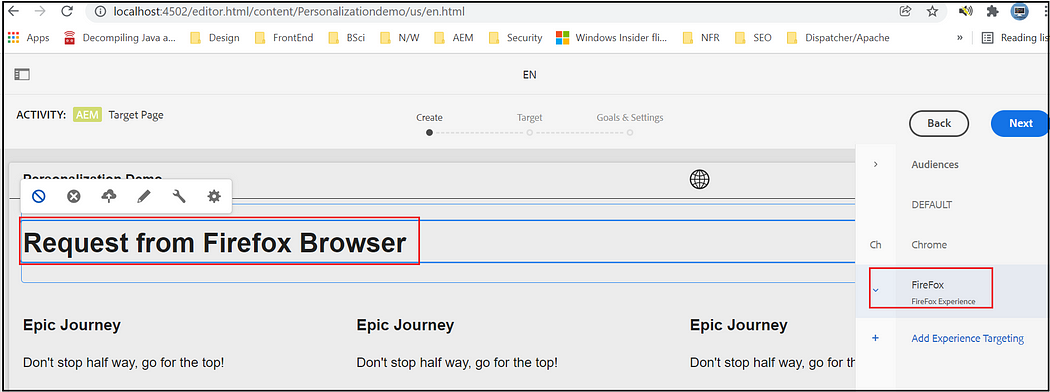
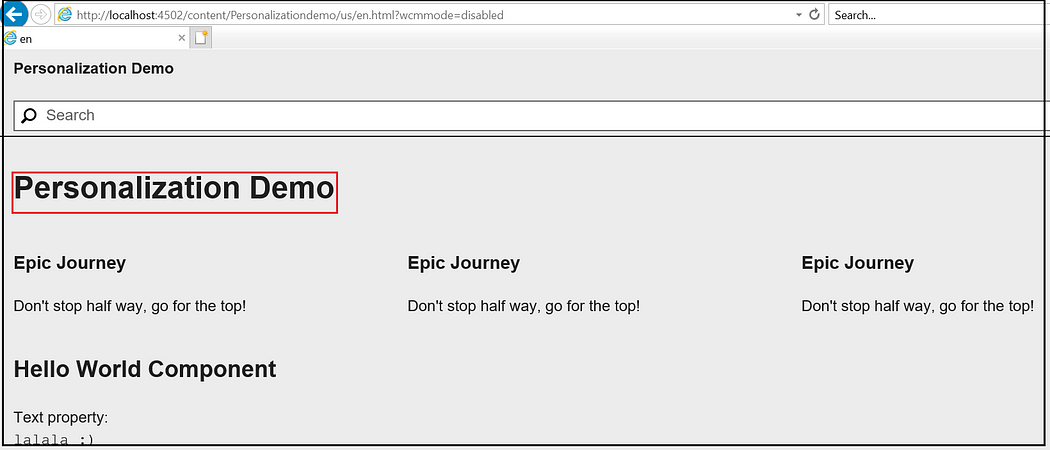
Now you will get different experiences while accessing the page from Firefox and Chrome browsers.

Chrome -

Firefox —

IE — Default behavior

ContextHub UI configuration:

ContextHub provides a toolbar for content authors to allow display and manipulation of client context data in order to achieve a reliable preview of experience targeting. The toolbar is fully customizable and configurable.

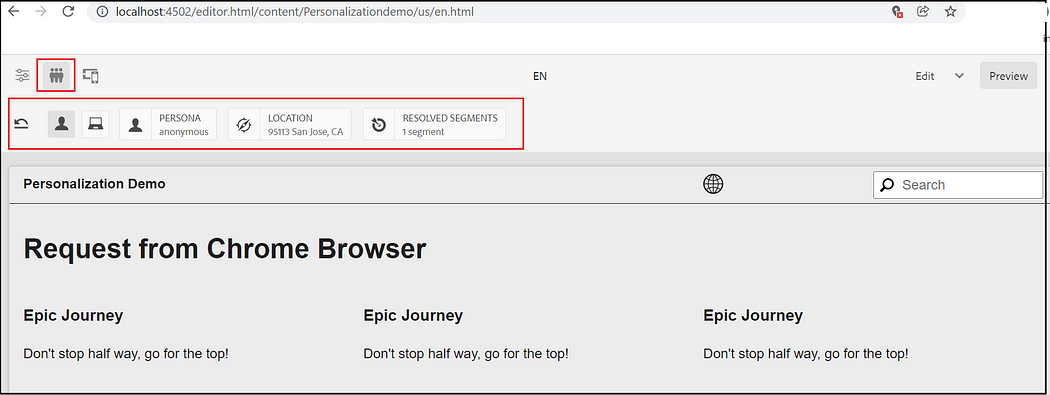
The location can be changed to preview different experiences.

Also, you can find the resolved segments

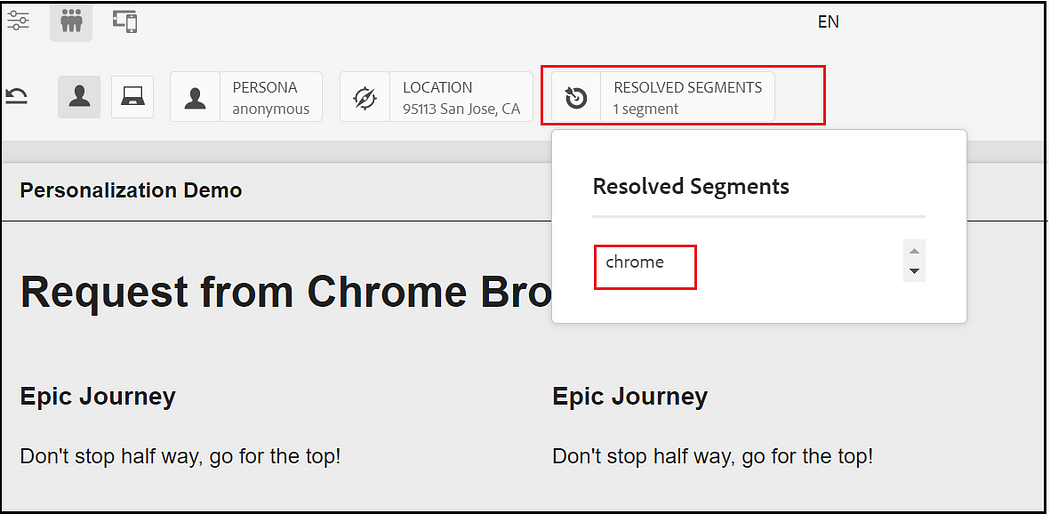
The resolved segment details can also be referenced from browser local storage

The browser info context hub is not enabled in the default UI(the default browser info UI module won’t provide an option to modify the browser info but just display the browser information —the Browser Info UI module can be extended to change the default behavior)

Let us now enable the Browser Info UI Module, the ContextHub configurations can be managed through UI — refer to https://experienceleague.adobe.com/docs/experience-manager-65/developing/personlization/ch-configuring.html?lang=en for more details. As a quick approach, copy /libs/settings/cloudsettings/legacy to your tenant under /conf/<tenant>/settings/cloudsettings, rename may be us default. Remove the configurations that are not required.

Tools →Sites →ContextHub, Select default configuration under your tenant then select ContextHub Configuration

Select Device ContextHub UI Mode

Create a new “ContextHub UI Module(generic) inside Device

Enter the module type as contexthub.browserinfo, refer to https://experienceleague.adobe.com/docs/experience-manager-64/administering/personalization/contexthub-config.html?lang=en for more details on adding ContextHub UI Modes and Modules.

Use CRXDE, if you are facing any issue while configuring through UI.

Now modify the ContextHub path to your site root node

Now you will be able to see the browser details in ContextHub UI(as mentioned earlier you will not able to modify the browser details as the location but the UI Module can be extended/customized based on your need)

In this post, we have seen a simple scenario to Target different experiences using ContextHub and AEM targeting engine but customization can be enabled — define custom store, custom UI modules, additional rules to identify the audience, etc to enable your uses cases. The ContextHub along with the AEM targeting engine will provide limited functionalities also you may see some flickering issues while rendering the final content, use Adobe Target to enable advanced experience Targeting and A/B testing.