Welcome to Tech Mastery, your expert source for insights into technology and digital strategy. Explore topics like Adobe Experience Manager, AWS, Azure, generative AI, and advanced marketing strategies. Delve into MACH architecture, Jamstack, modern software practices, DevOps, and SEO. Our blog is ideal for tech professionals and enthusiasts eager to stay ahead in digital innovations, from Content Management to Digital Asset Management and beyond.
The Document.craeteDocumentFragment() API creates a new empty document fragment (DocumentFragment) object. The document fragment is a lightweight container for creating HTML elements, an alternative to directly inserting elements into the DOM.
Instead of appending the elements directly to the document when they are created, append them to the DocumentFragment instead, and finish by adding that to the DOM. This is extremely helpful because most manipulations of DOM elements cause the browser to reflow and repaint the layout, which you want to reduce to a minimum. This is because the nodes created by the CreateDocumentFragment method are not part of the DOM; they reside in memory.
When you need to add a lot of nodes to Document, Adding them one by one in sequence may result in many calculations, such as adjusting the screen’s position each time(reflow). Since the document fragment is in memory and not part of the main DOM tree, appending children to it does not cause page reflow (computation of element’s position and geometry)
When we append the document fragment to the DOM, it is basically replaced by its children, i.e., there is no document fragment appended to the document; only its children get appended, but when we append the element to the DOM, the parent is also appended to the document.
<!DOCTYPE html>
<html>
<body><h1>Add items to an empty list: using The createDocumenFragment() Method</h1><ul id="browsers">
</ul><script>const browsers = ['Firefox', 'Chrome', 'Opera','Safari', 'Internet Explorer'];// Create a document fragment:
const dFrag = document.createDocumentFragment();
for (let x in browsers) {
  const li = document.createElement('li');
  li.textContent = browsers[x];
  dFrag.appendChild(li);
}// Add fragment to a list:
document.getElementById('browsers').appendChild(dFrag);
</script></body>
</html>
The createDocumentFragment() method can also extract parts of a document, change, add, or delete some of the content, and insert it back into the document.
createContextualFragment:
The createContextualFragment method is helpful if you want to create a DocumentFragment object with initial content. If you’re going to build a DocumentFragment object from the contents of a Range object
In myprevious post on this series, we have discussed how to enable local Magento open source commerce platform on local.
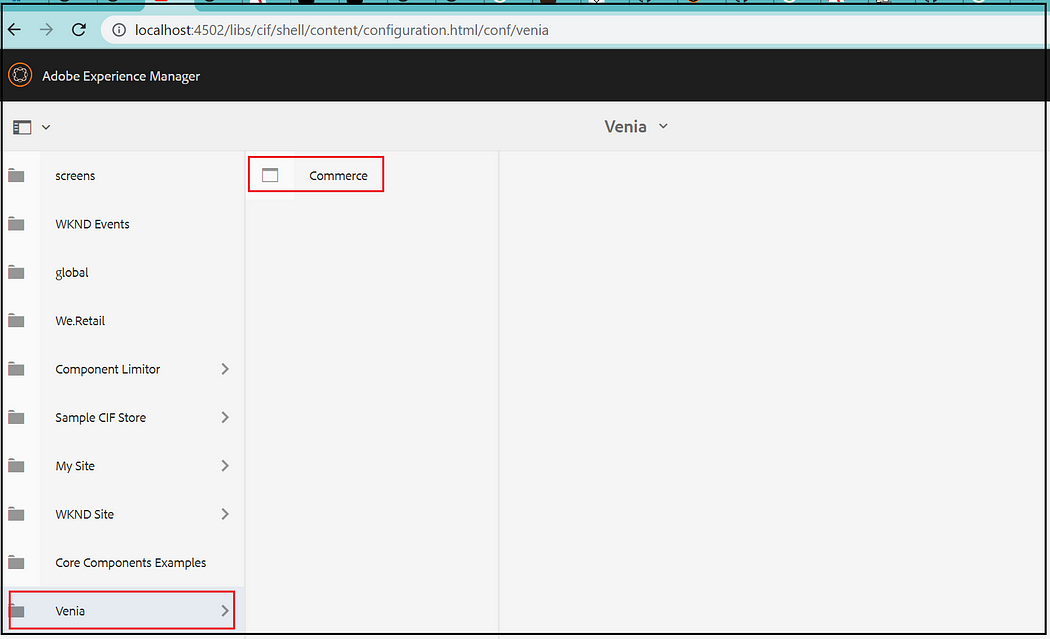
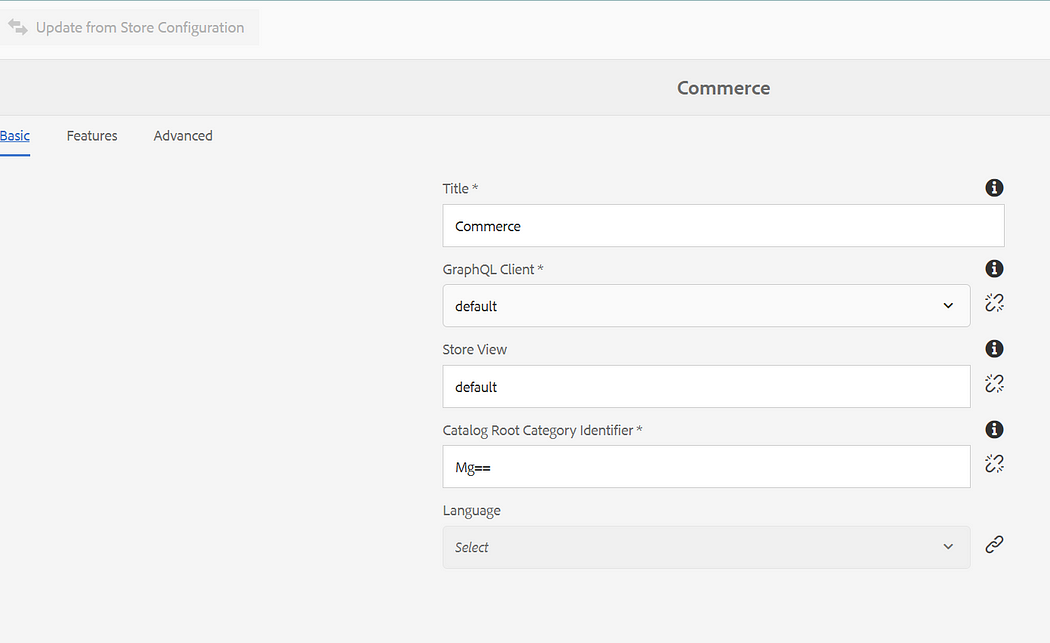
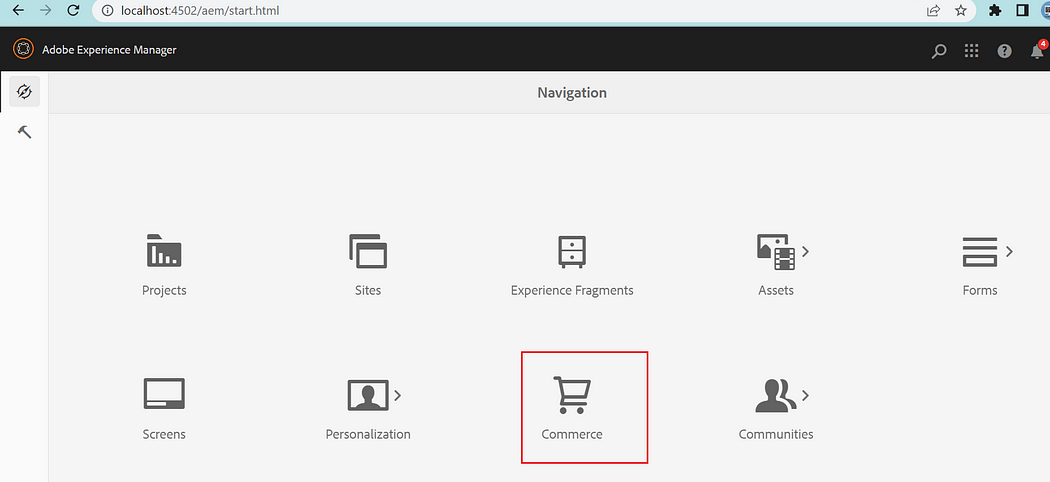
This post discusses setting up a Venia sample store in a local AEM server and integrating AEM to a local Magento server to enable eCommerce functionalities.
AEM CIF Core components use both the server and client rendering to construct the eCommerce websites; the category and product-related components are entirely server-rendered at the same time transaction related — cart, checkout, order, and account management components are Server and Client rendered — the initial pages are generated from the server. Still, the functionalities are enabled through React client-rendered components(CIF enables the placeholder component to render the react component).
I am using the latest AEM 6.5 server (6.5.12) for the demo — the steps are mostly the same for Cloud SDK with minimal changes; let us review SDK integration in another post.
Tools Required:
AEM 6.5(latest service pack — 6.5.12)
Java 11
Node JS
NPM
CIF addon/Venia sample project setup:
As a first step, download the CIF addon compatible with AEM 6.5 version from the Adobe Software Distribution Website and install it through the package manager on both Author and publisher.
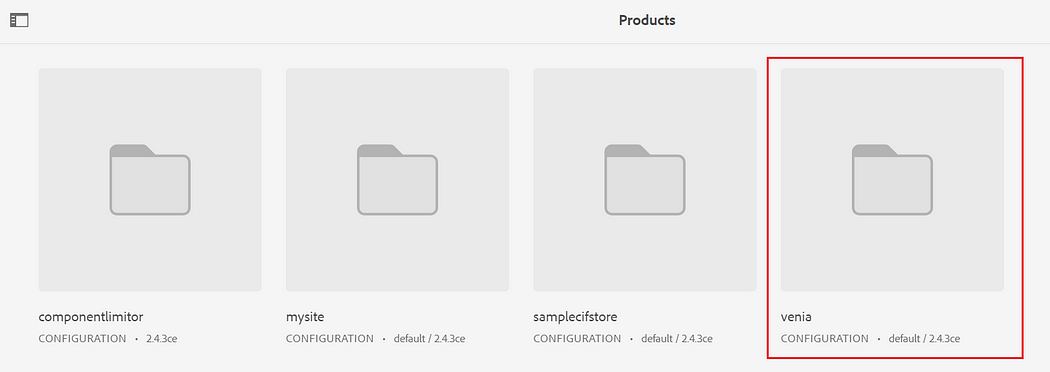
If required, you can create a new project through archetype by adding the includeCommerce=y flag; this includes CIF core components but needs to enable react components separately, so the best option is to start with the venia project.
AEM CIF components — Product and Category related components use the staged capability as part of the GraphQL queries; the staging functionality is not supported as part of the Magento Open Source Platform but on Adobe Commerce Platform(Enterprise).
Some of the latest product-related components are not supported Magento Open Source version; the Adobe Commerce Enterprise version is required, e.g., Product v2, Product List v2, and Product Collection v2(refer to https://github.com/adobe/aem-core-cif-components for more details) — the Staged functionality enabled as part of the latest component versions are only supported by Adobe Commerce Enterprise version.
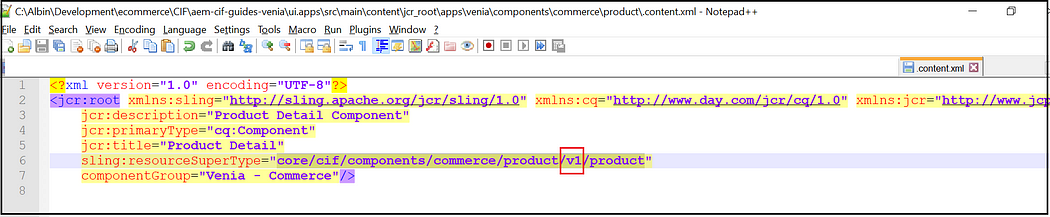
For the demo with Magneto Opensource version, modified the sling:resourceSuperType value of the /apps/venia/components/commerce/product to core/cif/components/commerce/product/v1/product (modify other Product related components if required)
Proxy Server Setup:
As discussed earlier, the CIF react components directly connect(from the browser )with the Magento server to enable the eCommerce functionalities, e.g., Cart Management, Checkout, and accounts management(the product detail and category details are server-side integrated from AEM to Magento), to avoid the CORS issues run a proxy server to proxy the client-side requests to Magento server.
Use the below command to run a proxy server to proxy the client-side GraphQL requests to the Magento server.
I am enabling the following configurations through the OSGI console for demo but enable through the code config. The default configurations are placed under aem-cif-guides-venia/classic/ui.config/src/main/content/jcr_root/apps/venia/osgiconfig-classic/config for AEM 6.5(classic) deployment.
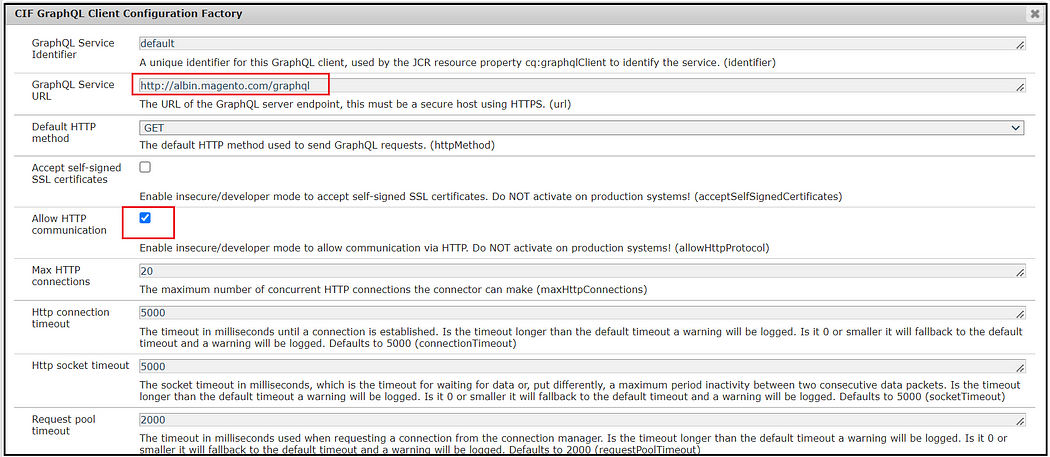
CIF GraphQL Client Configuration Factory:
Specify the Magento backend GraphQL URL, enable Accept self-signed SSL certificates and Allow HTTP communication configurations based on your local magneto setup(in my case, enabled HTTP communication).
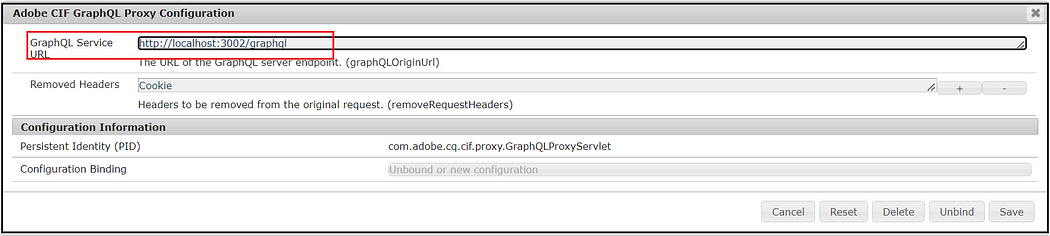
Adobe CIF GraphQL Proxy Configuration:
Configure the URL of the GraphQL local proxy server
Some of the optional configurations —
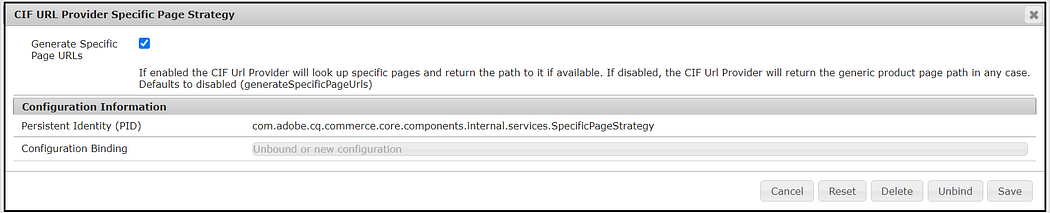
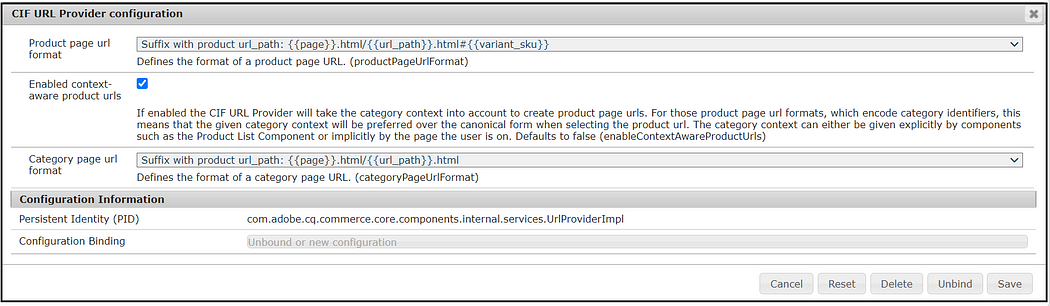
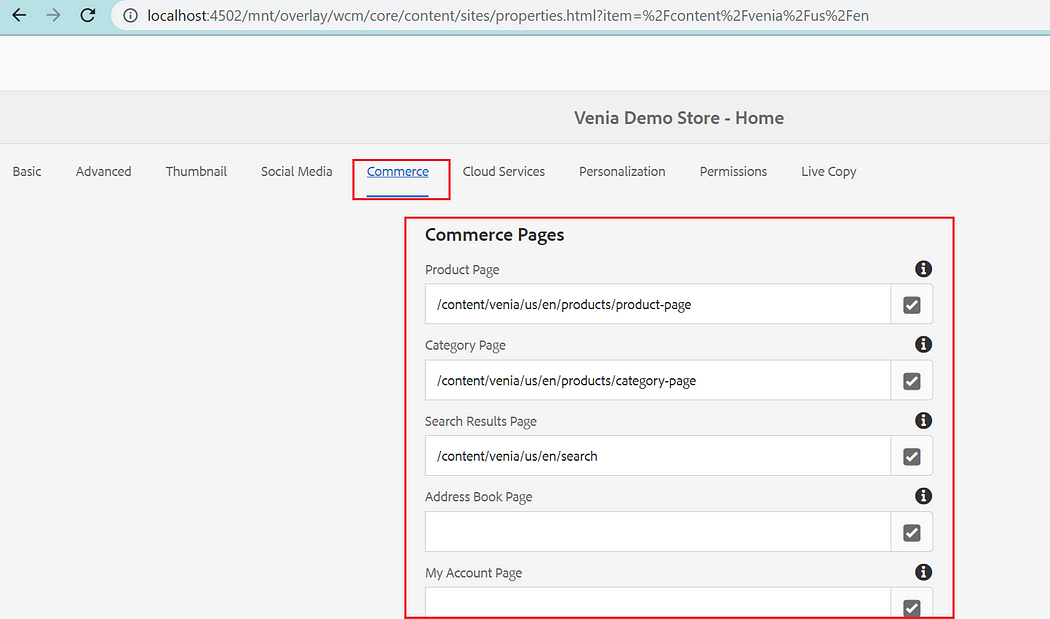
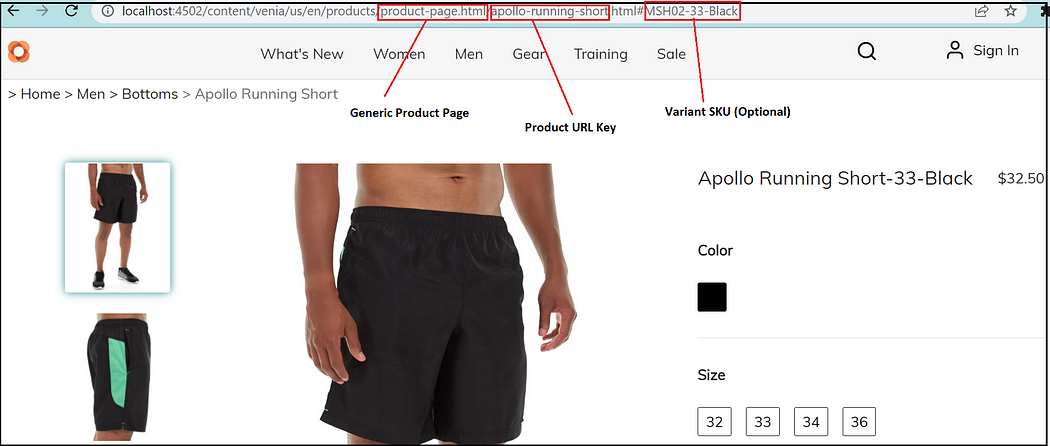
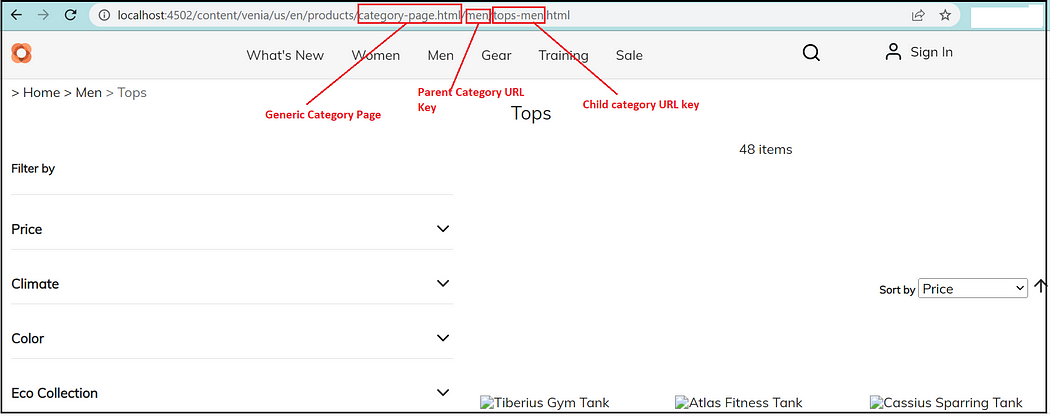
CIF URL Provider Specific Page Strategy: by default generic product/category page(e.g.,/content/venia/us/en/products/category-page.html and /content/venia/us/en/products/product-page.html)is used to render the product/category detail page; if this configuration is enabled and product/category specific page e.g.,/content/venia/us/en/products/product-test.html) is authored, the user will be more displayed with the particular page than the generic one.
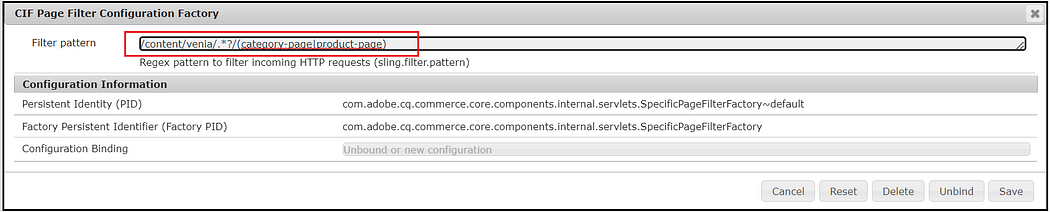
CIF Page Filter Configuration Factory: define the filter pattern to identify the generic product and category pages.
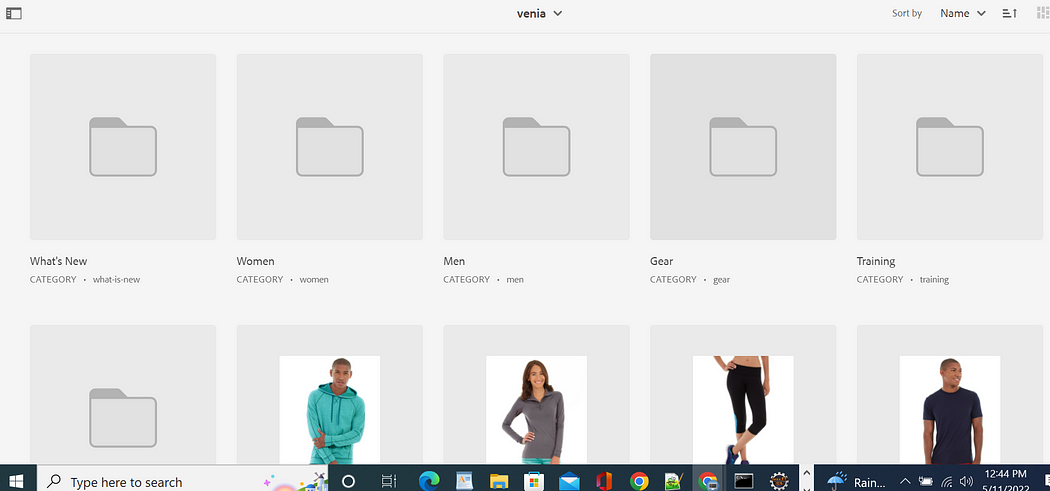
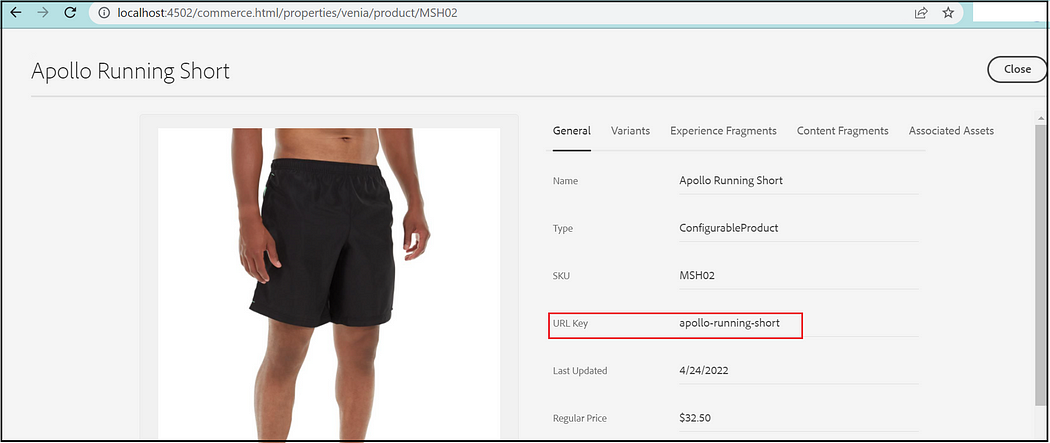
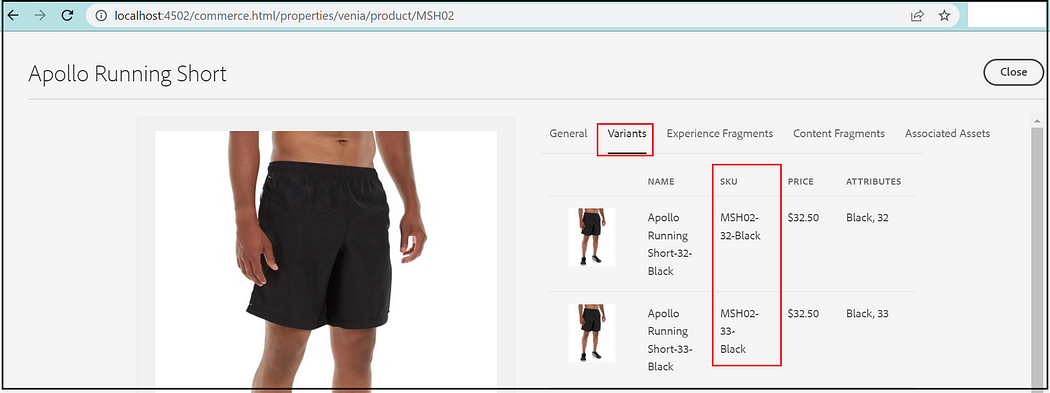
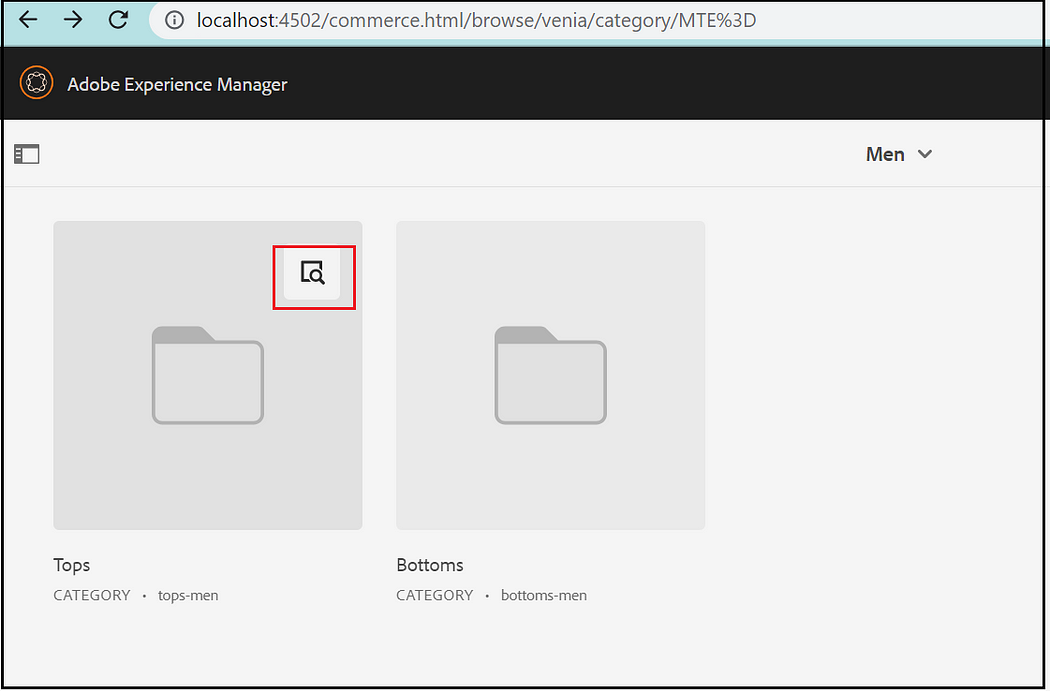
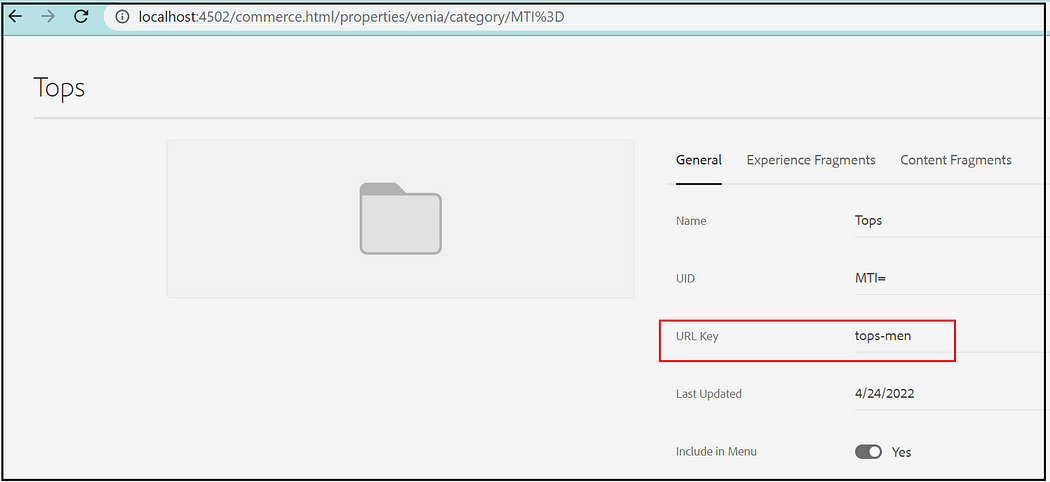
The URL keys and the variant SKU values can be referenced through the product browser.
For Product:
For Category:
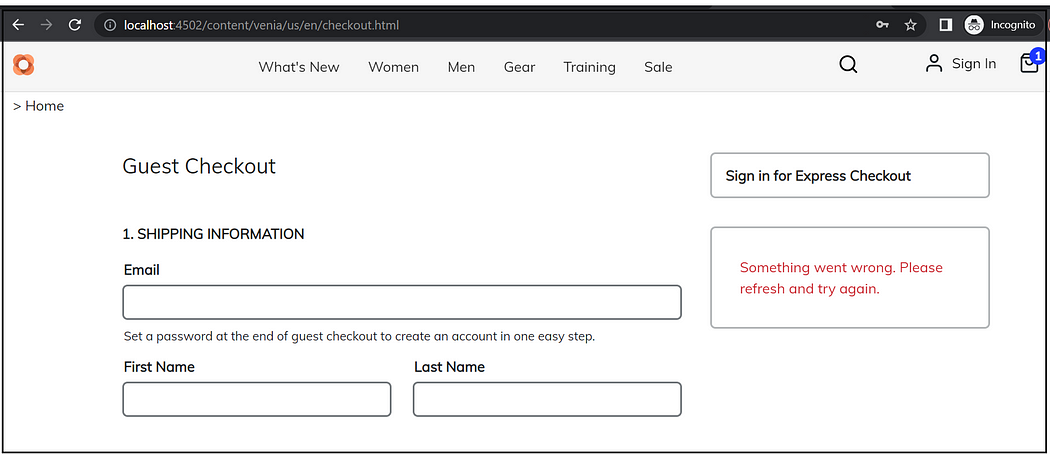
Now you can add the product to the cart and check out — you will see the error on the checkout page.
{"errors":[{"message":"Cannot query field \"applied_gift_cards\" on type \"Cart\".","extensions":{"category":"graphql"},"locations":[{"line":1,"column":536}]}]}
The issue is the Gift Card functionality is supported only by Adobe Enterprise Commerce but not by the Magento Open source version. To address the problem for the demo, removed GiftCardSummaryFragment references from aem-cif-guides-venia\ui.frontend\node_modules\@magento\peregrine\lib\talons\CartPage\PriceSummary\priceSummaryFragments.gql.js. Build and deploy the venia project after this change, for the actual scenario with Magento Opensource override and customize the talons\CartPage.
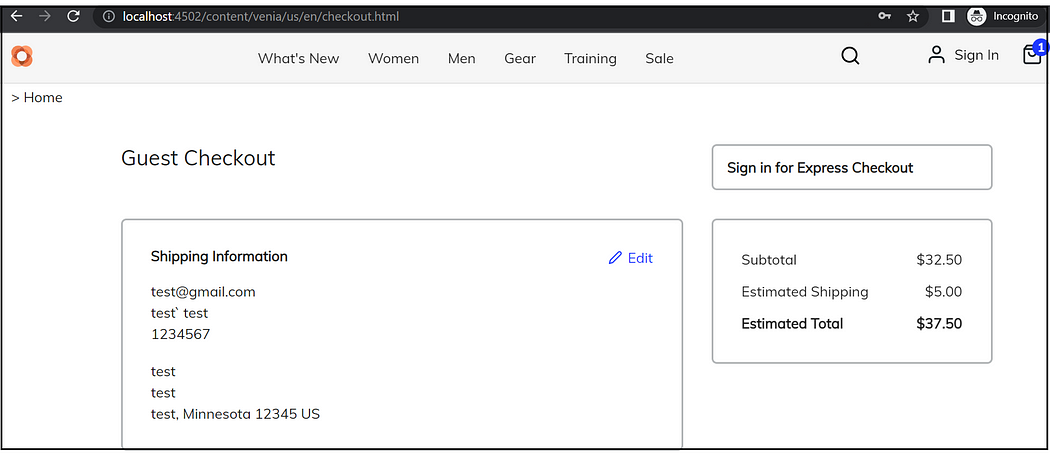
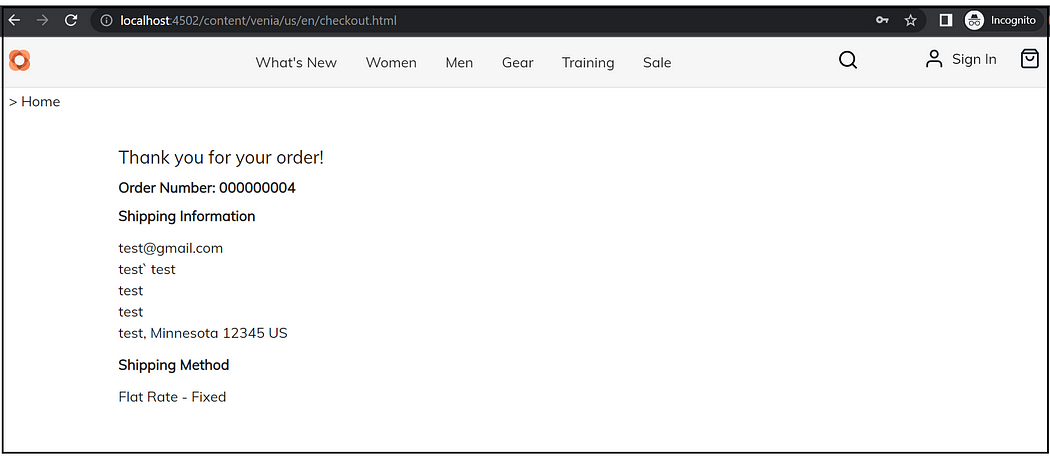
Now the checkout is a success.
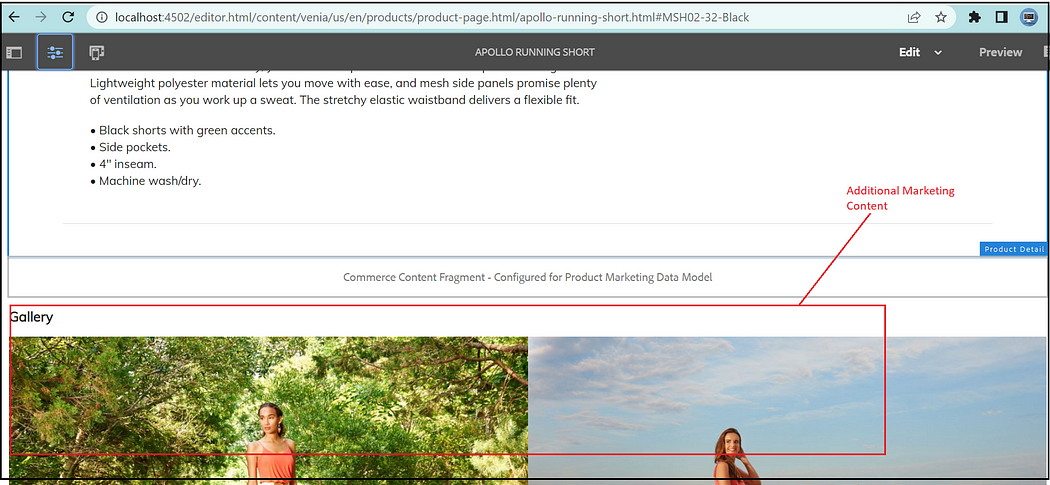
Additional Marketing Contents:
You should be able to associate additional product-specific marketing data to the Product Detail pages through Experience/Content Fragments and Assets.
Create the required Product Specific Experience/Content Fragments and Assets(you can do the same for category pages)
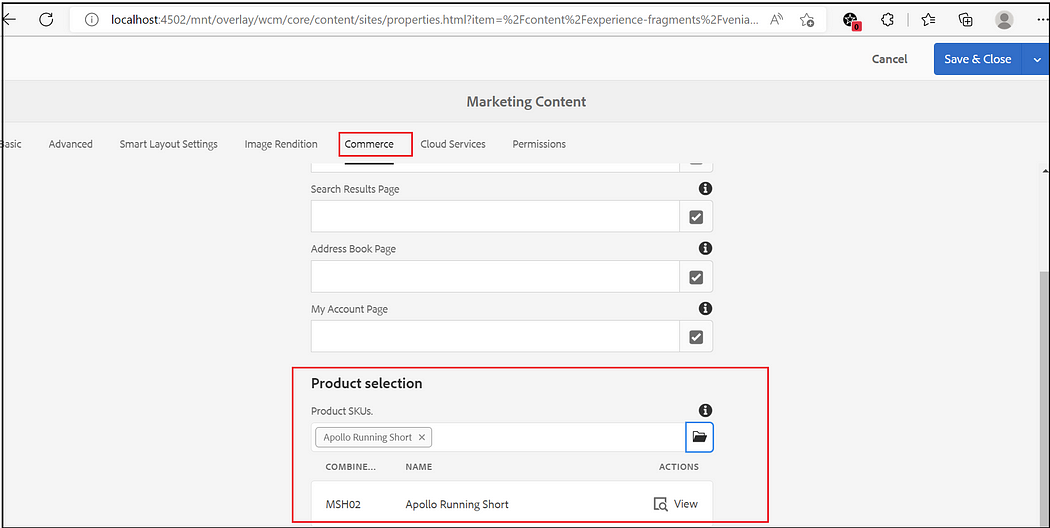
Associate the Product Specific Experience/Content Fragments and Assets to the Products.
Open the experience/content fragments and assets and associate the SKU through the commerce tab.
MSM:
You can use AEM’s MSM capability to support multiple country/language stores in AEM. Refer to the following Adobe Document for details on multi-store setup through MSM — Commerce Multi-Store Setup | Adobe Experience Manager
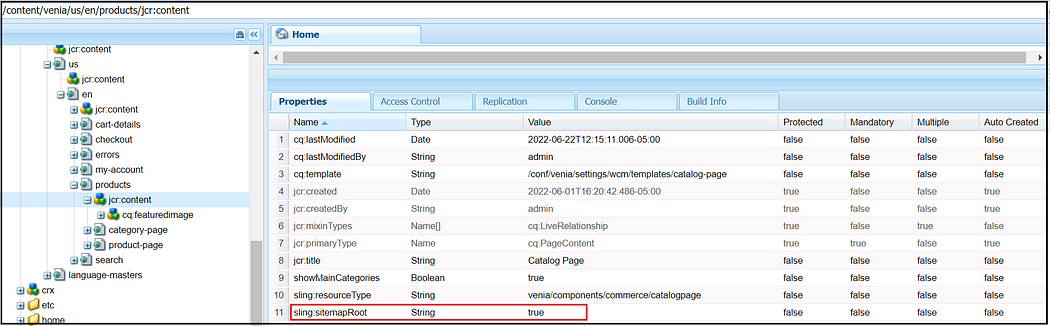
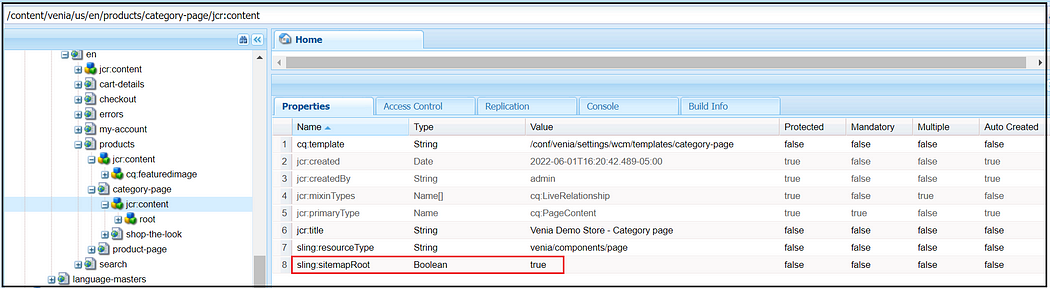
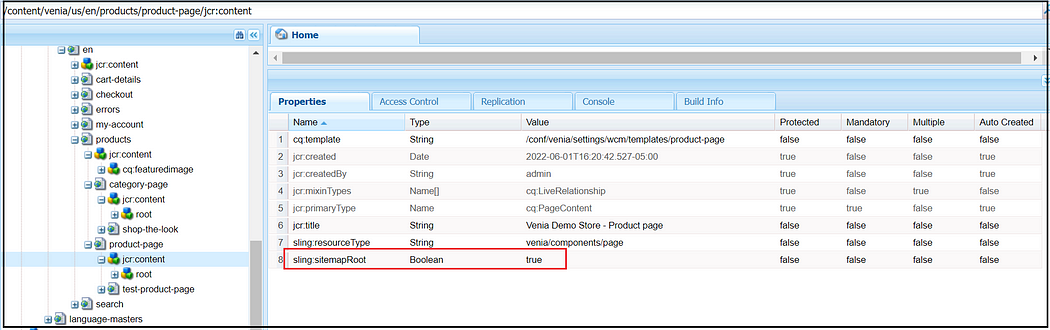
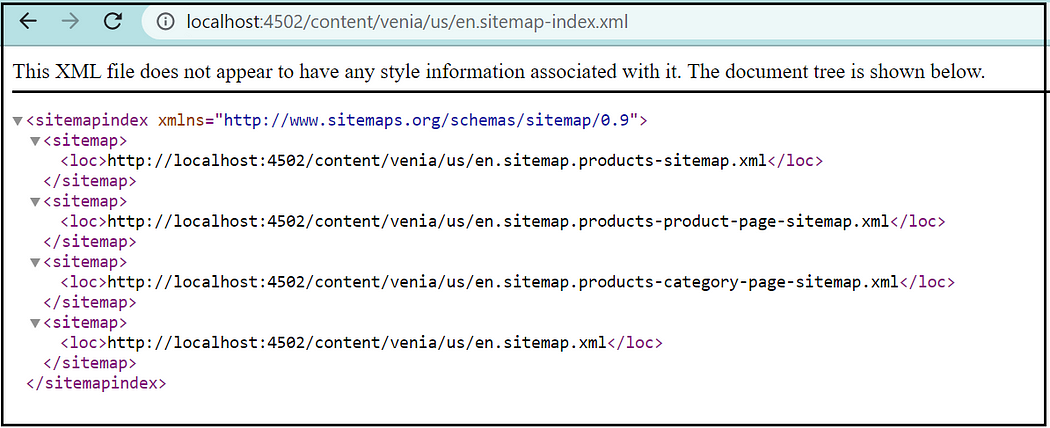
Specialized Product and Category Pages:
By default, we are using generic Product/Category pages to display the different Category and Product details(displayed through a dynamic selector). If required, you can define the specialized Category/Product pages for specific Categories and Products. Refer to the following document for details on enabling specialized Category/Product Pages — Creating Multiple Category and Product Pages | Adobe Experience Manager
The CIF components and the GraphQL queries can be customized as required to support the custom business requirements.
As per the latest Architecture guidance, the same CIF architecture can be used to integrate with the third part eCommerce platforms, but an additional extension/mapping layer(maybe through Adobe I/O runtime) is required to map the CIF GraphQL request to the target format, e.g., REST and vice versa. Refer to https://github.com/diconium/commerce-cif-graphql-integration-hybris for the extension layer built for Hybris integration
I was getting the below error while using the react-helmet to dynamically change the head section - meta tags, title etc, also the pages were not loading.
scheduler.development.js:171 Uncaught TypeError: Cannot read properties of undefined (reading 'add')
at e.r.init (Dispatcher.js:53:1)
at e.r.render (Dispatcher.js:67:1)
at finishClassComponent (react-dom.development.js:17485:1)
at updateClassComponent (react-dom.development.js:17435:1)
at beginWork (react-dom.development.js:19073:1)
at HTMLUnknownElement.callCallback (react-dom.development.js:3945:1)
at Object.invokeGuardedCallbackDev (react-dom.development.js:3994:1)
at invokeGuardedCallback (react-dom.development.js:4056:1)
at beginWork$1 (react-dom.development.js:23964:1)
at performUnitOfWork (react-dom.development.js:22776:1)
at workLoopSync (react-dom.development.js:22707:1)
at renderRootSync (react-dom.development.js:22670:1)
at performSyncWorkOnRoot (react-dom.development.js:22293:1)
at react-dom.development.js:11327:1
at unstable_runWithPriority (scheduler.development.js:468:1)
at runWithPriority$1 (react-dom.development.js:11276:1)
at flushSyncCallbackQueueImpl (react-dom.development.js:11322:1)
at workLoop (scheduler.development.js:417:1)
at flushWork (scheduler.development.js:390:1)
at MessagePort.performWorkUntilDeadline (scheduler.development.js:157:1)
To fix the issue
Replaced react-helmet with react-helmet-async
npm install react-helmet-async or yarn add react-helmet-async
Wrap the App element with HelmetProvider
import { HelmetProvider } from 'react-helmet-async';
ReactDOM.render(
<React.StrictMode>
<HelmetProvider>
<App />
</HelmetProvider>
</React.StrictMode>,
document.getElementById('root')
);
Now the helmet can be used in individual components to change the dynamic header elements
After this, I saw the behavior, non of the existing meta tags defined in index.html apart from the title, replaced with the new values. To fix that, I added data-rh="true" to the metatags in index.html that require the change.
The AEM internationalization framework(i18n) uses dictionaries in the repository to store English strings and their translations in other languages. The framework uses English as the default language. Localized strings can be stored in several dictionaries in the repository, e.g., component level. The AEM internationalization framework combines the dictionaries and makes them available in Sling as a single ResourceBundle object. The i18n can be used in slightly, JavaScript, and Java to display the language-specific labels and values.
In some cases, we may have the use case to share the i18n dictionaries externally.
There are a couple of options to share the dictionaries externally.
ResourceBundleExportServlet:
By default the dictionaries are exposed using the ResourceBundleExportServlet (com.adobe.granite.i18n.impl.ResourceBundleExportServlet) registered under path /libs/cq/i18n/dict.
The ResourceBundleExportServlet collects all the dictionaries defined in the AEM system for a particular language and(or) country and exposes them as JSON.
By default, the /libs path is blocked from Dispatcher; the dictionary path should be allowed to access externally. The challenge with this approach is all the available dictionaries are exported as part of the JSON response but will not be able to export the selected dictionaries.
Client library JSON:
Another option is to share the i18n JSON as a client library resource e.g
Define the i18n dictionary as a json under the /apps folder(ui.apps) and copy the i18n from /apps(ui.apps) to corresponding clientlibs resource folder through Front End build script.
Custom servlet with sling:basename:
Another approach is defining a custom servlet combined with sling:basename for the dictionary to share the specific dictionary values externally.
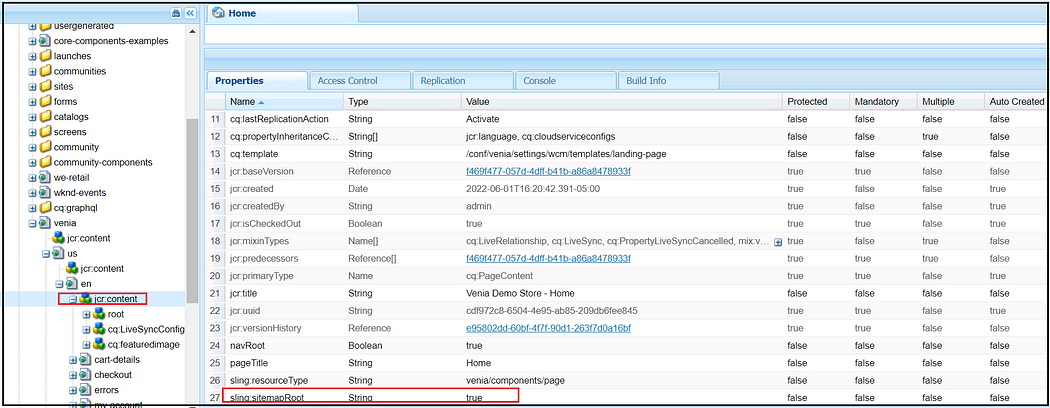
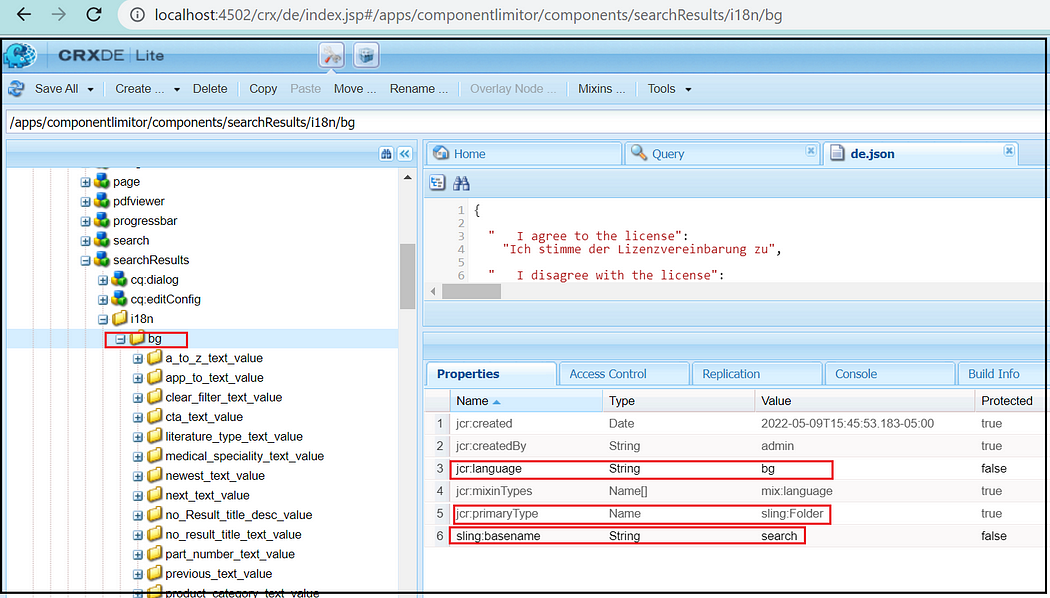
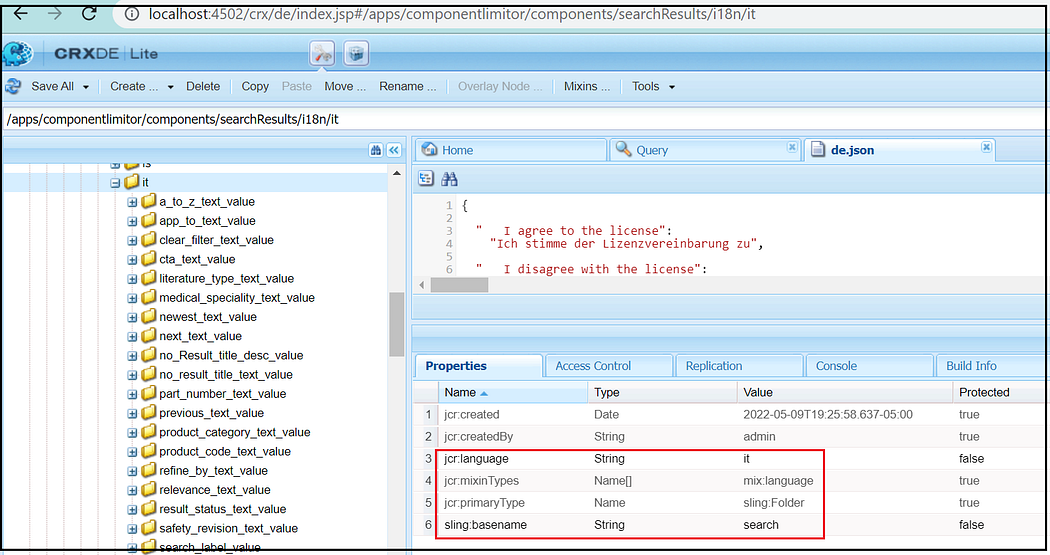
As a first step, enable the sling:basename for the all language nodes( mix:language node), e.g., sling:basename=search, and the sling:basename will be used to select the specific dictionary. You can define i18n dictionary-specific sling:basename’s(e.g., search,search1, etc.), so those particular dictionaries can be selected by specifying the sling:basename. Ensure the jcr:primaryType of the language node is sling:Folder, the nt:Folder won't support adding sling:basename property.
Now enable a custom servlet(refer below), the path is defined based on the sling:basename enabled e.g./bin/fetchi18nvalues/search, you can specify multiple paths to support different sling:basename.
The language can be added as a selector to the URL; the language selector is validated against the predefined list of languages.
The servlet selects the i18n dictionary based on the sling:basename on the request path and the language selector and shares the data as JSON.
The custom servlet shares only the specific dictionary/languages tagged with the same sling:basename; the servlet can be customized to add additional functionalities.