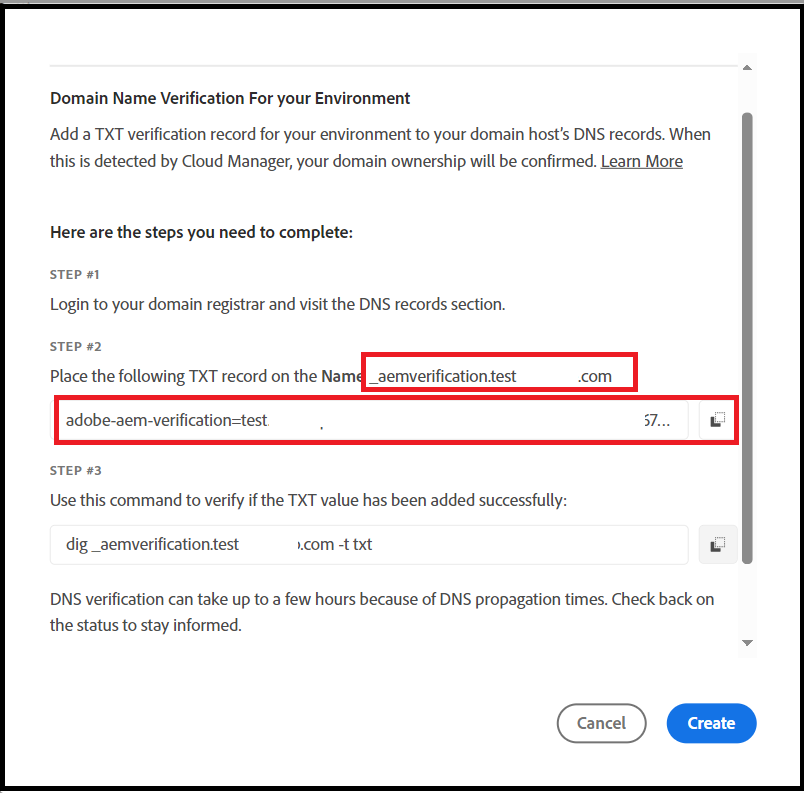
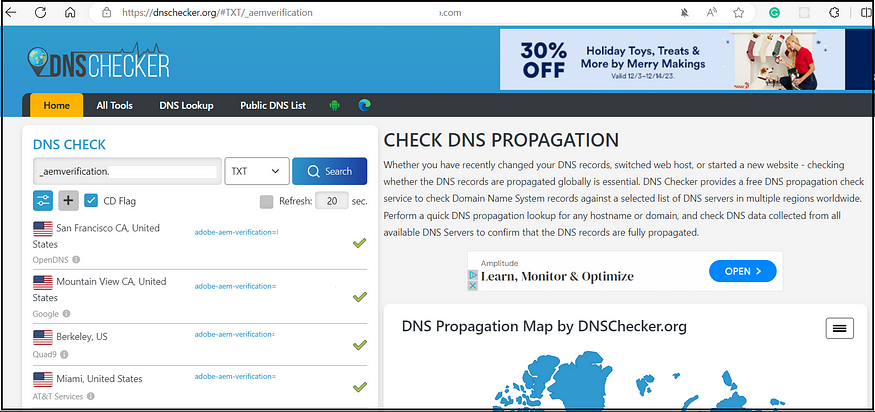
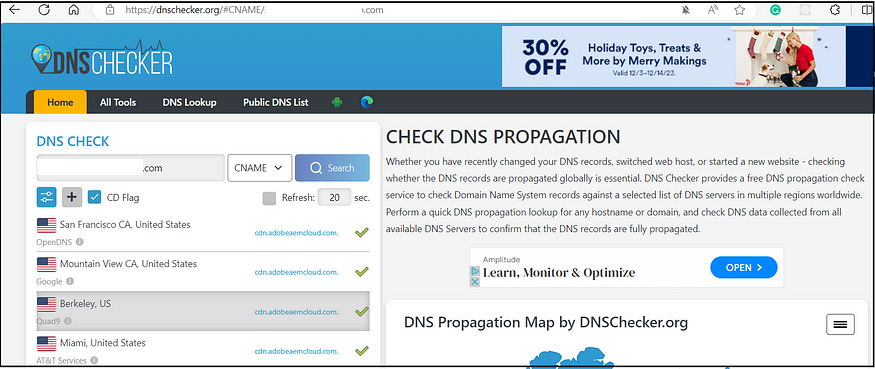
AEM as a Cloud Service integrates Adobe Identity Management Service (IMS) for user verification. Various other Adobe products, including the Adobe Admin Console, also utilize this IMS authentication method. For AEM Authors in AEM as a cloud service, Adobe IMS authentication is activated, a change from previous AEM versions where identity and access management (IAM) settings had to be implemented individually on each AEM author server. With AEM in the cloud, single sign-on (SSO) configurations for AEM Authors and user and group management are centrally handled through the Adobe Admin Console using Adobe IMS.
The Admin Console enables administrators to oversee all users in the Experience Cloud from a single point. Within this console, users and groups are allocated to product profiles linked to a specific AEM as a Cloud Service instance. This arrangement permits them to access that particular instance.
To manage the Identity configurations, the role of a System Administrator is necessary.
Create a new identity Directory.

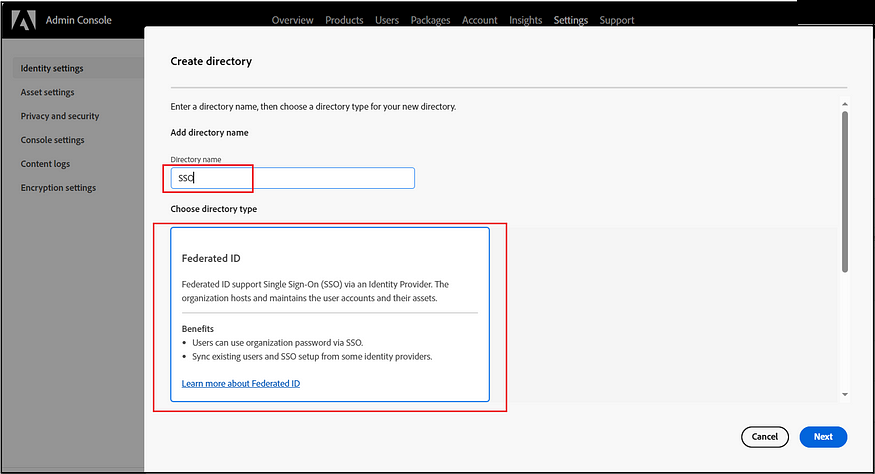
Either option is viable for enabling the SSO configuration. If Azure AD is selected, complete the setup by logging in as the admin user.
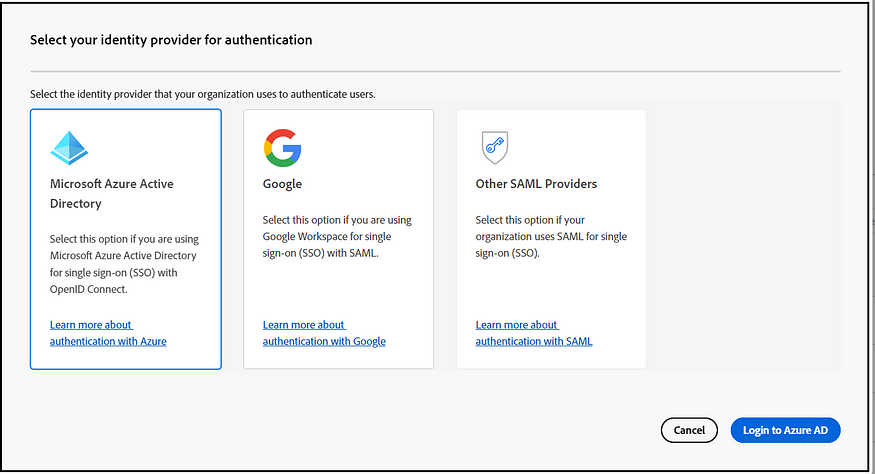
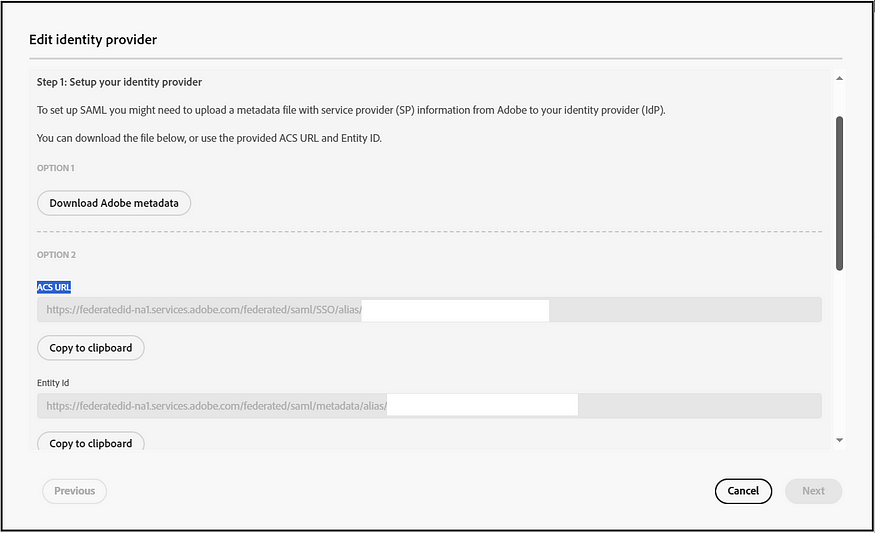
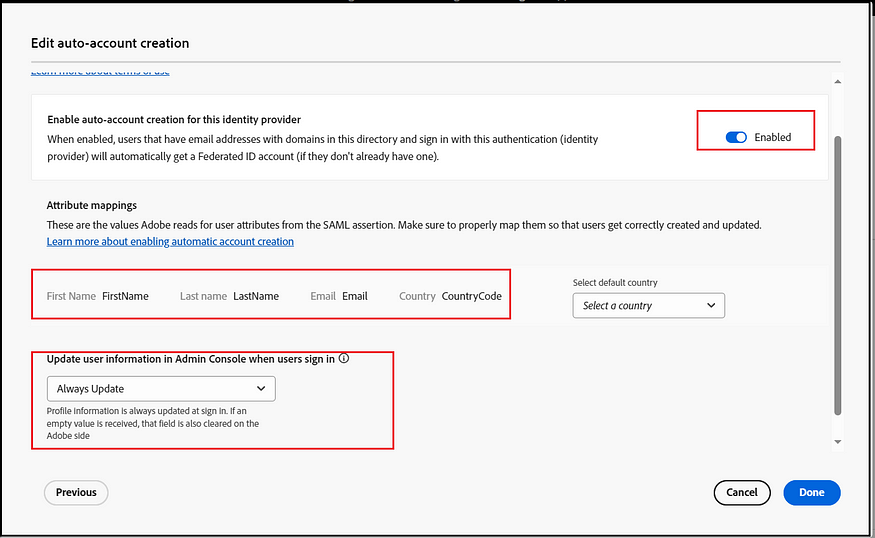
The “Other SAML providers” option facilitates SSO activation with various SAML providers. Once SAML configurations are enabled, you can obtain the ACS URL and Entity ID or choose to download the Adobe metadata file. Enable the required configurations in IDP using the ACS URL and Entity ID or the Adobe Metadata file. Once the IDP configuration is ready, the IDP metadata file can be uploaded to finalize the configurations, ensuring that SAML claims such as FirstName, LastName, Email, and Country Code are appropriately mapped.

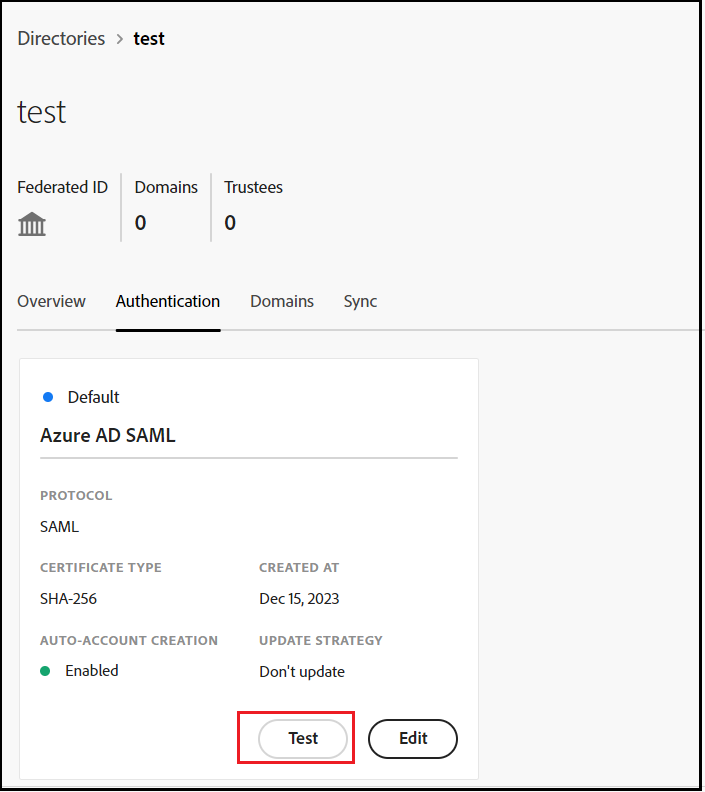
You can test the IDP configurations, ensuring that the SSO configurations and claim mappings work as expected.
The subsequent step involves claiming the SSO domain (such as the email domain, for instance, example.com for user@example.com). If necessary, multiple SSO domains can be claimed.
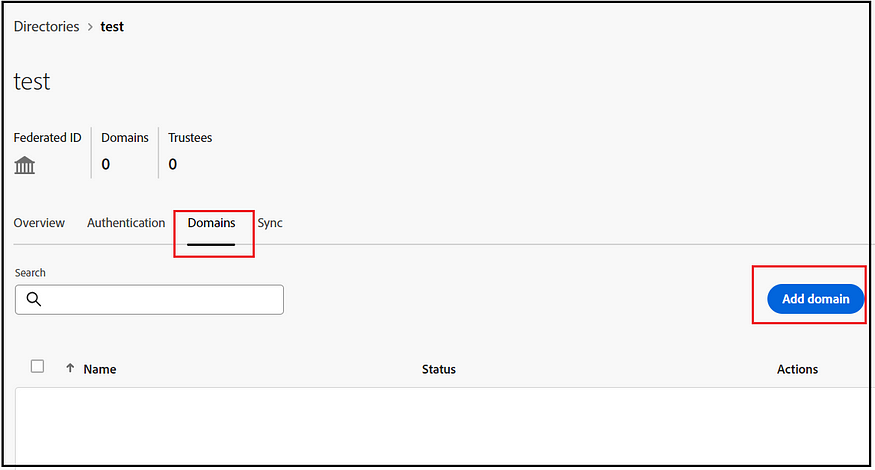
Three methods are available: logging in directly to Azure Active Directory, adding a domain through Google, and adding domains via DNS proof. After verifying the domain, your SSO configurations become active and ready for use.
However, a potential challenge arises if an organization has already claimed or validated the SSO domain (mainly when a company operates with multiple Adobe Admin Console organizations). In such instances, domain validation may fail, resulting in a notification that “This domain has already been claimed.

An alternative is for the organization that has already claimed the domain to approve its use in a different organization. While user and group management remain distinct in this scenario, it’s important to note that the original organization retains control over the authentication configuration, which the new organization will use. To obtain this approval, you should follow the below-specified process.

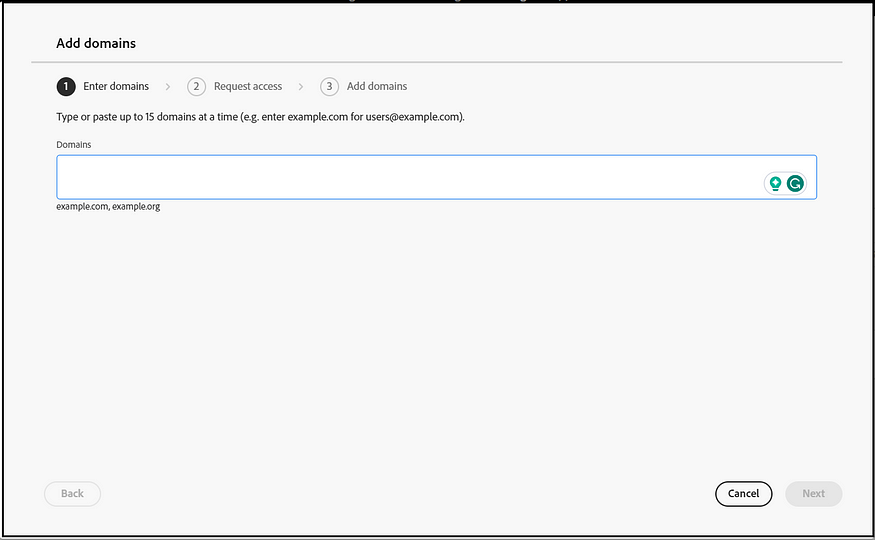
Initiating this will send a request email to the organization that has previously claimed the domain. Once they approve, the directory becomes active. As mentioned before, no additional authentication-related configurations are necessary. The settings from the organization that initially configured this will be utilized.
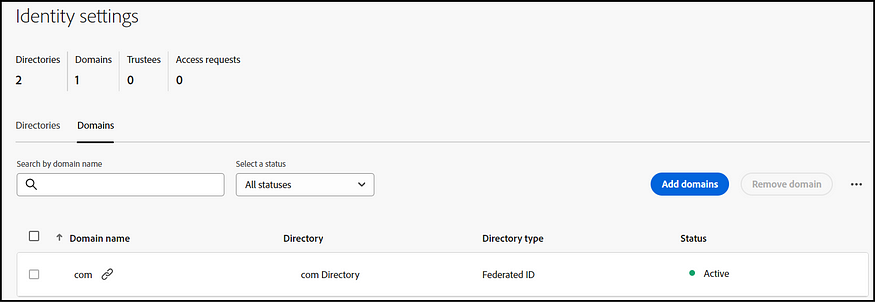
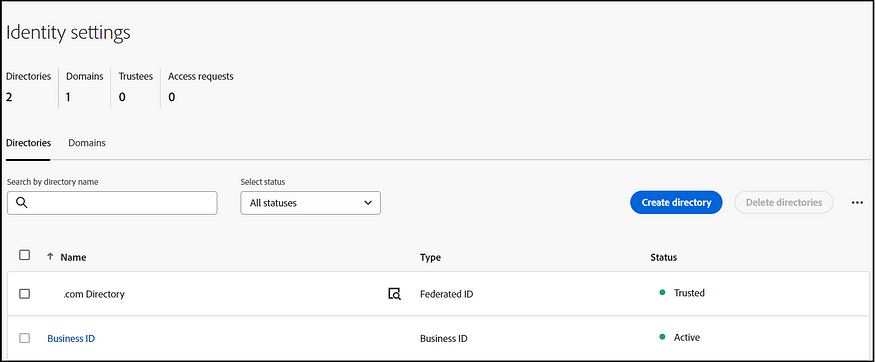
SSO via the company IDP is now active. When logging into AEM Author, other Adobe products, or the Admin Console with an email corresponding to the configured domain, users will be redirected to the company’s SSO page — successful login grants access to the intended services.
If the directory configuration is enabled for an organization with pre-existing users, these users must be transitioned to Federated ID, assuming their default authentication was via Enterprise ID. This transition can be efficiently managed in bulk by downloading the user details as a CSV file, making the necessary updates, and then re-uploading the modified CSV.
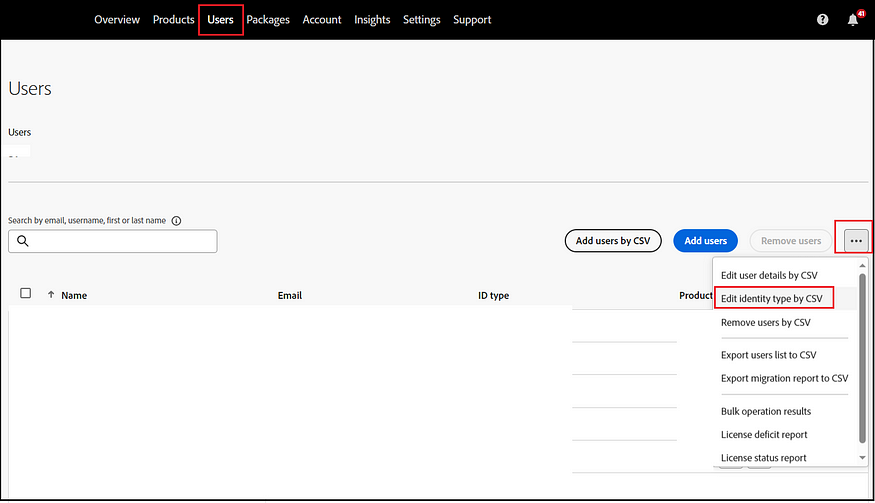
Download CSV template
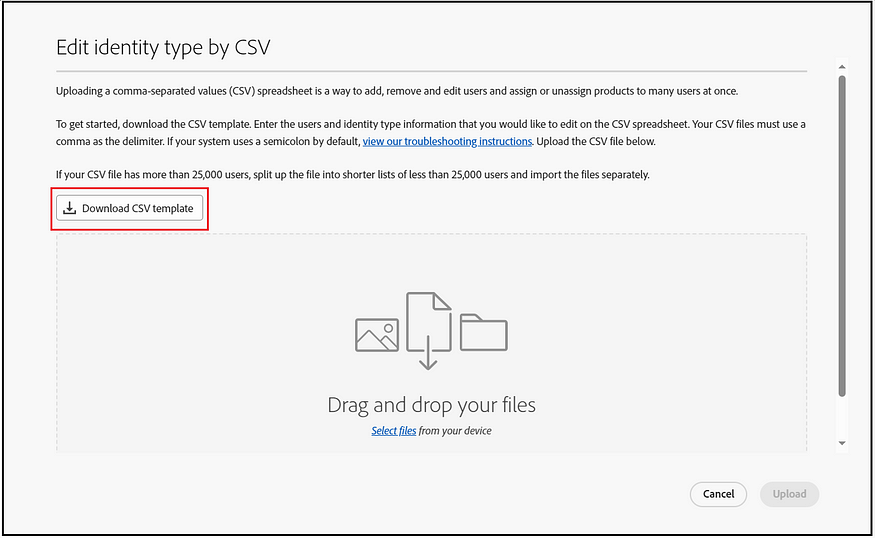
Choose the specified directory to download only those users associated with it who require ID-type migration.
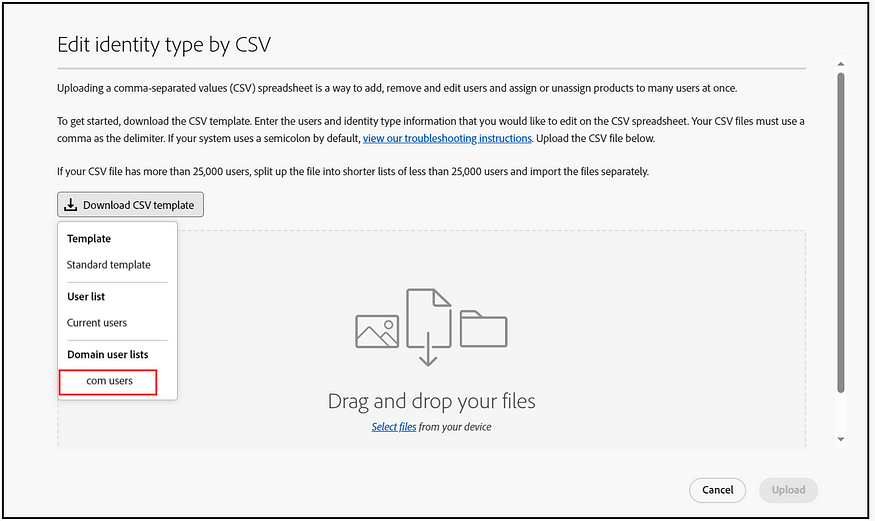
Modify the New Identity type to “Federated ID,” update the New Email, and set the New Username to the existing email ID. For the Country code, specify the appropriate code, or use ‘UD’ (Undefined) if specifying a country code is not necessary.

After incorporating the new values for all users, upload the files. The processing might take a while, but you can monitor its progress via the “bulk operation results” section. This change in Identity Type will not affect the existing user permissions.
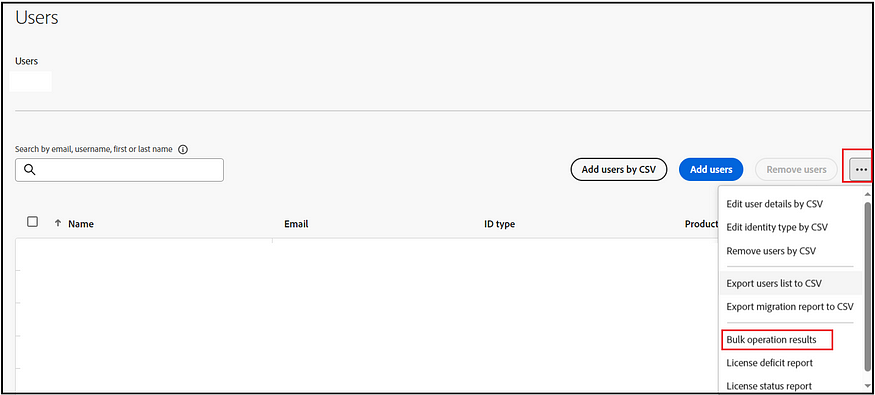
The SSO configuration is now complete, allowing users to utilize the company SSO to log in to the Adobe Admin Console and AEM Authors.
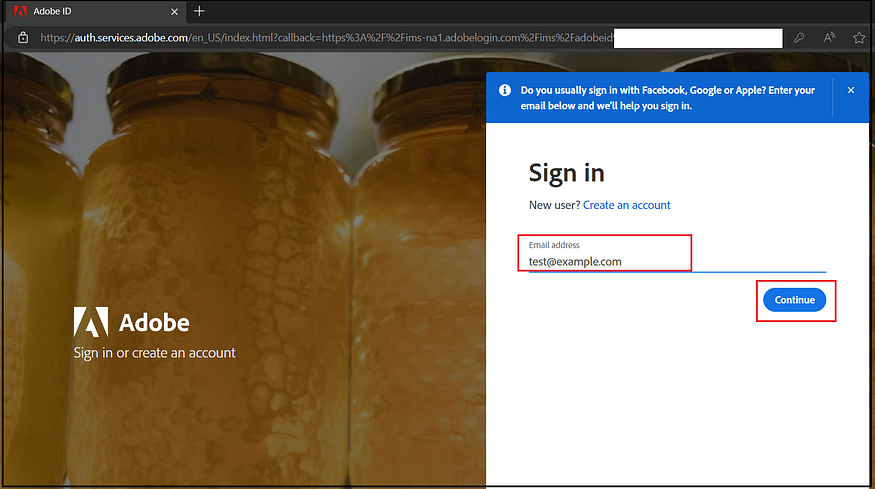
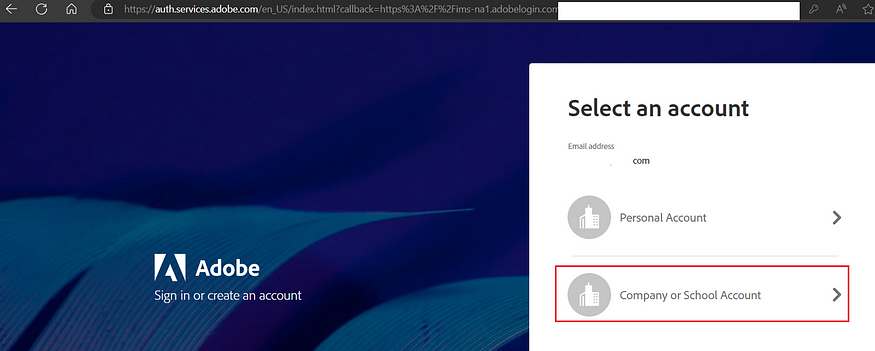
Select ‘Company or School Account’ on the next screen. This action directs the user to the company IDP. Upon successful login, the user will be redirected to the Admin Console or AEM Authors, depending on the initial request.
Next, follow these high-level steps to enable the necessary permissions for AEM Authors.
Create IMS Groups:
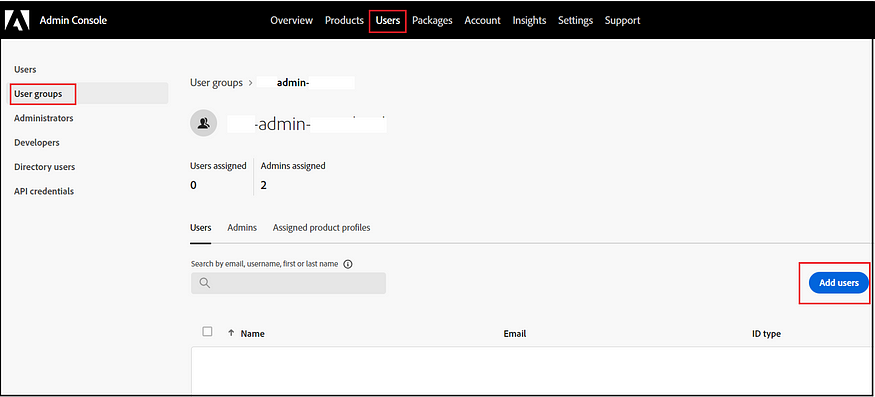
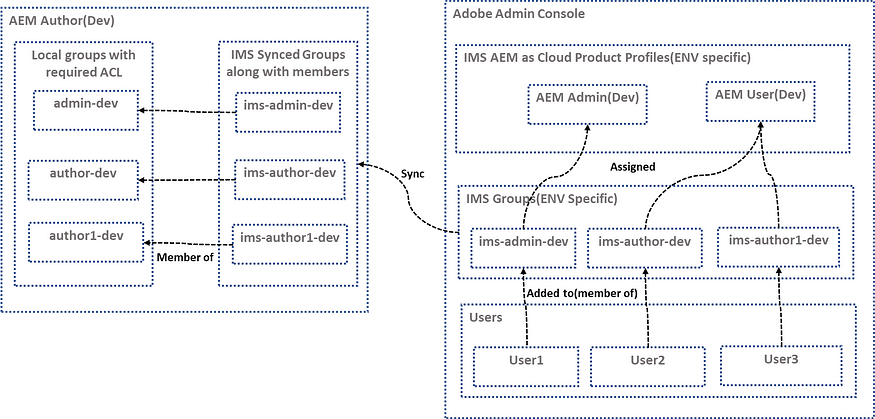
In the Adobe Admin Console, establish IMS Groups to streamline the management of users who need the same level of access. Additionally, appoint Admins to oversee each of these individual groups. Create groups specific to each environment to manage user access.

Place the users into the appropriate groups as needed.
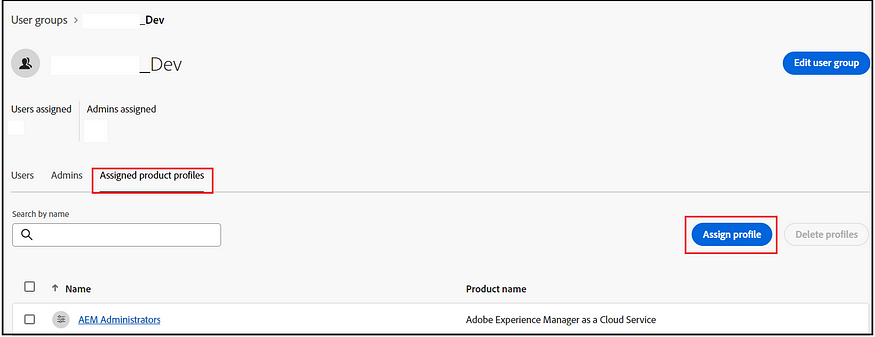
Assign Product Profiles to the Groups:
Assign the Product Profiles to their respective groups. By default, AEM as a Cloud Service creates AEM Admin and AEM User profiles for each environment. Assign the environment specific Admin profile, or user profile, to the corresponding environment-specific groups. The admin profile grants full control over the environment, while the User profile provides basic read-only access to the specific environment. If necessary, additional product profiles can be defined. These product profiles are then synchronized with the AEM servers.
- AEM Administrators: An AEM administrator is typically assigned to developers, in particular developers who need access to, for example, the development environments. The AEM administrator’s product profile is used to grant administrator privileges in the associated AEM instance.
- AEM Users: AEM users are the users in your organization who use AEM as a Cloud Service generally to create content. These users need to access AEM to do their tasks. The AEM user's product profile is typically assigned to an AEM content author who creates and reviews the content. This content can be of many types such as pages, assets, publications, and so on. The AEM user's product profile shown below is assigned to these members.
Assign groups that require full administrator access to the corresponding environment-specific Administrator profile. The rest of the users can be added to the environment-specific AEM Users profile.
IMS groups and Members to AEM:
The IMS groups and their associated members are synchronized with the corresponding AEM environment. This membership synchronization occurs whenever a user logs into the system. This process ensures that users are accurately linked to their specific AEM access levels.
Create Corresponding Local Groups in AEM:
In AEM, create local User Groups that correspond to the IMS groups. Clearly define the specific permissions for each of these local groups within the AEM environments.
Assign Local Groups to the Corresponding IMS Groups:
Link the local groups in AEM to the relevant IMS groups. These IMS groups are automatically created and synced in AEM, along with the details of their members from IMS. Utilizing local groups in AEM for permission management, instead of adding users directly to the IMS groups, helps maintain a clear separation between IMS-managed groups and AEM local groups. This approach ensures that the IMS groups handle user membership while the local AEM groups manage the necessary permissions.
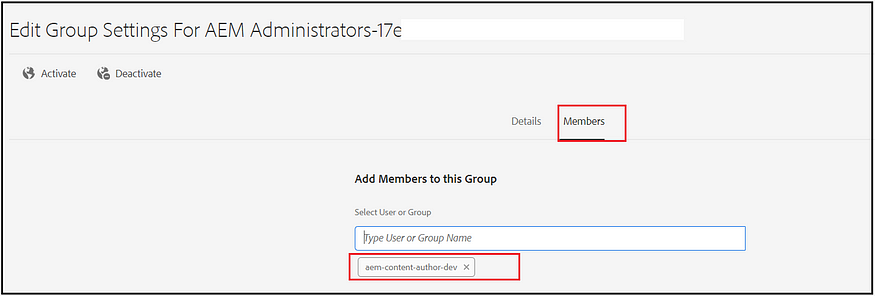
Users assigned to a IMS group in the Adobe Admin Console are typically automatically linked to the corresponding local User Group in AEM. This means that when users log into AEM, they acquire the permissions associated with the local User Group that align with their Product Profile. Consequently, when users log in through the SSO, they gain the appropriate access within the AEM system.
If needed, you can activate automatic synchronization of IDs between Active Directory or LDAP servers and the identities created within the Adobe Console through the User Sync tool. This tool enables system administrators to align user groups from the customer’s directory with product configurations and user groups in the Admin Console. The User Sync Tool can adaptively map new LDAP groups for user membership, facilitating dynamic user group creation within the Admin Console.
The User Sync Tool is available via the Adobe GitHub repository. As an open-source tool, it offers customization options, allowing customers to tailor it to their needs. This synchronization feature includes dynamically mapping new LDAP groups for user membership in the Admin Console and creating new user groups dynamically.
References:
IMS Support for Adobe Experience Manager as a Cloud Service | Adobe Experience Manager (mktossl.com)
Create a directory for SAML-based identity providers (adobe.com)
Originally published at https://www.albinsblog.com.
Follow me for upcoming blogs follow.
