This post will discuss handling SSL and domains when using AEM as a Cloud Service. This is for you if you’ve been wondering about keeping things secure and running smoothly on the cloud. Let’s dive into some easy tips and tricks.
AEM as a Cloud service allows you to manage SSL and domains through a cloud manager.
SSL Management:
As a first step, begin by uploading your SSL certificates to Cloud Manager. refer to SSL Certificate Management Basics — Developers | by Albin Issac | Tech Learnings | Medium for understanding the details of SSL management. At any given time, Cloud Manager will allow a maximum of 50 SSL certificates to be installed. These can be associated with one or more environments across your program and also include any expired certificates. However, some prerequisites exist for the SSL certificates: Domain Validated (DV) or self-signed certificates are not supported. The SSL certificate files must be in PEM format to be installed with Cloud Manager, and the Private Key should be in pkcs8 unencrypted format. For more details on managing SSL certificates in AEM as a Cloud, refer to the guide Introduction to Managing SSL Certificates | Adobe Experience Manager on the Adobe Experience Manager website.
AEM as a Cloud Service supports single domain, SAN, and wildcard certificates via the Cloud Manager.
You can go to cloud manager environments → SSL Certificates →Add SSL Certificates.
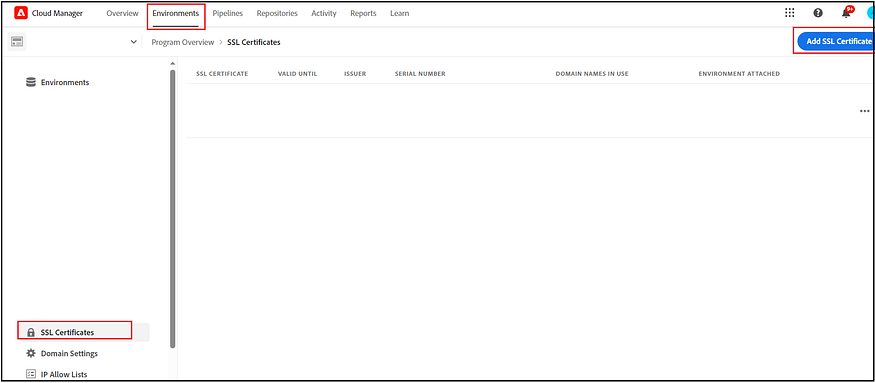
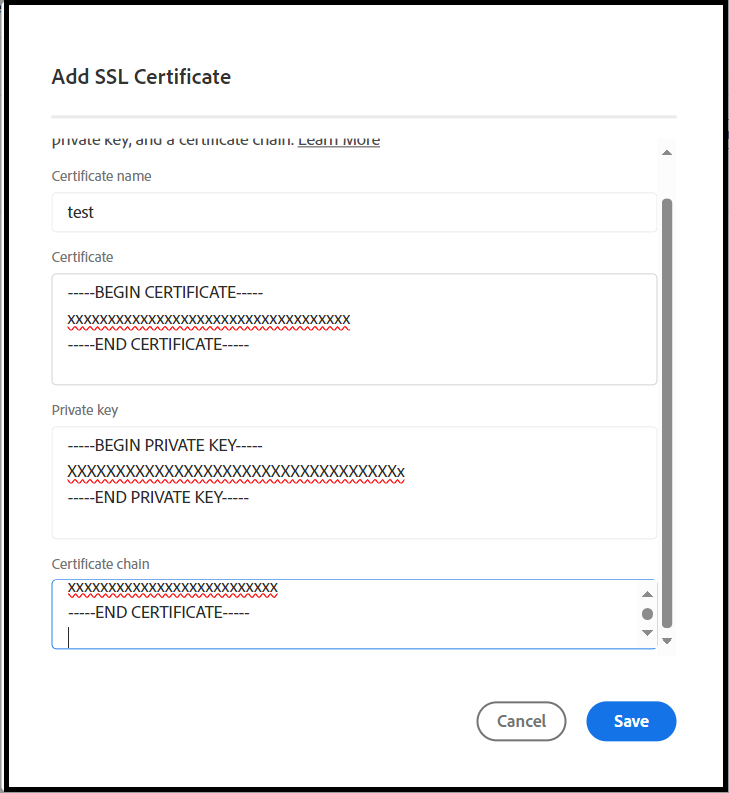
Enter a name for the SSL certificate and copy its content. Copy the content of the SSL certificate, you will receive the certificate file from the Certificate Authority (e.g., DigiCert) by following the certificate generation process. Ensure the file is in .pem format; if it’s not, you’ll need to convert it to .pem.
-----BEGIN CERTIFICATE-----
xxxxxxxxxxxxxxxxxxxxxxxxxxxxxxxxxxx
-----END CERTIFICATE-----
Copy the content of the private key, ensuring that it is in the non-encrypted pkcs8 format. If your key is in another format, such as OpenSSL, it can be converted to pkcs8. I usually use Key Explorer for this purpose, although OpenSSL can also be used to convert to different formats. These tools provide a quick way to change key formats.
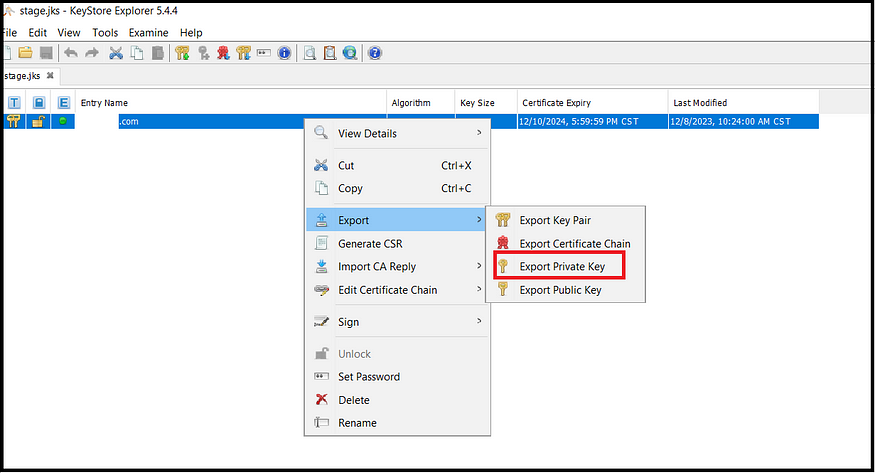
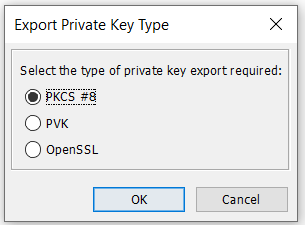
Make sure that the key is not encrypted.
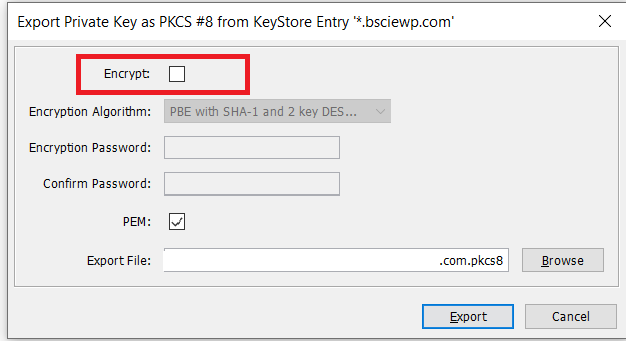
In addition to the actual certificate, you will receive certificate chains from the Certificate Authority (CA), which typically include two types of chain certificates: the Intermediate certificate and the Root certificate. You should arrange the Intermediate and Root certificate contents in the correct order and copy the combined content into the certificate chain field.
-----BEGIN CERTIFICATE-----
Intermediate Certificate
-----END CERTIFICATE-----

-----BEGIN CERTIFICATE-----
Root certificate
-----END CERTIFICATE-----
If the private key is uploaded in a format other than pkcs8, you will encounter an error stating, ‘Private key does not match the certificate.
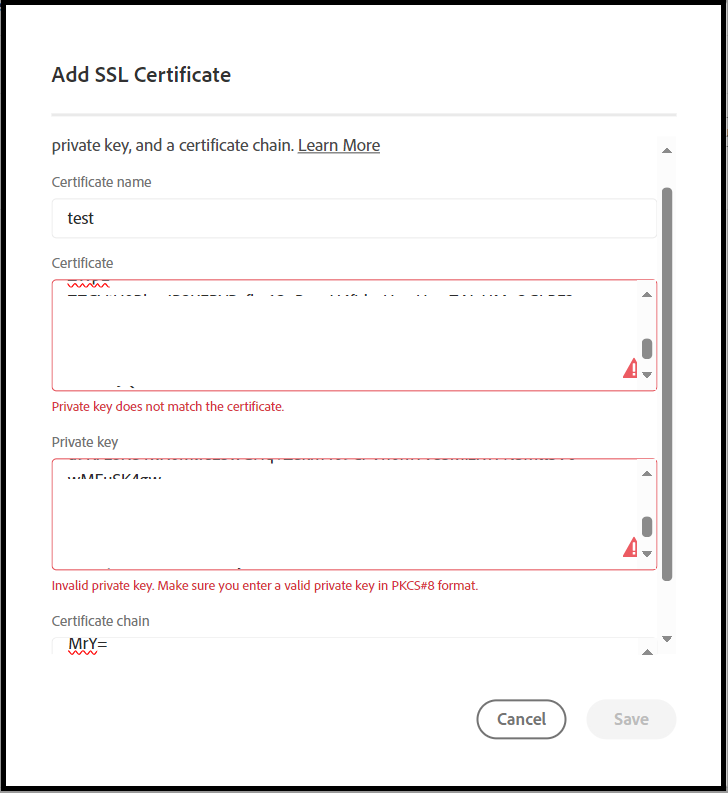
Once the certificate is successfully uploaded, it becomes available for association with a domain and environment. The SSL certificate can also be updated or deleted as needed.
DNS Management:
Now, you have the ability to add a new custom domain, associate it with an SSL certificate, and assign it to a specific environment. For more detailed information on DNS management in AEM as a Cloud service, please refer to ‘ Adding a Custom Domain Name | Adobe Experience Manager’ in the Adobe Experience Manager documentation. Additionally, for a fundamental understanding of DNS management, consult ‘DNS Management Basics for Web Developers | by Albin Issac | Tech Learnings | Medium.
There are certain limitations when managing custom domains in Cloud Manager. Each environment can support a maximum of 500 custom domains. Custom domain names are accommodated in Cloud Manager for both ‘publish’ and ‘preview’ services in Sites programs, but they are not supported for author services. To add a custom domain name in Cloud Manager, a user must hold either the Business Owner or Deployment Manager role. Additionally, you must be utilizing the out-of-the-box (OOTB) Fastly CDN.
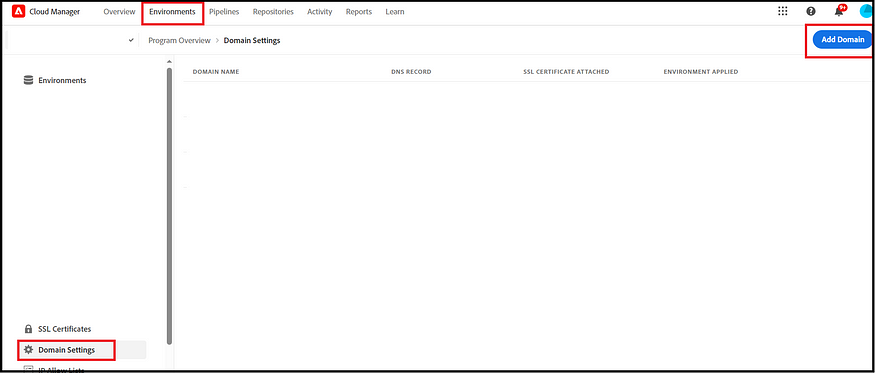
Cloud Manager → Environments → Domains →Add Domain
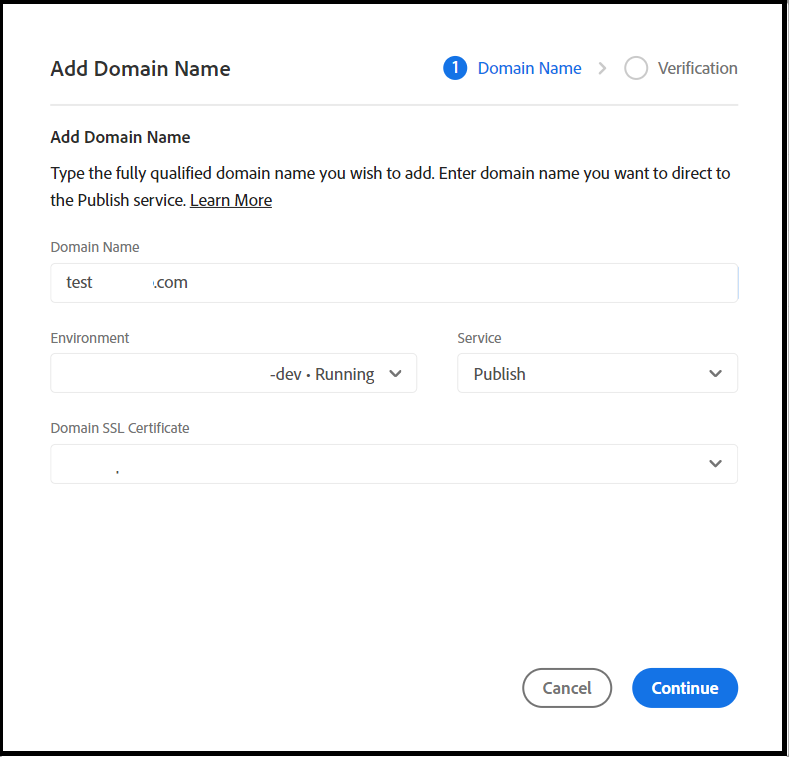
Enter the fully qualified domain name, such as a test domain (e.g., samplesite-dev.test.com) or a live site (e.g., samplesite.test.com). Then, select the environment where this domain will be active, based on your configuration (e.g., dev, uat, stage, prod). Next, choose the service with which you want to associate the domain, either ‘publish’ or ‘preview’. Finally, select the SSL certificate associated with this domain (only those SSL certificates linked to the specified domain will be listed).
Now, you will receive a TXT record that needs to be configured in your Domain Manager to verify domain ownership.
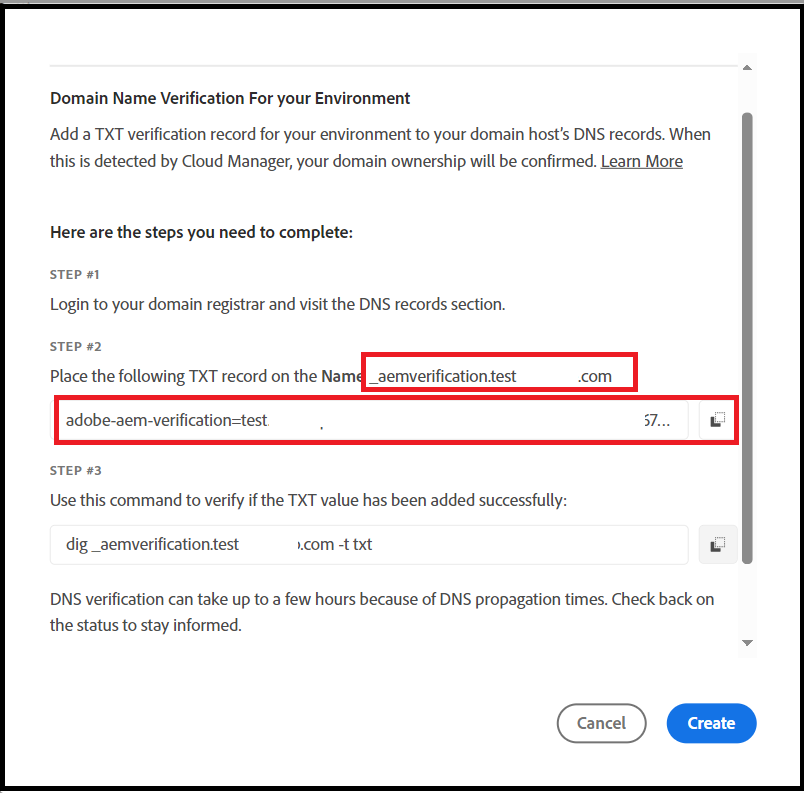
Now, add the TXT record to your domain using your DNS management system, such as CSC Global, GoDaddy, etc.

Wait for the changes to propagate, which may take some time. You can verify this through online tools or command-line utilities like ‘dig’.
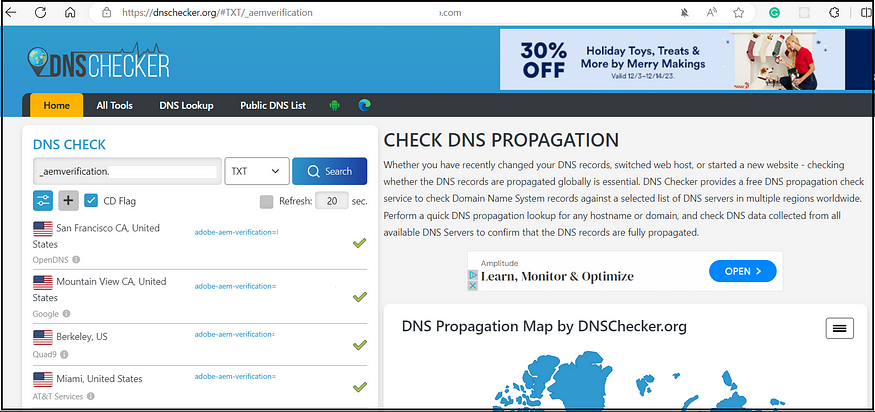
Click ‘Create.’ The TXT record will then be validated. You can also choose to create it first and validate it later, once the changes have propagated, by clicking ‘Verify’ again.

Once the domain is successfully validated, a green checkmark will appear.

Now, return to your Domain Manager and create a CNAME record for your custom subdomain (e.g., www.testdomain1.com) that points to cdn.adobeaemcloud.com. Alternatively, you can add an A-Record instead of a CNAME if you are using a root (APEX) domain. For more details, refer to the ‘Configuring DNS Settings | Adobe Experience Manager’ section in Adobe Experience Manager documentation.

Wait for the changes to take effect. You can verify this through the same online tools or command-line utilities,
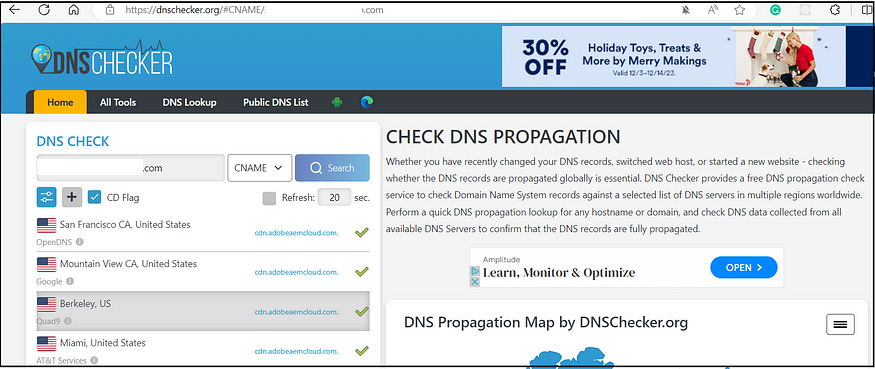
Now, click ‘Resolve’ again to configure the domain’s CNAME resolution.

Once resolved, you will see a ‘Resolved Correctly’ message, indicating that the domain is now ready for use.


Enable the necessary Dispatcher configurations to direct the domain to a specific content path.
AEM as a Cloud offers a self-service capability for managing SSL and DNS configurations through Cloud Manager, greatly simplifying the process of handling SSL certificates and DNS settings. It’s important to configure your domain well in advance, as the entire process, including domain validation and resolving through your DNS manager, can take a reasonable amount of time.
As an additional note, I recommend creating a common test domain to manage test domains across different environments. For instance, using test.com allows you to create various subdomains for different environments, such as dev.test.com, uat.test.com, stage.test.com, etc.
site1-dev.test.com
site1-uat.test.com
site1.stage.test.com
Now, create a wildcard certificate that supports *.test.com and upload this certificate to Cloud Manager. It can be used to configure all the test domains across various environments. Additionally, create a SAN (Subject Alternative Name) certificate to support all your live domains.
No comments:
Post a Comment