How to receive Outbound Message notification from Salesfore through Salesforce Adapter in Oracle SOA Suite 12c
Salesforce Outbound messaging allows you to specify that changes to fields within Salesforce can cause messages with field values to be sent to designated external servers.Outbound messaging is part of the workflow rule functionality in Salesforce. Workflow rules watch for specific kinds of field changes and trigger automatic Salesforce actions, such as sending email alerts, creating task records, or sending an outbound message.
After you set up outbound messaging, when a triggering event occurs, a message is sent to the specified endpoint URL. The message contains the fields specified when you created the outbound message. Once the endpoint URL receives the message, it can take the information from the message and process it. To do that, you need to examine the outbound messaging WSDL.
The Salesforce Adapter in Oracle SOA Suite help to integrate with Salesforce cloud. This post will explain the steps to enable the Outbound messaging in Salesfore and receive the notifications in Oracle SOA Suite via Salesforce Adapter.
Define Outbound message in Salesforce:
Login to Salesforce
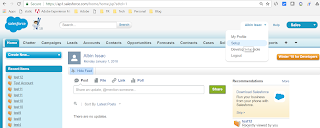
Click on Setup
Search for Outbound messages and click on Workflow & Approvals - Outbound Messages
Click on Continue in the next screen
Click on New Outbound Message
Select the required Object and Click on Next
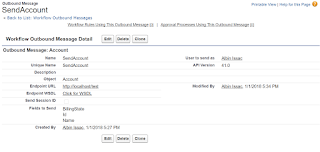
Enter the details
Name : Enter name for the outbound message
EndPoint URL - enter a dummy URL now and the same will be changed after designing the SOA composite'
Fields to send : Select the fields that should be part of the outbound message
Click on Save
Define Workflow Rule to trigger the Outbound message:
Define a Workflow Rule to trigger the Outbound message whenever the new account is created with matching criteria.
Click on Setup and quick search for "Workflow Rules" and Click on Workflow & Approvals - Workflow Rules
Click on Continue
Click on New Rule
Select the Object (Account) and Click on Next
Enter the details
Rule Name
Evaluate the rule when a record is - Select the option when this rule should be fired - Created(Whenever new Account is created)
Run this rule if the following - Criteria are met
Select the criteria - Billing State/Province equal to MN then fire the rule
Select Add Workflow Action and Click on Select Existing Action
Select Outbound Message from Choose Action Type Search field
Add Outbound Message : SendAccount to selected actions and Click on Save
Click on Done
Generate enterprise WSDL:
Refer Generate enterprise WSDL section from the following post https://www.albinsblog.com/2017/12/how-to-integrate-with-salesforcecom-through-salesfore-adapter-oracle-soa-12c.html
Generate Outbound Message WSDL
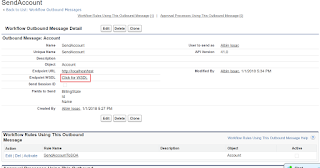
Open the outbound message defined in the previous steps and click on "Click for WSDL"
Save the WSDL to the system
Configure CSF Key - Authentication key:
Refer Configure CSF Key section from the following post https://www.albinsblog.com/2017/12/how-to-integrate-with-salesforcecom-through-salesfore-adapter-oracle-soa-12c.html
Design the SOA Composite:
Create a SOA Project with empty composite
Right click on Exposed Services and Insert Salesfore Adapter in the
Change the endpoint name as required and click on next
Select the enterprise.wsdl
Add new Authentication Key
CSF Key Name - Defined in the previous step(salesforce-credential)
UserName
Password - Password+Security Token
Click on Ok
Click on Test
Click on Next
Select the Outbound Messaging WSDL - select the Outbound Messaging WSDL generated in the previous steps
Click on Next and Finish
Add a BPEL component to the Composite and select Template Type as No Service
Link the Adapter service and the BPEL process, select the Delivery and Transaction options
Add a receive activity to the BPEL process and link the Adapter service and the receive activity.
Define the Input variable and select Create Instance option.
Add the required activities to process the request.
Deploy the BPEL process to the server.
Monitor the {$Oracle_Home}/user_projects/domains/{your_domain}/servers/{server_name}/logs/{server_name}-diagnostic.log file to locate the endpoint URL of the Salesforce Adapter process. It would look something like this For SOA: https://{host}:{port}/integration/flowsvc/salesforce/{partition_name}/{project_name}/{service_name}/v1.0/ For OSB: https://{host}:{port}/integration/flowsvc/salesforce/{project_name}/{service_name}/v1.0/
https://servername:7201/integration/flowsvc/salesforce/default/SalesforeAdpater/SalesforceService/v1.0 (the URL should be accessible via valid SSL certicate)
Update the endpoint URL in Salesfore Outbound Message:
Edit the Outbound Message defined in the previous steps and update the endpoint URL with new URL.
Now the notification will be send to the endpoint whenever the new account is created with Billing State/Province as MN.
To see the failure messages - Search for outbound in quick search and click on Monitoring - Outbound Messages


Hello,
ReplyDeleteIts a very nice explanation on salesforce adapter. I have 2 questions here
1) I tried this and I am not able to open the URL of the adapter which is similar to below
https://servername:7201/integration/flowsvc/salesforce/default/SalesforeAdpater/SalesforceService/v1.0
Is the port Managed server port here?
2) Do we need to open up any firewalls?
Please let me know
Thanks