This tutorial explains the details on how to configure search collection in Adobe Search and Promote to support multiple environments through same account.
Collection in Search and Promote
The collections can be used to allow customers to search specific areas of a website so that they can quickly find what they are looking for.
For example, customers can search a collection of URLs that are related to product sales or to support services.
Each collection is specified on a single line with a name and a URL mask. A URL mask can consist of the following:
• a full path such as http://www.mydomain.com/products.html
• a partial path such as http://www.mydomain.com/products
• a regular expression
To make a mask a regular expression, you insert the keyword regexp between the collection name and the URL mask e.g FAQs regexp ^.*/faqs
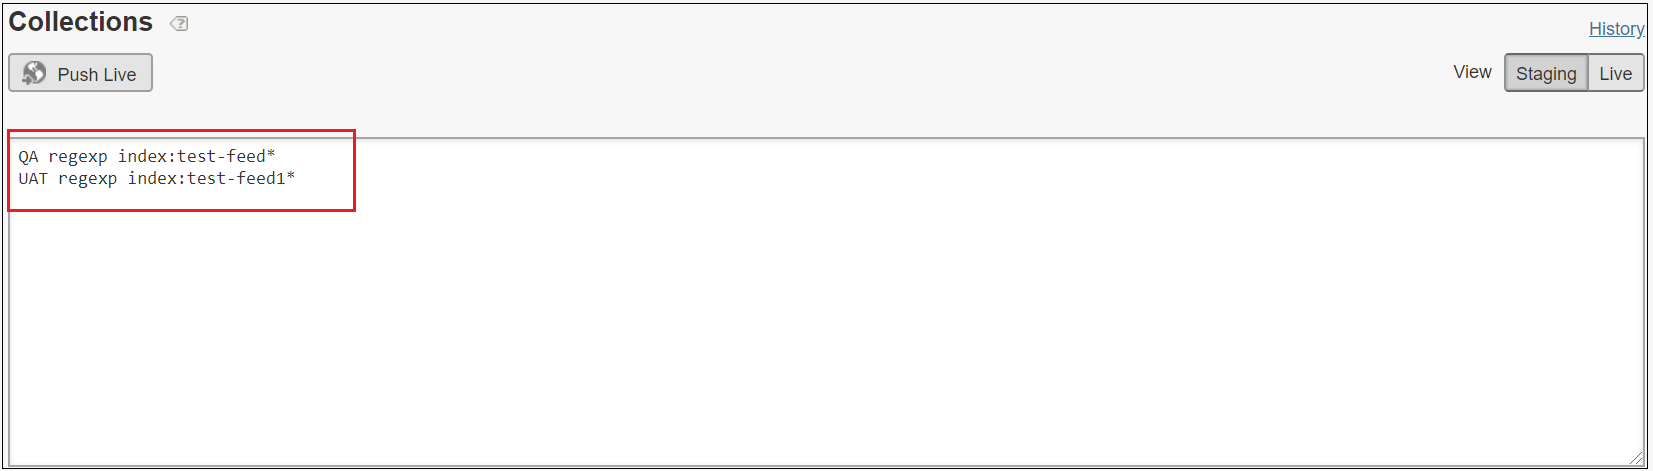
The IndexConnector URL entry points can be referenced to the collection as below
QA regexp index:test-feed*
Each line in the Collections field can contain only one URL mask. However, you can specify multiple URL masks for the same collection name on different lines.
The collection=<Collection Name> e.g. collection=Support parameters specifies the collection to use for the search.This parameter maps to the sp_k backend search parameter, sp_k=<Collection Name> e.g. sp_k=Support
Configuring Collection
One of the best scenario to use the collection is indexing the data for multiple environments e.g QA, UAT etc into a same Adobe Search and Promote account, the collection parameters can be used to search the documents specific to the environment.
I am using the IndexConnector as a URL entry point to index the data through XML feed files but the URL entry points can be a website URL with links.
Refer the below URL for more details on configuring Index Connector.
Refer the below URL for details on enabling custom JSON presentation and Transport templates
Let us now configure the collections to support QA and UAT environments search through same Search and Promote account.
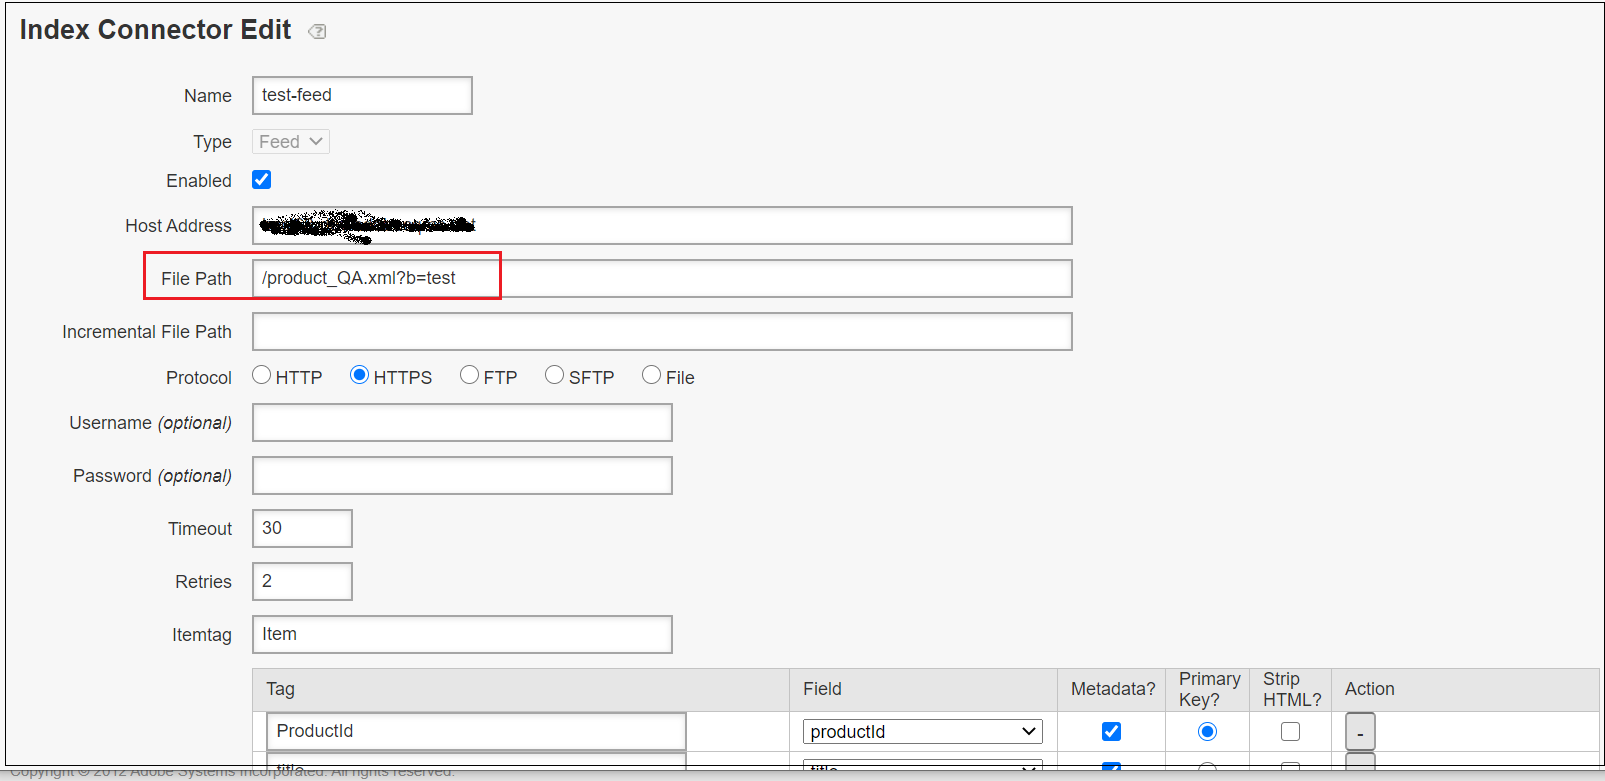
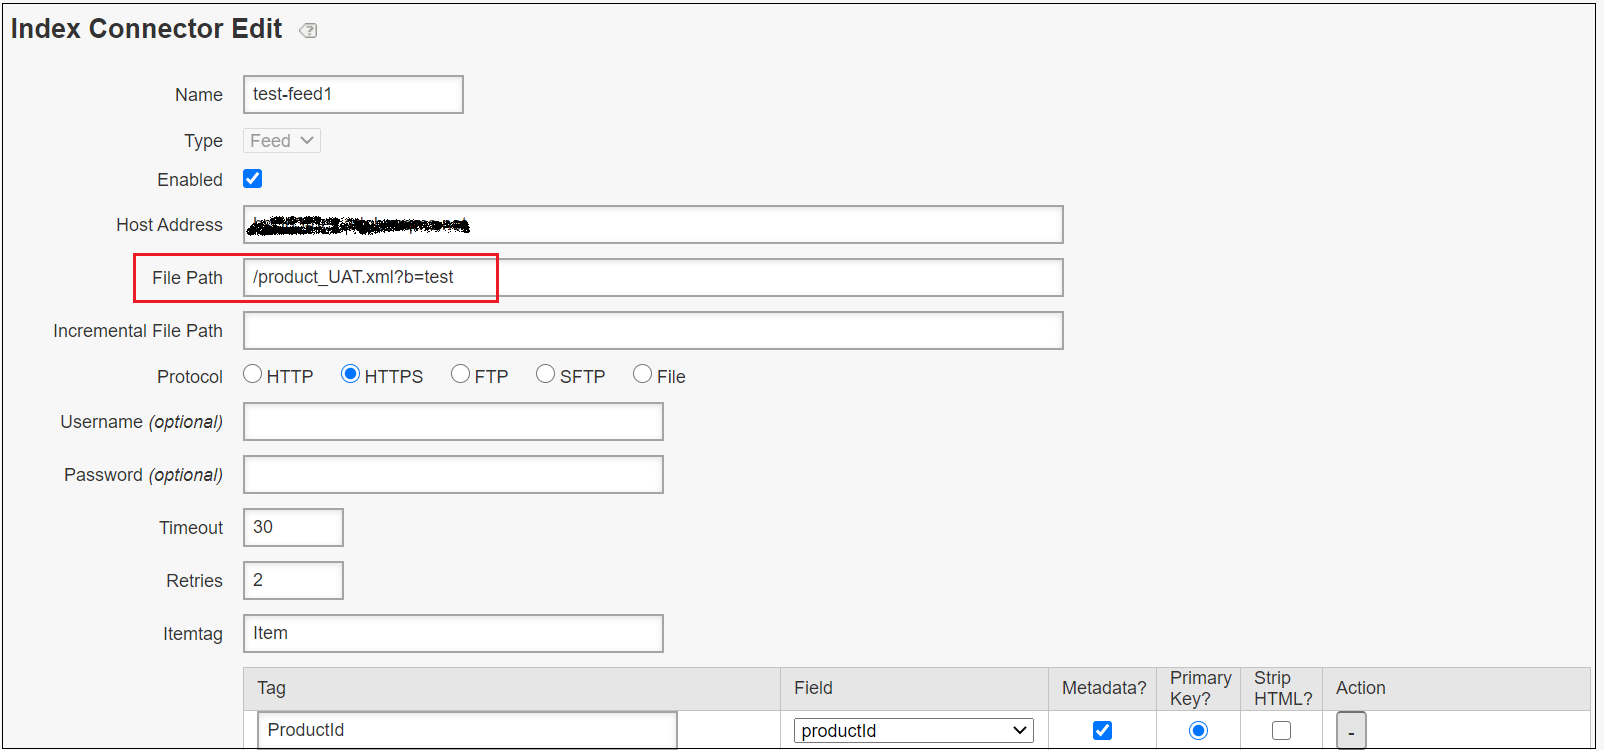
As a first step configure the index connector for both QA and UAT environments with environment specific feed file.
product_QA.xml
<feed xmlns:xs="http://www.w3.org/2001/XMLSchema" version="2.0">
 <channel>
  <title>Product Feed</title>
  <Item>
   <link>https://qa.example.com/product-title/p/prod1</link>
   <title>
   <![CDATA[Book Prod1 Title]]>
   </title>
   <description>
   <![CDATA[<p>Prod1 description</p>]]>
   </description>
   <productType>Book</productType>
   <ProductId>prod1</ProductId>
   <imageUrl>/content/dam/Images/product/prod1.jpg</imageUrl>
  </Item>
  <Item>
   <link>https://qa.example.com/product-title/p/prod2</link>
   <title>
   <![CDATA[Book Prod2 title]]>
   </title>
   <description>
   <![CDATA[<p>Prod2 description</p>]]>
   </description>
   <productType>Book</productType>
   <ProductId>prod2</ProductId>
   <imageUrl>/content/dam/Images/product/prod2.jpg</imageUrl>
  </Item><Item>
   <link>https://qa.example.com/product-title/p/prod3</link>
   <title>
   <![CDATA[Watch Prod3 Title]]>
   </title>
   <description>
   <![CDATA[<p>Prod3 description</p>]]>
   </description>
   <productType>Watch</productType>
    <size>10</size>
   <ProductId>prod3</ProductId>
   <imageUrl>/content/dam/Images/product/prod3.jpg</imageUrl>
  </Item>
  <Item>
   <link>https://qa.example.com/product-title/p/prod4</link>
   <title>
   <![CDATA[Watch Prod4 Title]]>
   </title>
   <description>
   <![CDATA[<p>Prod4 description</p>]]>
   </description>
   <productType>Watch</productType>
    <size>20</size>
   <ProductId>prod4</ProductId>
   <imageUrl>/content/dam/Images/product/prod4.jpg</imageUrl>
  </Item>
  </channel>
</feed>
product_UAT.xml
<feed xmlns:xs="http://www.w3.org/2001/XMLSchema" version="2.0">
 <channel>
  <title>Product Feed</title>
  <Item>
   <link>https://uat.example.com/product-title/p/prod1</link>
   <title>
   <![CDATA[Book Prod1 Title]]>
   </title>
   <description>
   <![CDATA[<p>Prod1 description</p>]]>
   </description>
   <productType>Book</productType>
   <ProductId>prod1</ProductId>
   <imageUrl>/content/dam/Images/product/prod1.jpg</imageUrl>
  </Item>
  <Item>
   <link>https://uat.example.com/product-title/p/prod2</link>
   <title>
   <![CDATA[Book Prod2 title]]>
   </title>
            <description>
   <![CDATA[<p>Prod2 description</p>]]>
   </description>
   <productType>Book</productType>
   <ProductId>prod2</ProductId>
   <imageUrl>/content/dam/Images/product/prod2.jpg</imageUrl>
  </Item><Item>
   <link>https://uat.example.com/product-title/p/prod3</link>
   <title>
   <![CDATA[Watch Prod3 Title]]>
   </title>
   <description>
   <![CDATA[<p>Prod3 description</p>]]>
   </description>
   <productType>Watch</productType>
            <size>10</size>
   <ProductId>prod3</ProductId>
   <imageUrl>/content/dam/Images/product/prod3.jpg</imageUrl>
  </Item>
  <Item>
   <link>https://uat.example.com/product-title/p/prod4</link>
   <title>
   <![CDATA[Watch Prod4 Title]]>
   </title>
   <description>
   <![CDATA[<p>Prod4 description</p>]]>
   </description>
   <productType>Watch</productType>
             <size>20</size>
   <ProductId>prod4</ProductId>
   <imageUrl>/content/dam/Images/product/prod4.jpg</imageUrl>
  </Item>
  </channel>
</feed>
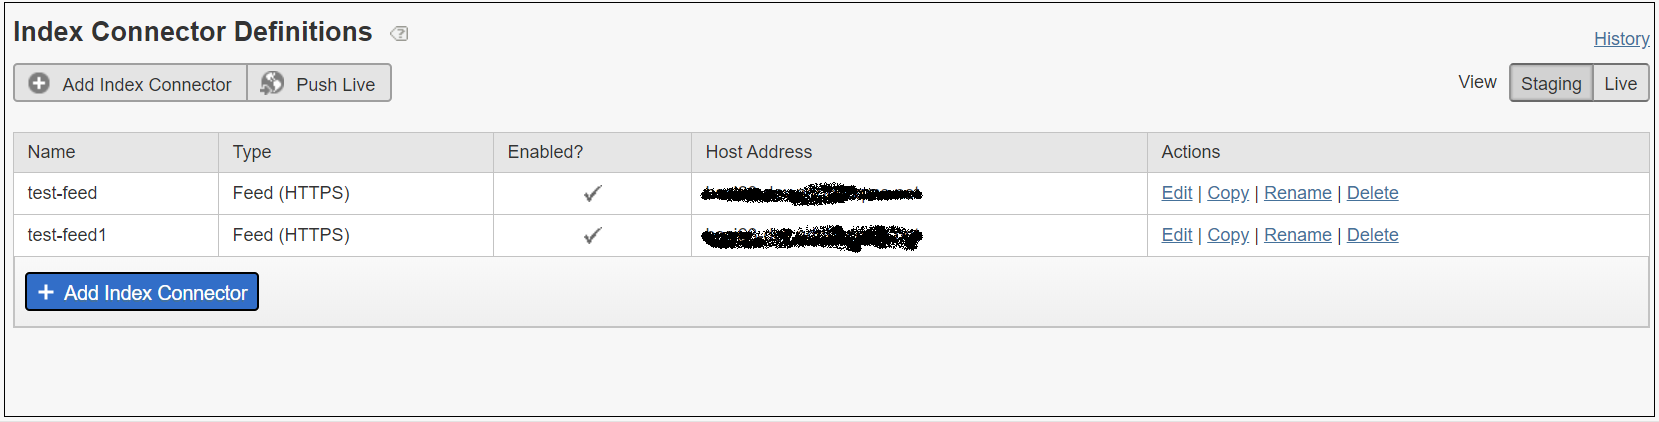
Enable the IndexConnector for both QA and UAT data feeds, Settings → Crawling →Index Connector


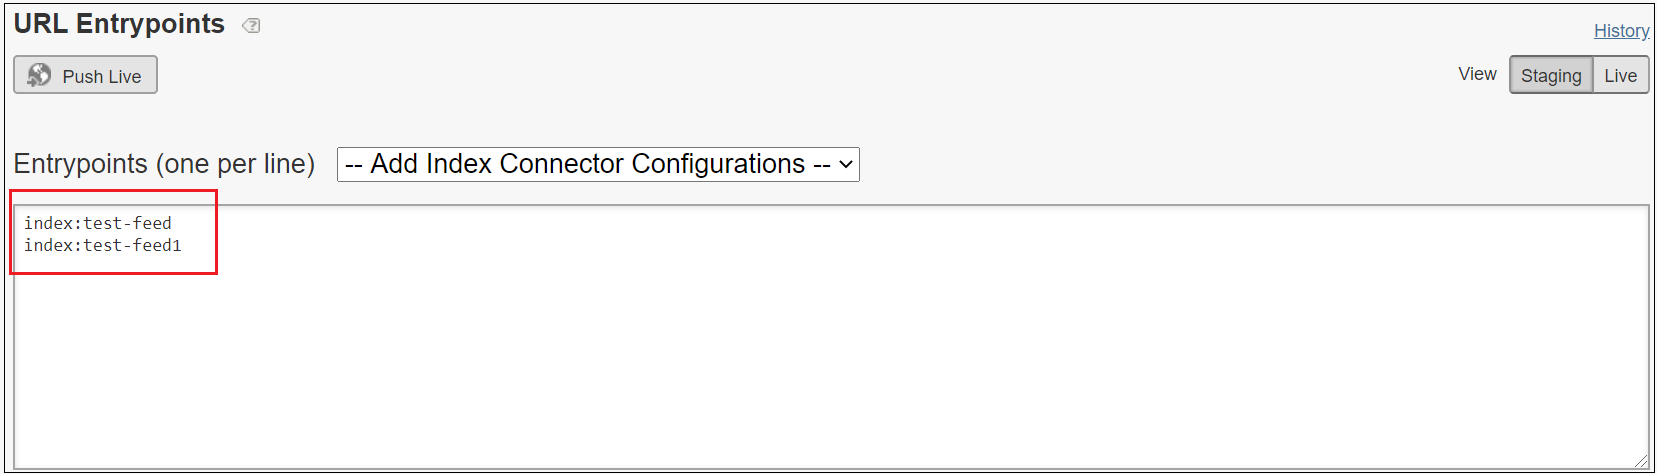
Add the IndexConnector configurations to the URL entry points, Setting → Crawling → URL Entrypoints, the URL entry points can be configured as environment specific URL’s instead of IndexConnector
e.g
https://uat.example.com/search_index.html
https://qa.example.com/search_index.html

Configure the collection Settings → Searching → Collections, the collection can be also configured as environment specific URL masks
e.g.
UAT https://uat.example.com/products
QA https://qa.example.com/products

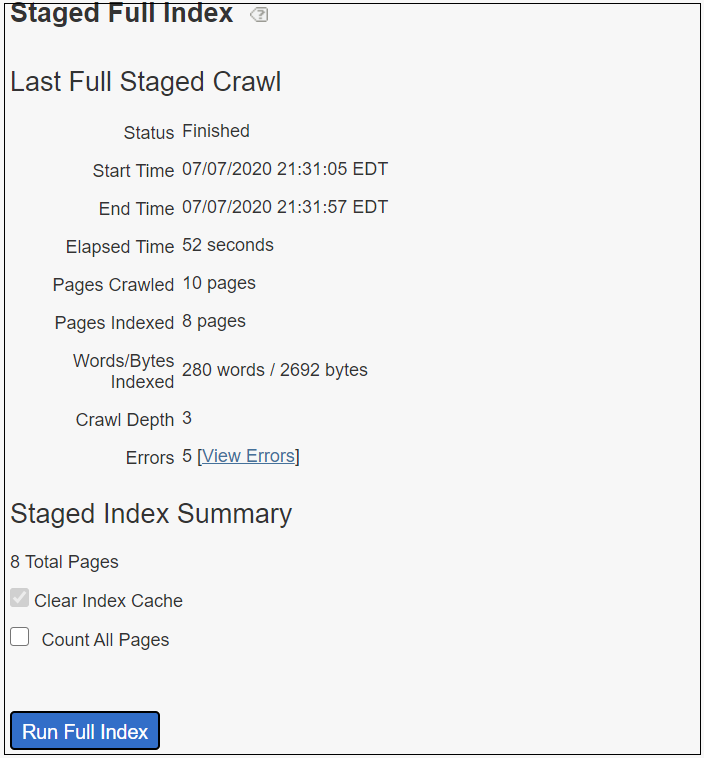
The configurations are ready, let us now run a Stage indexing (note the configuration are not pushed to live yet)
Index →Full Index →Staged Index →Run Full Index

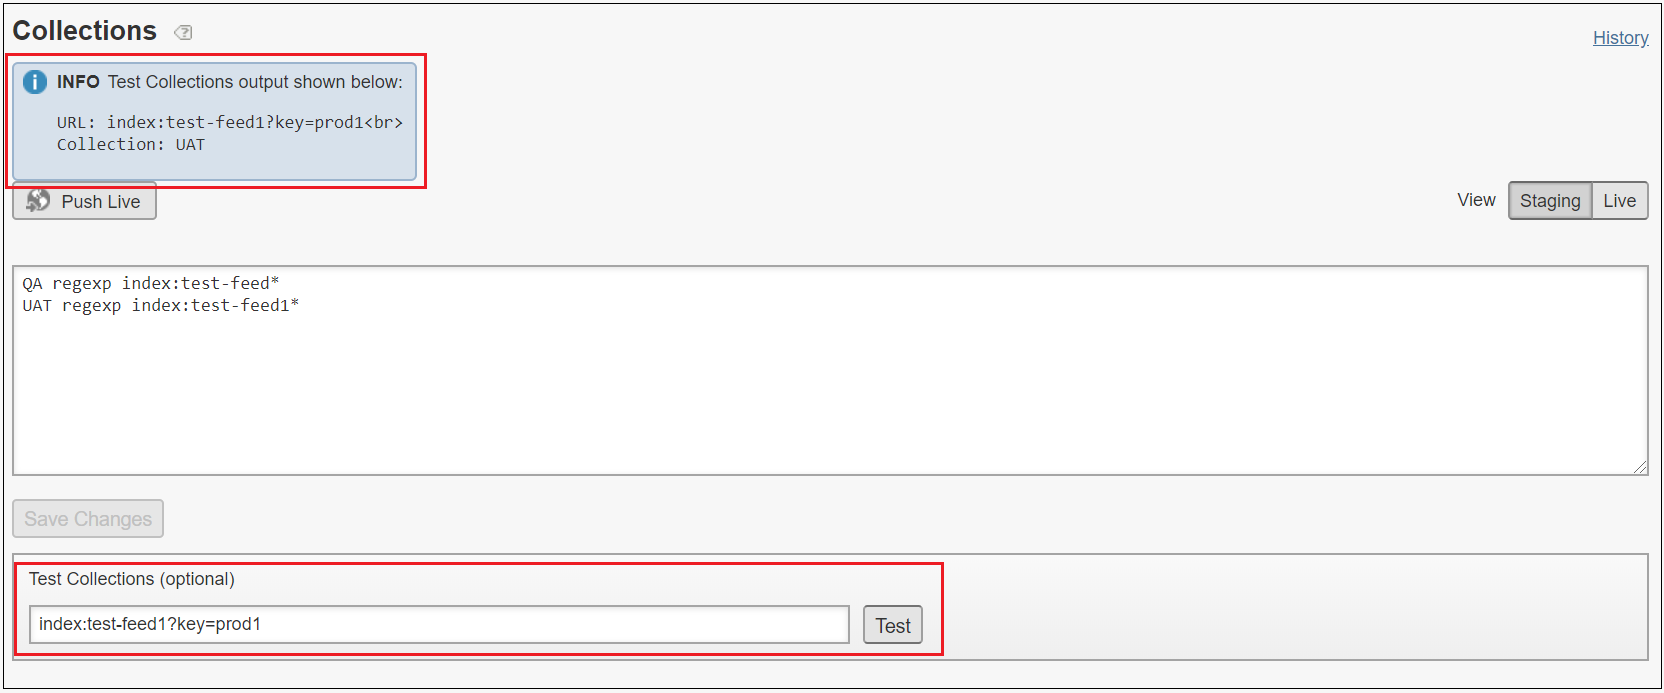
The collections can be tested through collection page “Test Collections” option


Specify the search index URL, the index URL can be taken from Reports → Data Views →Default View, for index connector the URL is formed based on the primary key defined in IndexConnector definition(our case product id)

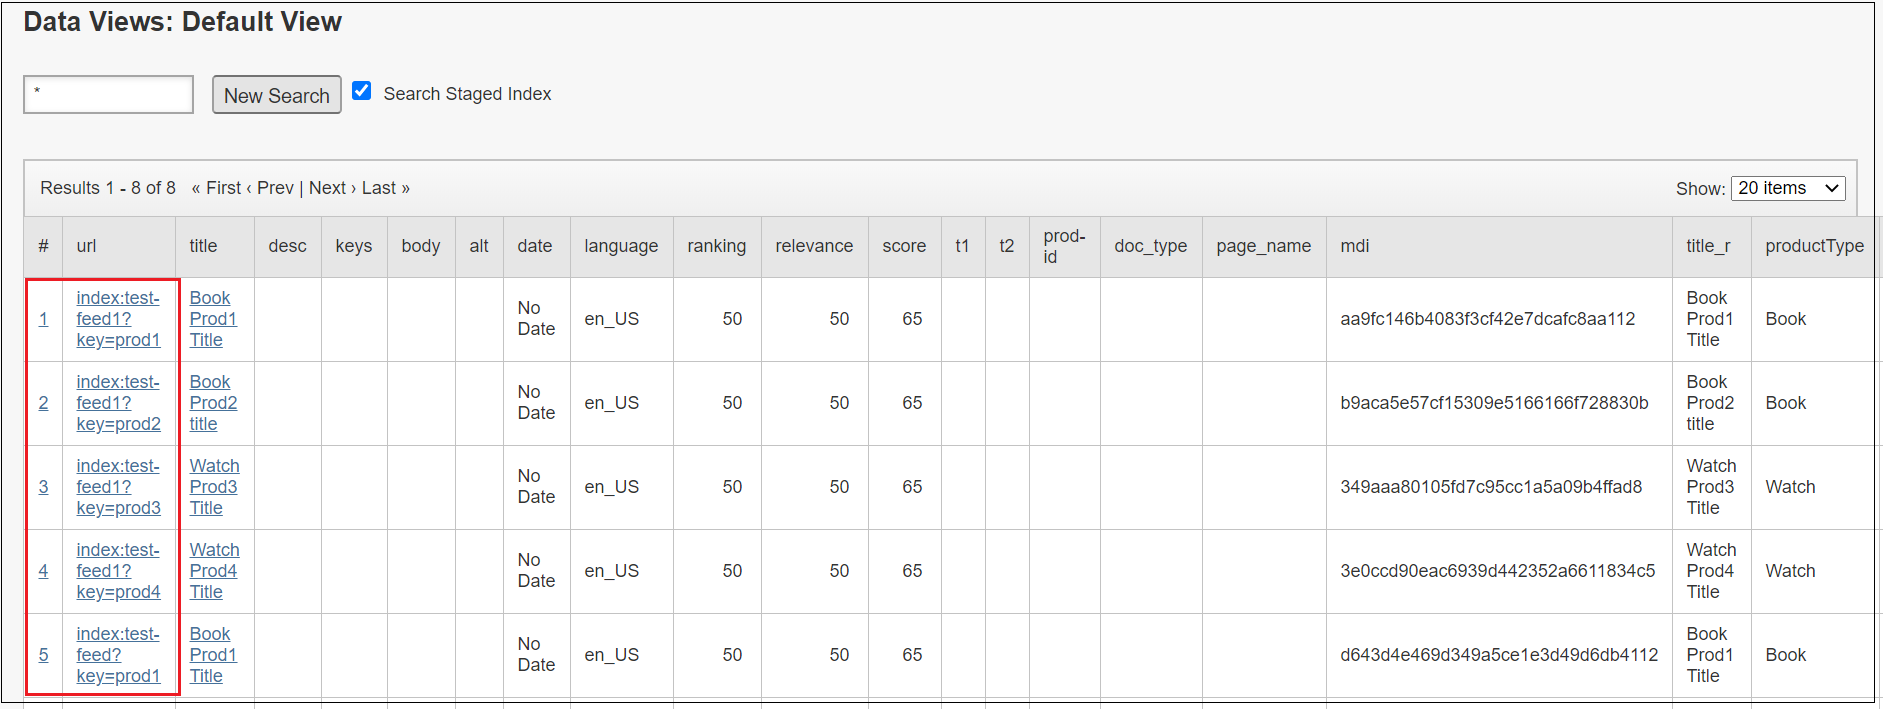


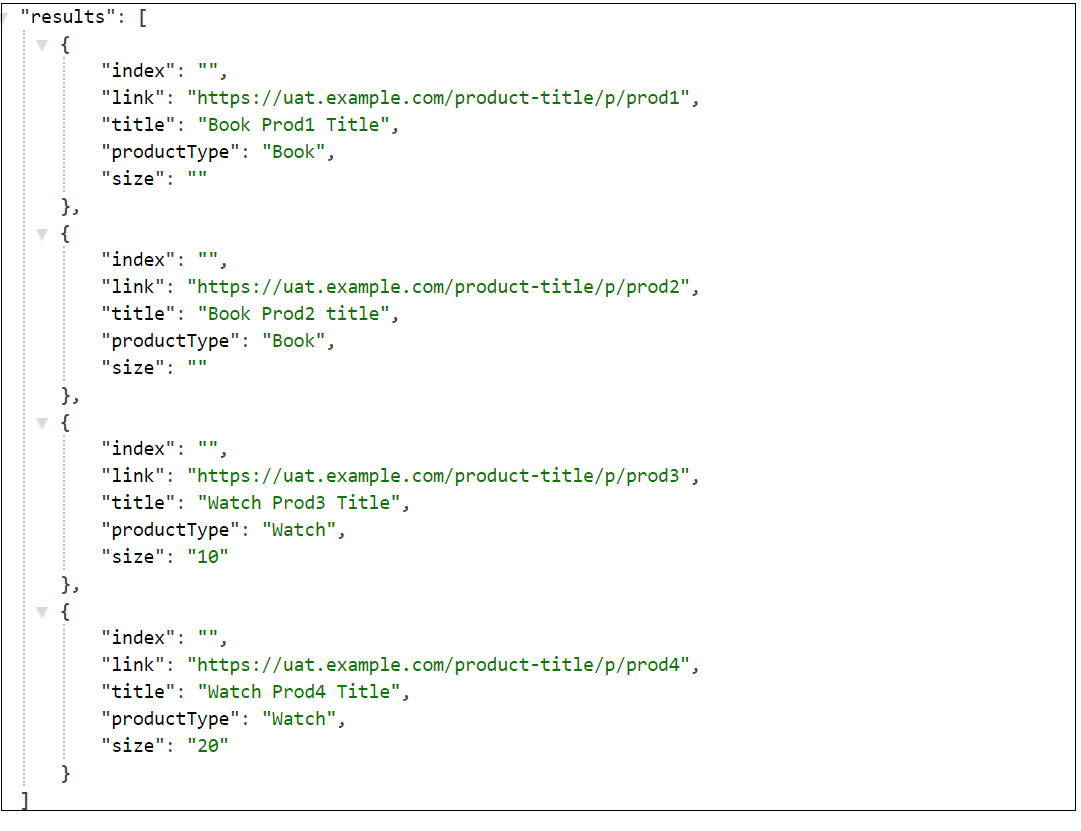
Let us now fetch the search result through URL
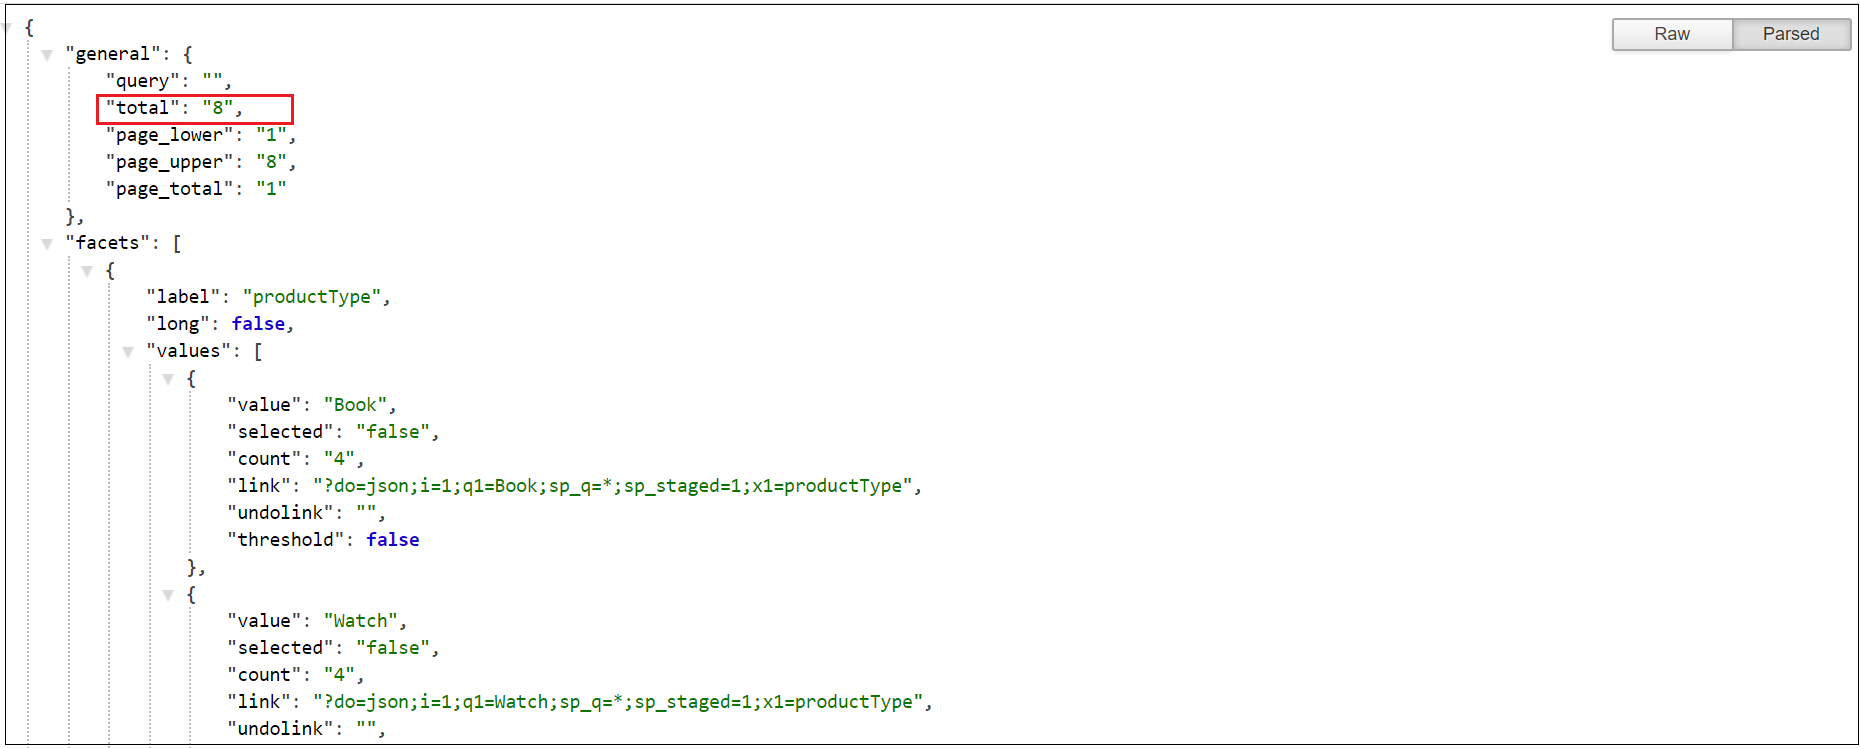
URL to fetch all the data with out specifying the collection name — http://stage-xxxxxx.guided.ss-omtrdc.net/do=json&sp_staged=1&sp_q=*
This will display the data from both collection(QA and UAT)

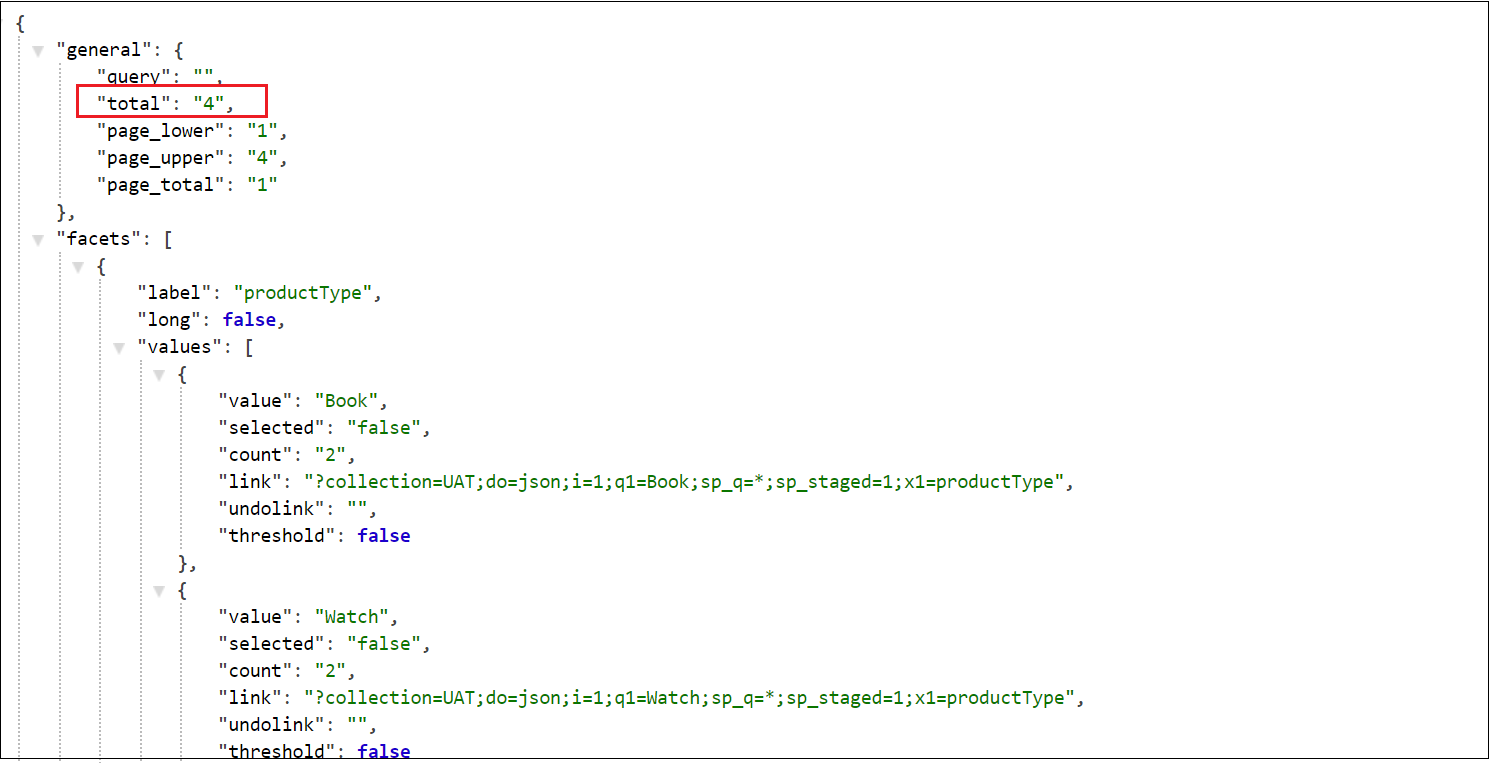
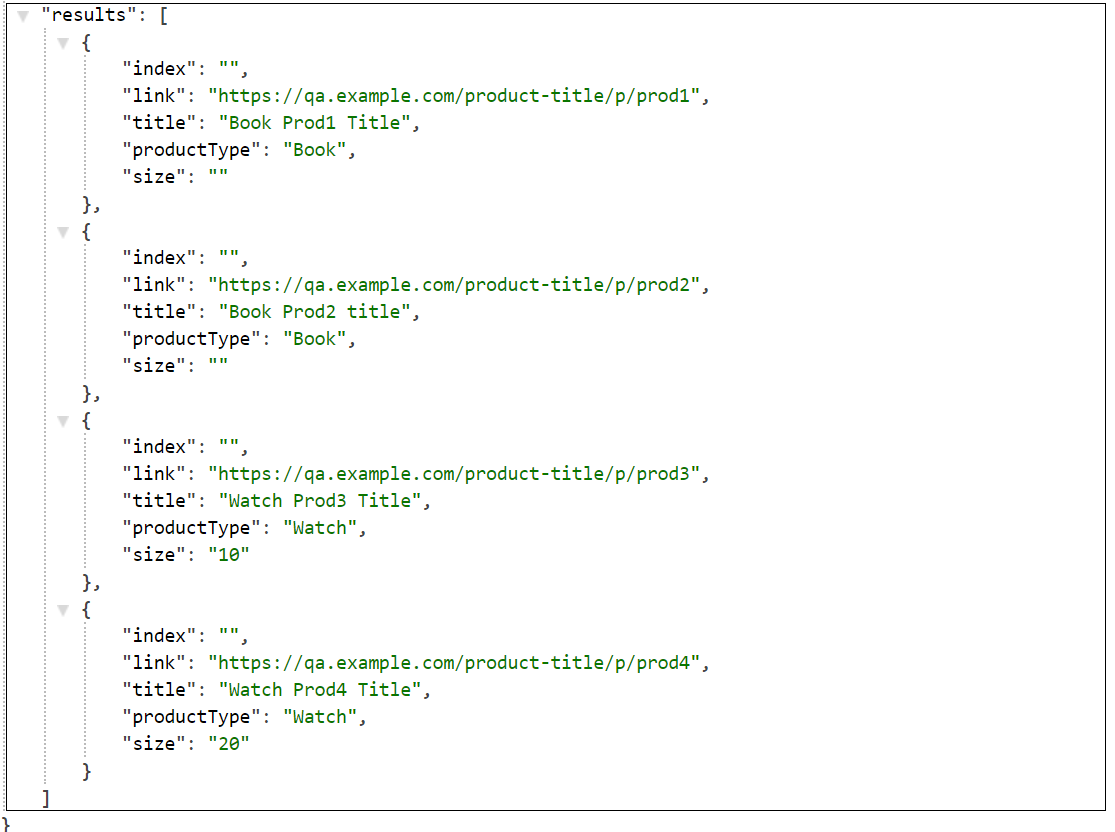
The URL to fetch the data specific to UAT, this will return the data specific to UAT collection


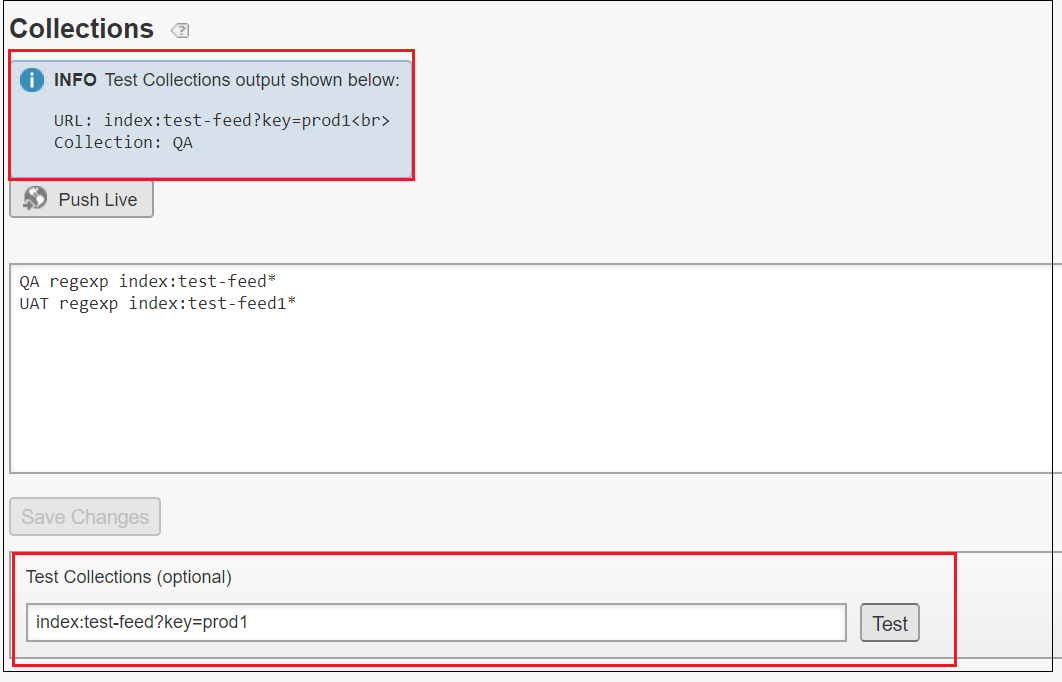
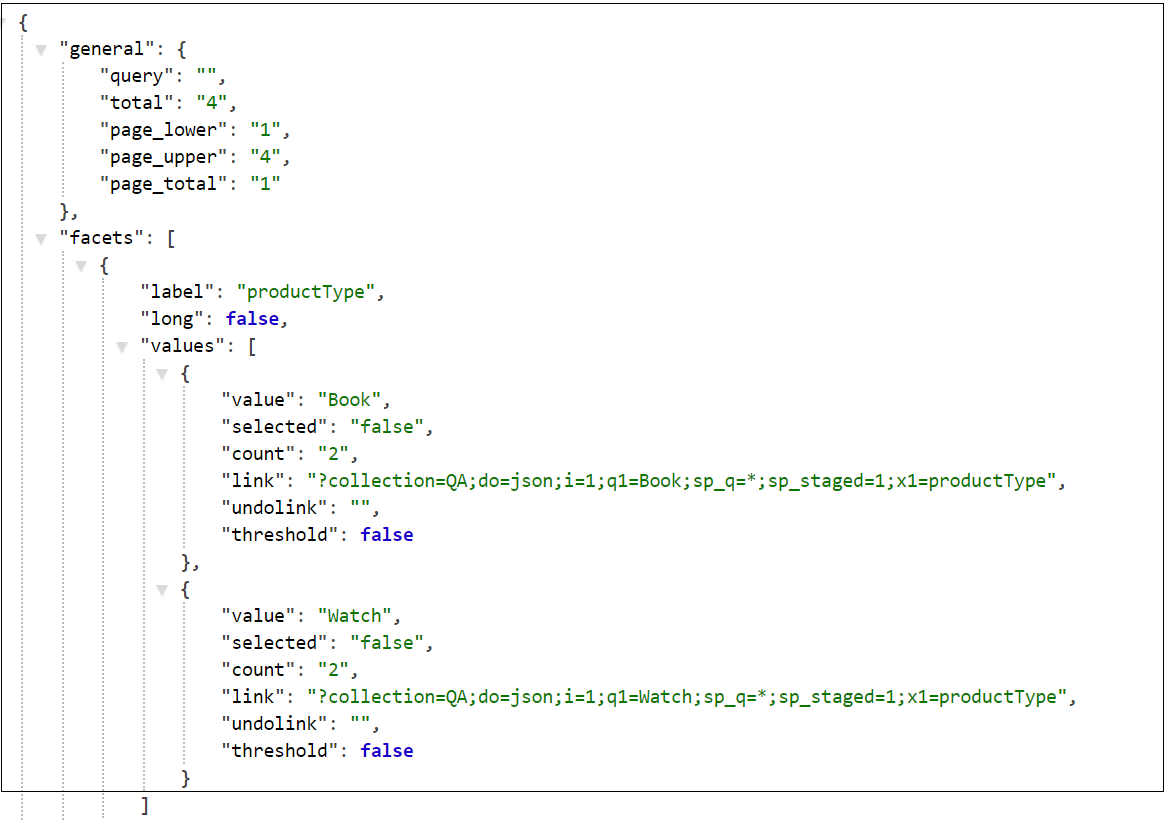
The URL to fetch the data specific to QA, this will return the data specific to QA collection


The configuration can be pushed live after successful validation and run a live index, Index →Full Index →Live Index →Run Full Index
The URL to access live data http://xxxxxxxxxxx.guided.ss-omtrdc.net/do=json&sp_q=*&collection=QA
The search collection can be used to enable the user to search on a specific section of the website e.g products, materials etc . The collection functionality can be also used to enable the search functionality for different environments(e.g QA and UAT) in the same Adobe Search and Promote Account.