AEM(Adobe Experience Manager) as a Cloud Service — Setting up Local Development Environment in Windows
Introduction
This tutorial walks through setting up a local development environment for Adobe Experience Manager (AEM) using the AEM as a Cloud Service SDK for Windows machine, includes the development tooling required to develop, build and compile AEM Projects, as well as local run times allowing developers to quickly validate new features locally before deploying them to AEM as a Cloud Service via Adobe Cloud Manager.
AEM(Adobe Experience Manager) is now available as a Cloud Service and has the following benefits:
- Is the cloud-native way of leveraging the AEM applications.
- Provides Continuous Delivery and Continuous Integration for updates with zero downtime.
- Is based on a dynamic architecture that autoscales, thus removing infrastructure considerations.
- Is security focused, using automated tests to scan for common vulnerabilities.
- Validates customer code using automated tests.
- Has performance topologies optimized for maximum resilience and efficiency.
- Significantly reduces the manual configuration required.
- Is deeply integrated with the Adobe Experience Cloud.
Local Dev environment structure

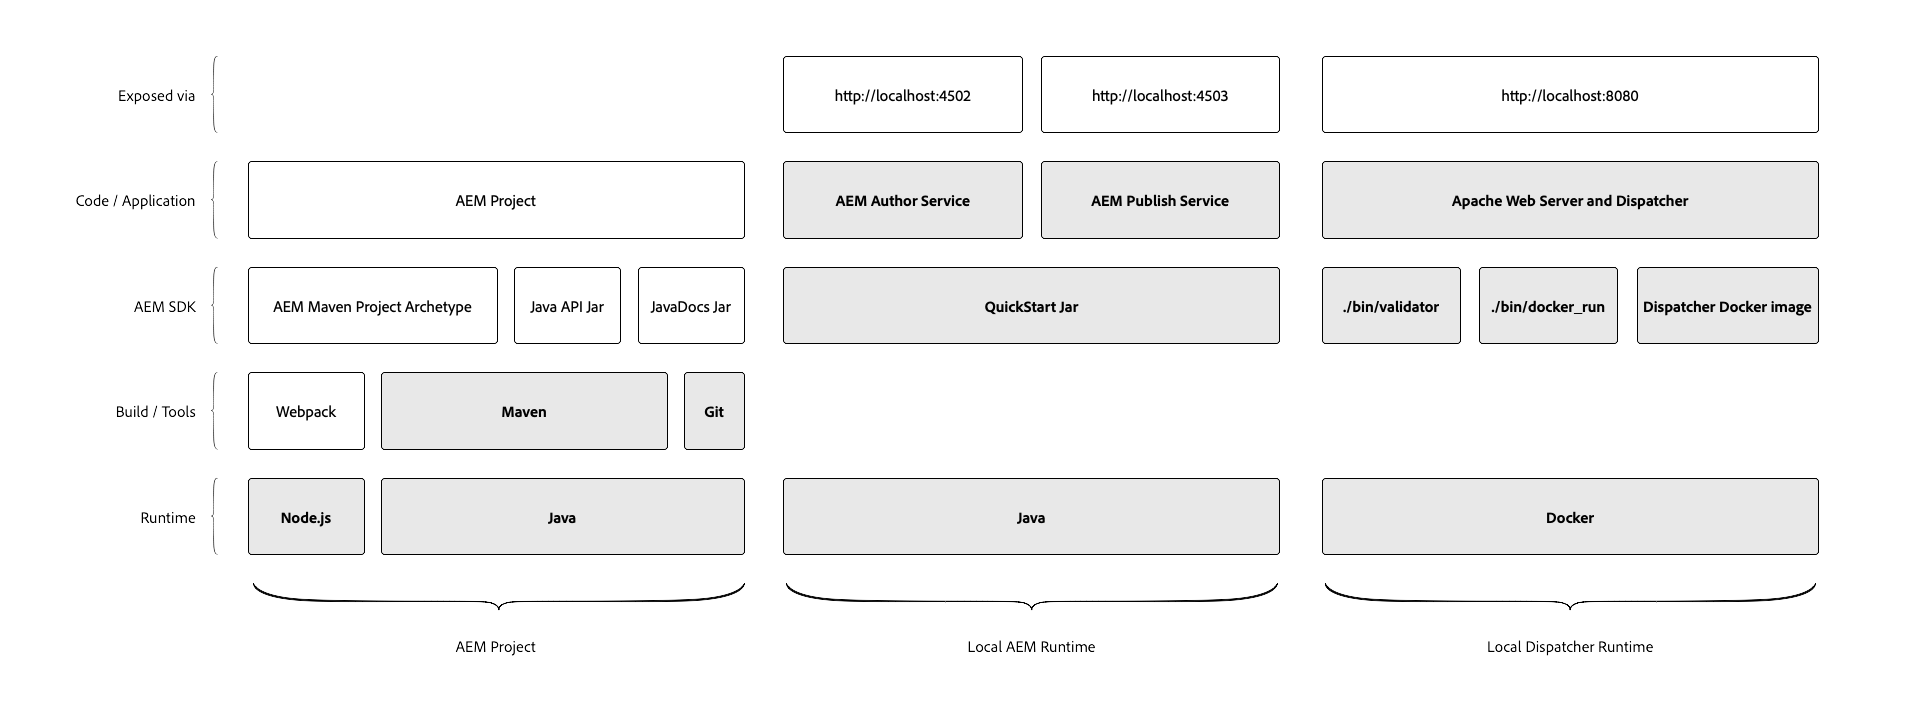
Prerequisites
- Maven
- Java
- AEM SDK.
- Docker Desktop
Download the required software's
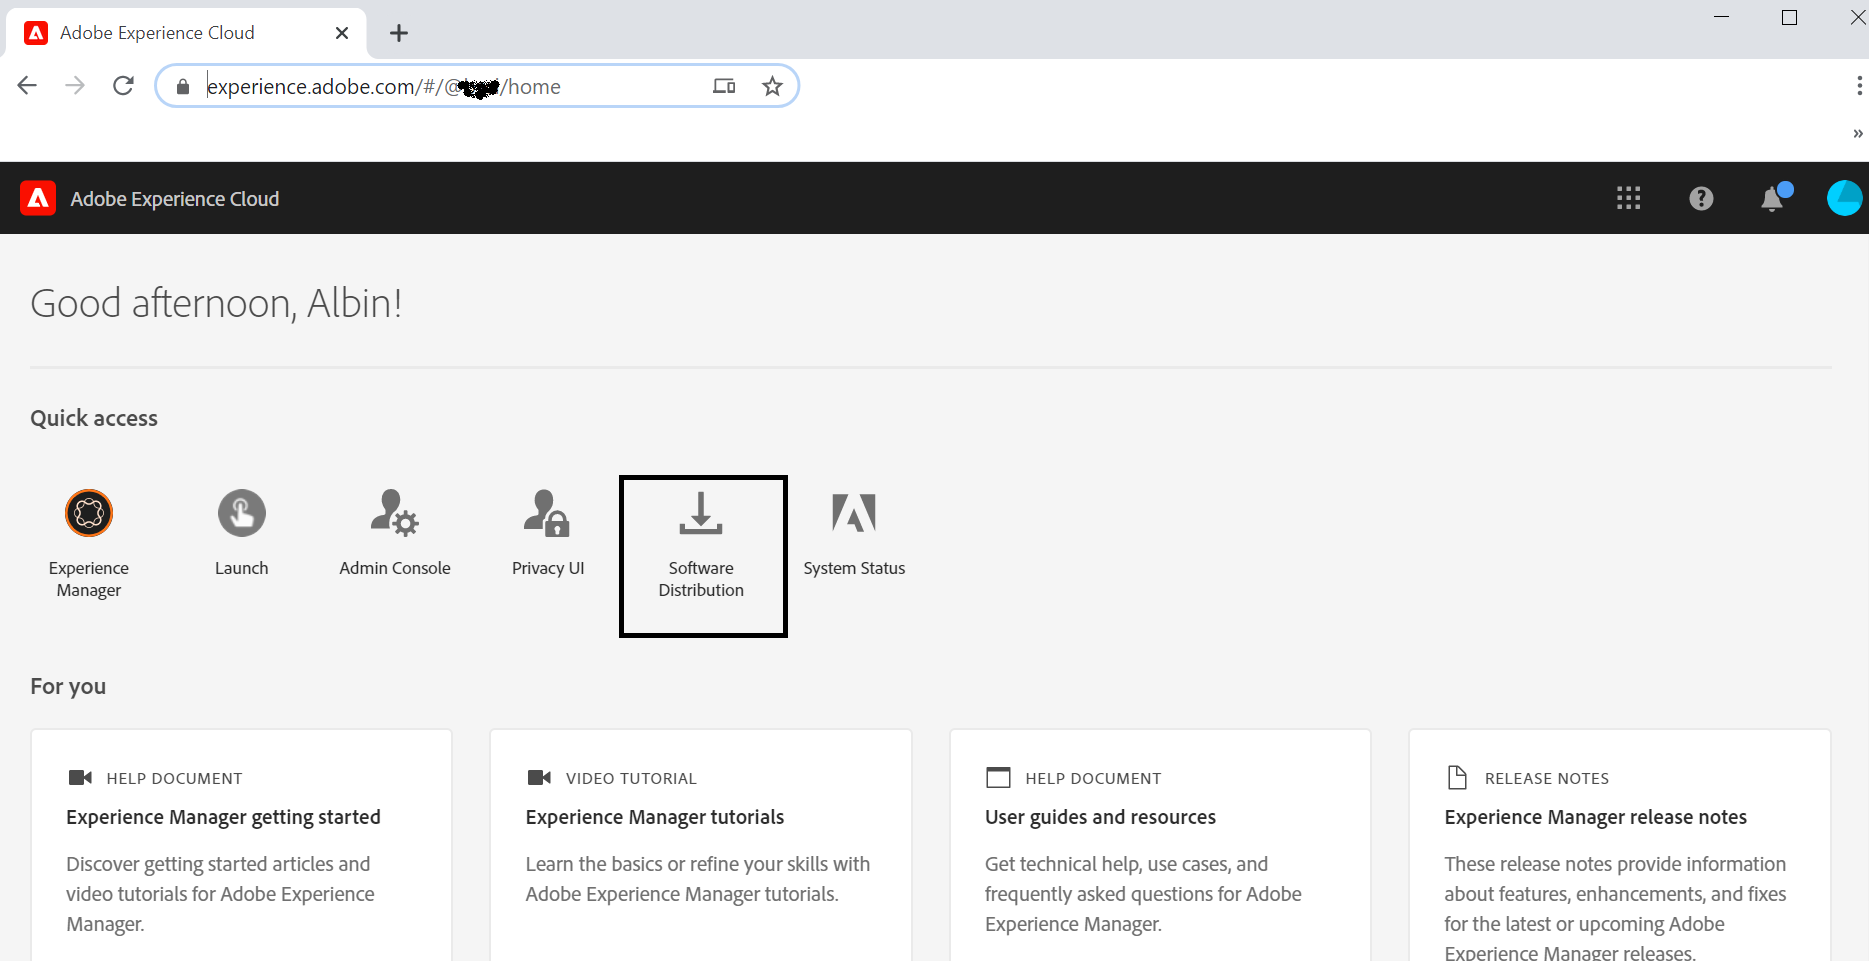
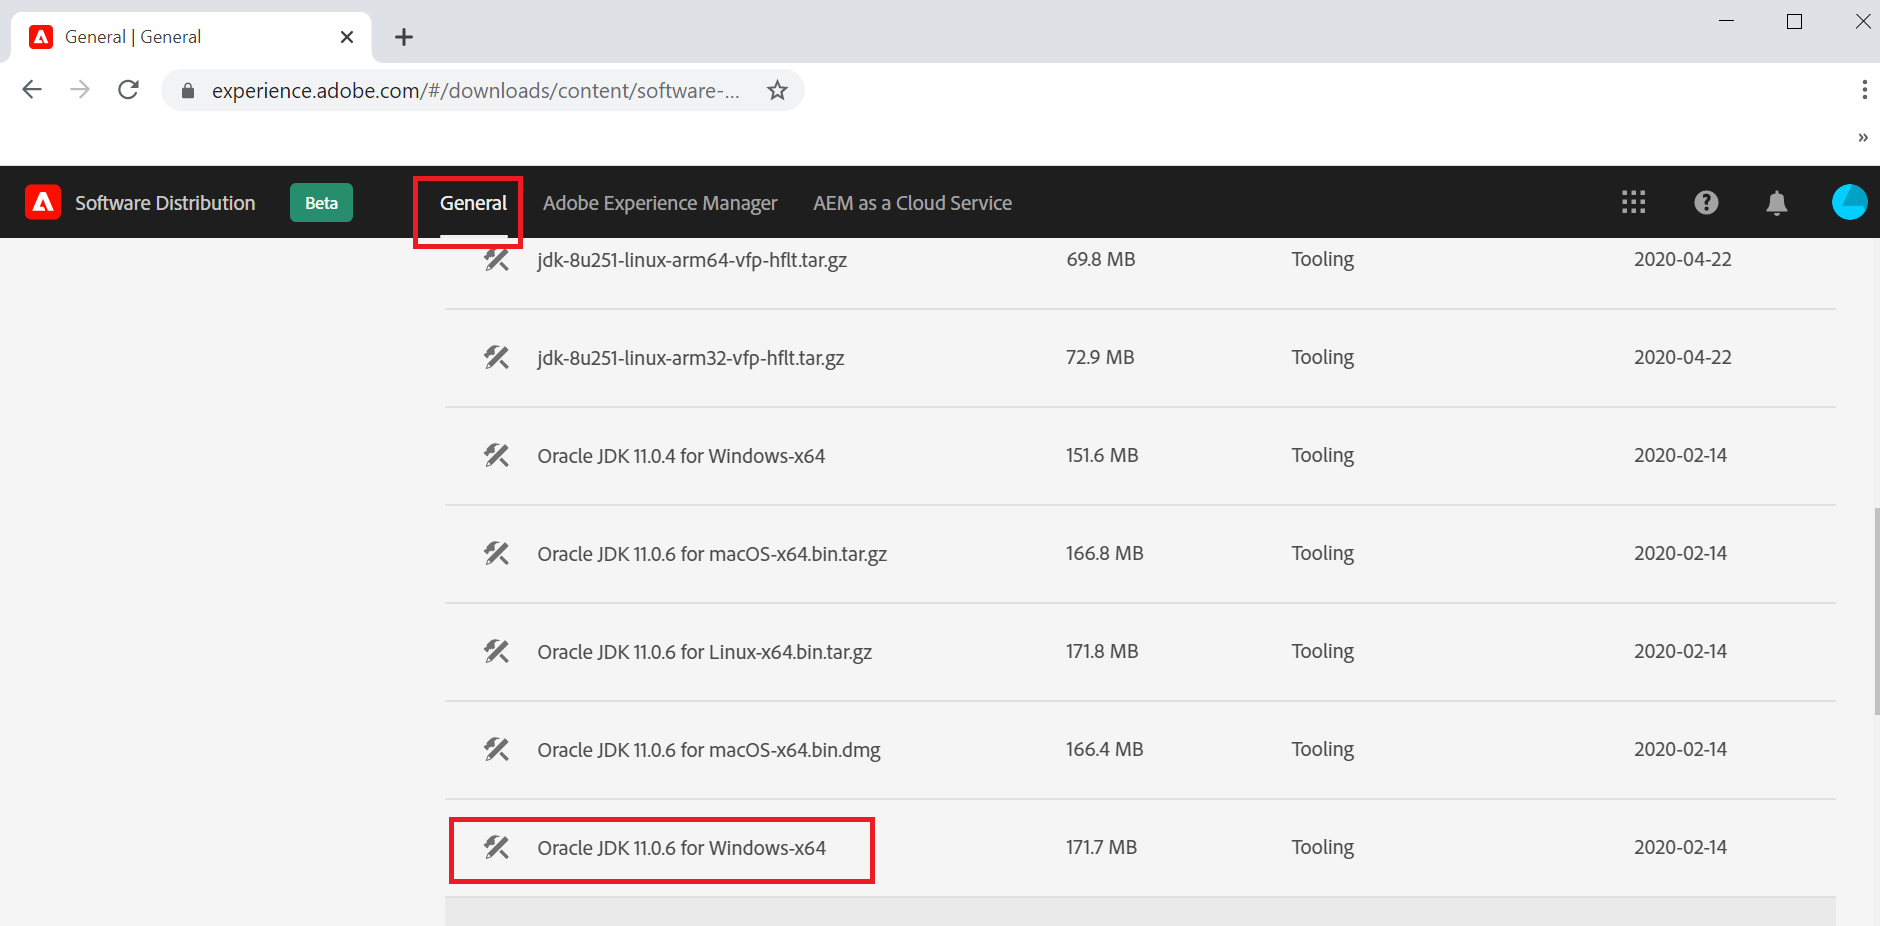
Download Java and AEM SDK software’s from https://experience.adobe.com/(your user id should have the required permissions to download the software's).


Latest SDK

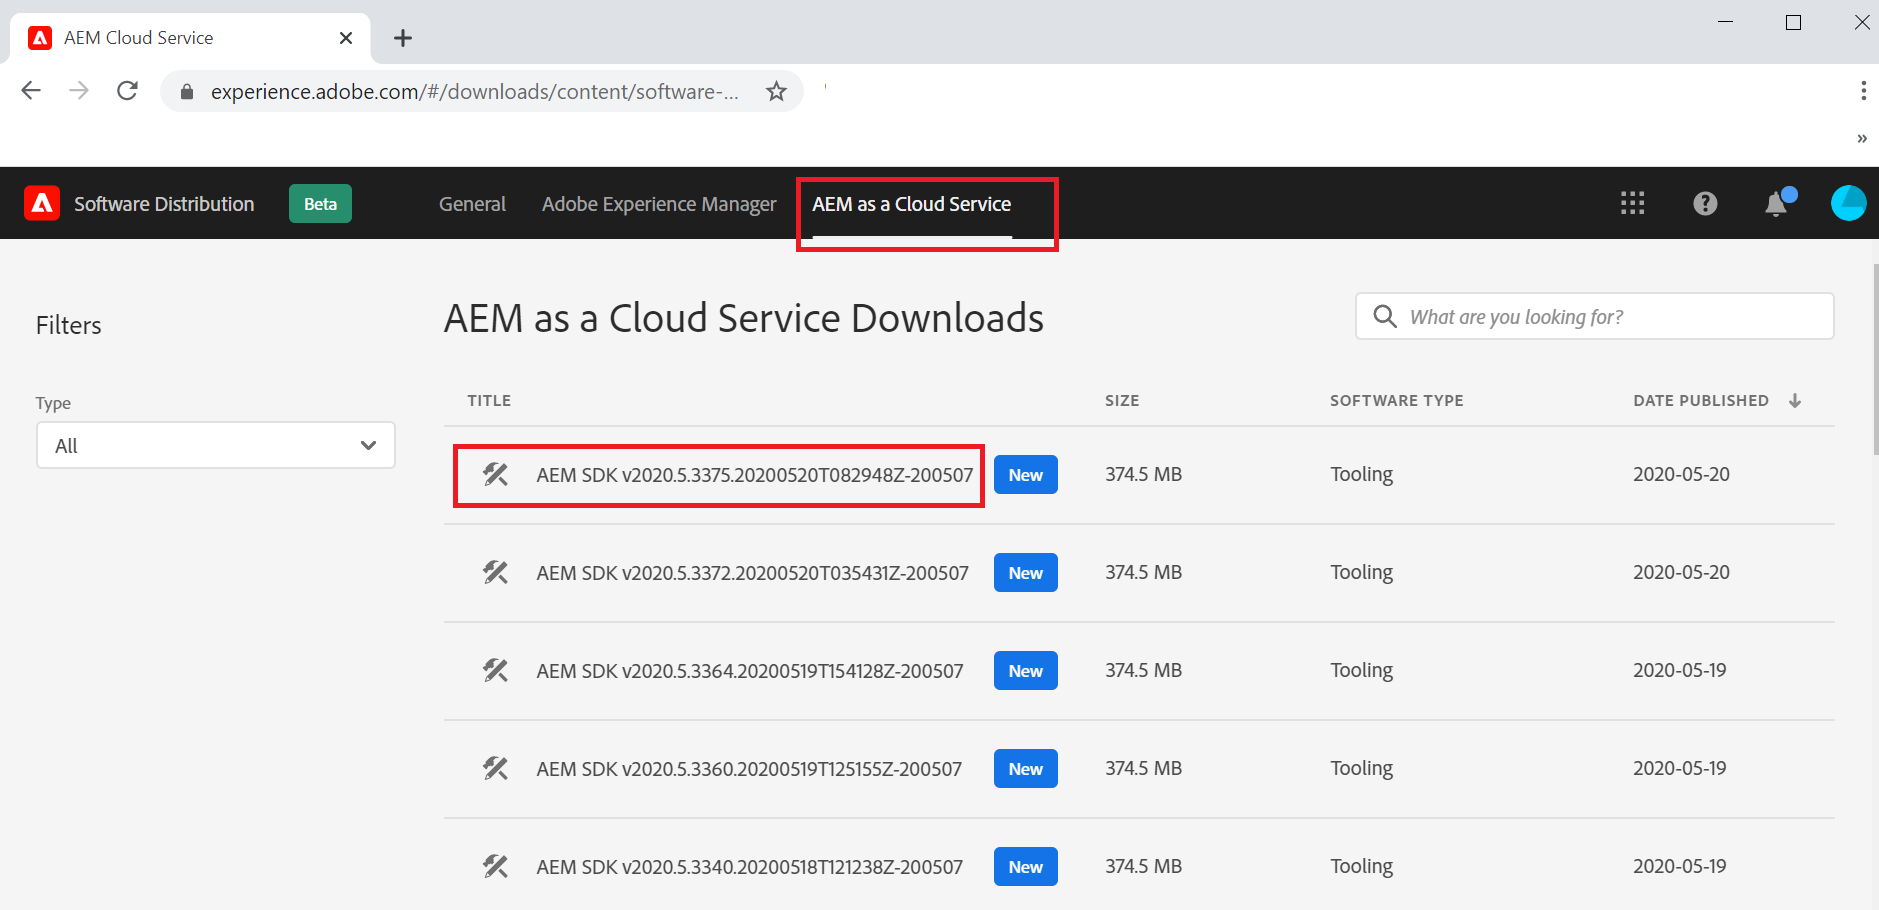
Extract the Java(jdk-11.0.6_windows-x64_bin.zip) and AEM SDK(aem-sdk-2020.5.3375.20200520T082948Z-200507.zip) files into a local folder
Setup AEM Publisher
Create a local folder with name publish and copy aem-sdk-quickstart-2020.5.3375.20200520T082948Z-200507.jar file from the extracted SDK folder into the publish folder
Rename aem-sdk-quickstart-2020.5.3375.20200520T082948Z-200507.jar file to aem-sdk-quickstart-publish-p4503.jar
Open a windows command prompt and navigate to the folder(publish) where the jar file is(aem-sdk-quickstart-publish-p4503.jar) located.
Set the JAVA_HOME and PATH environment variables pointing to the JDK 11(ignore this step if the JDK is already installed and configured through system variables)

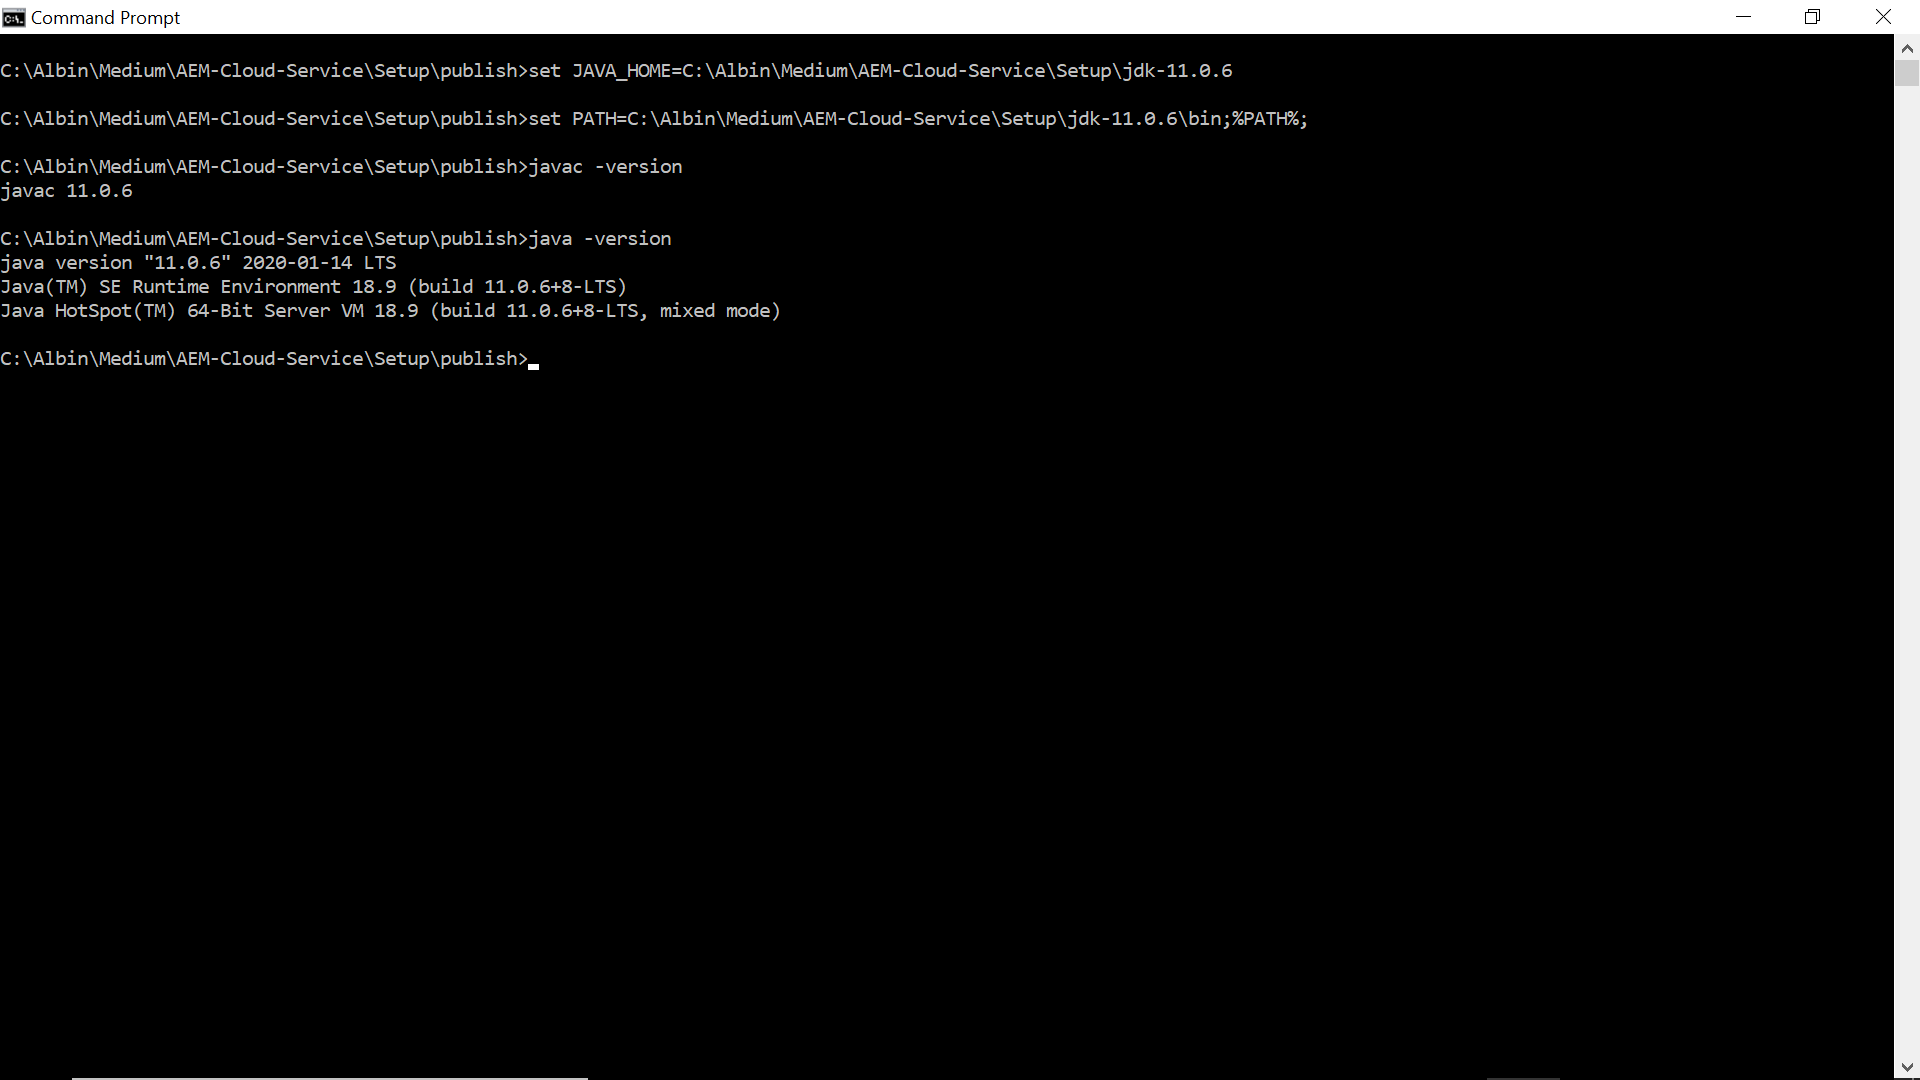
Execute the following command — java -jar aem-sdk-quickstart-publish-p4503.jar(enter the required admin password).

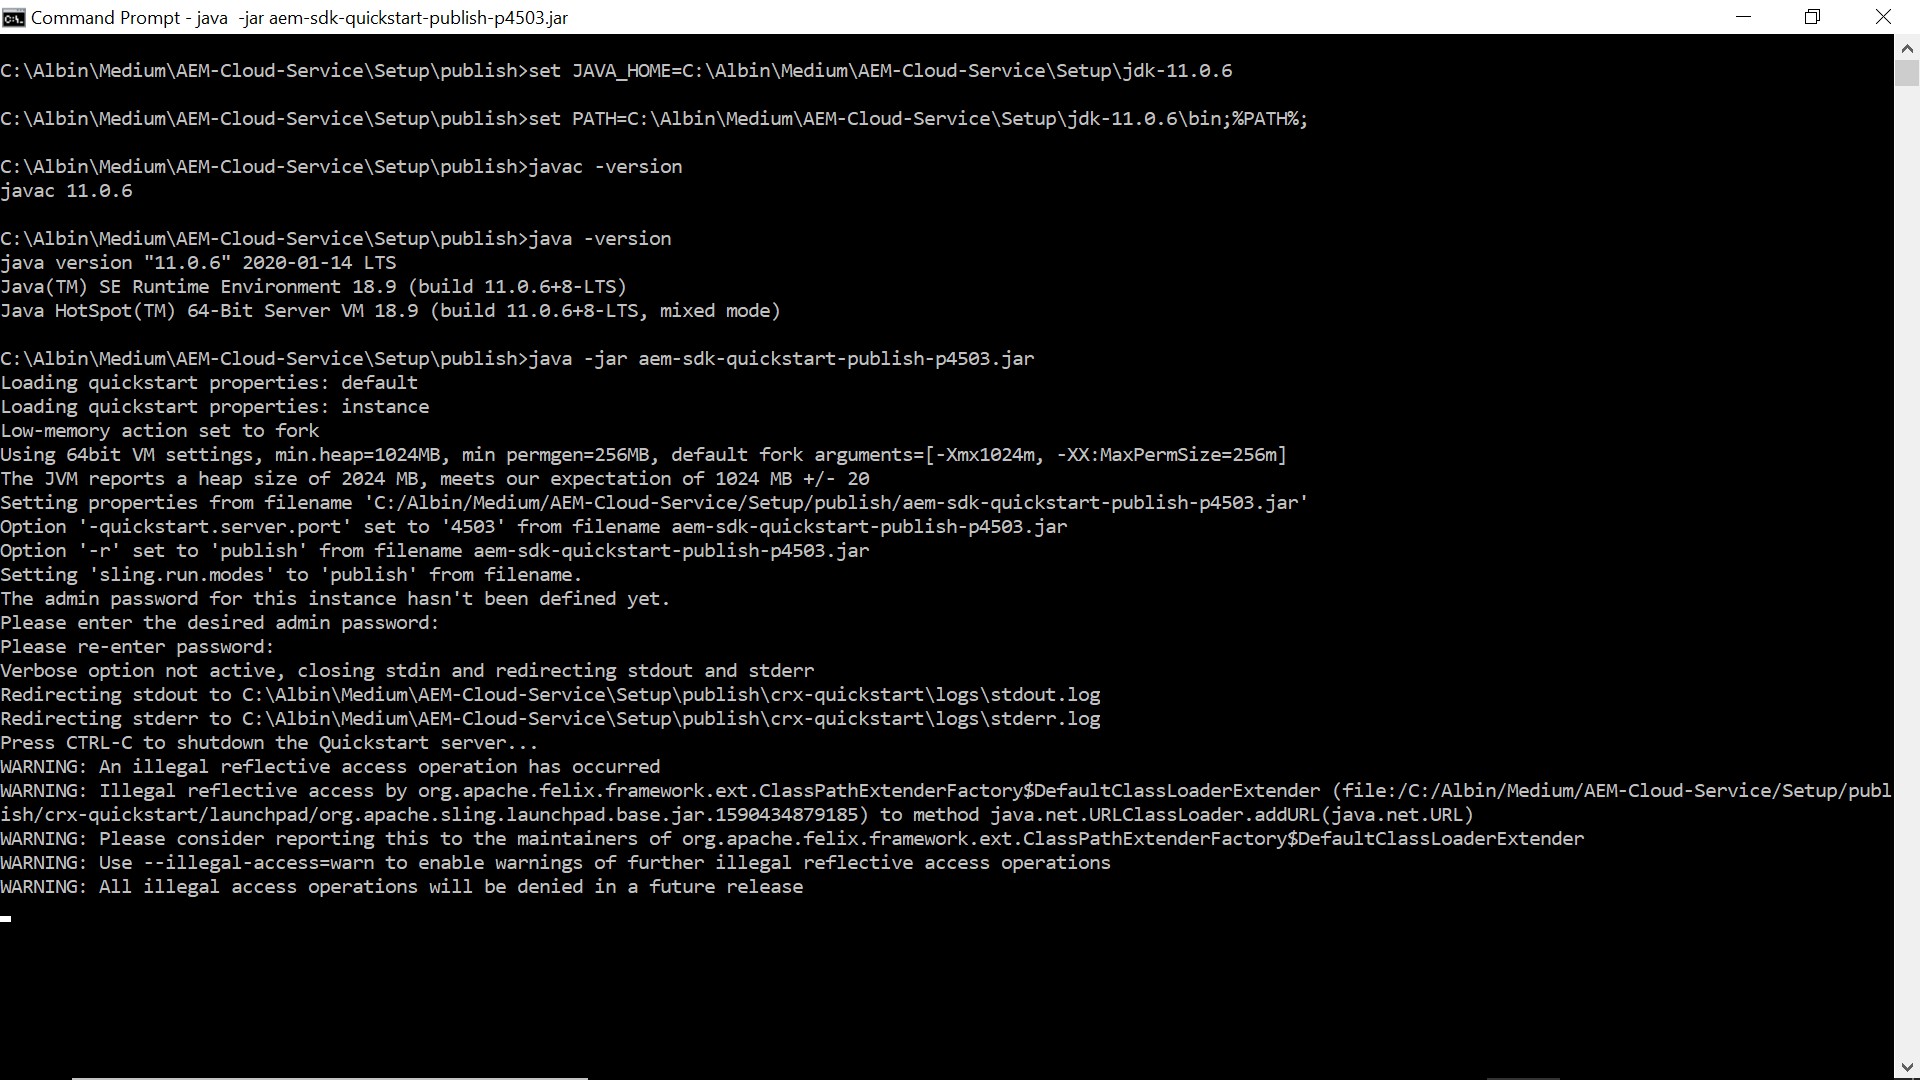
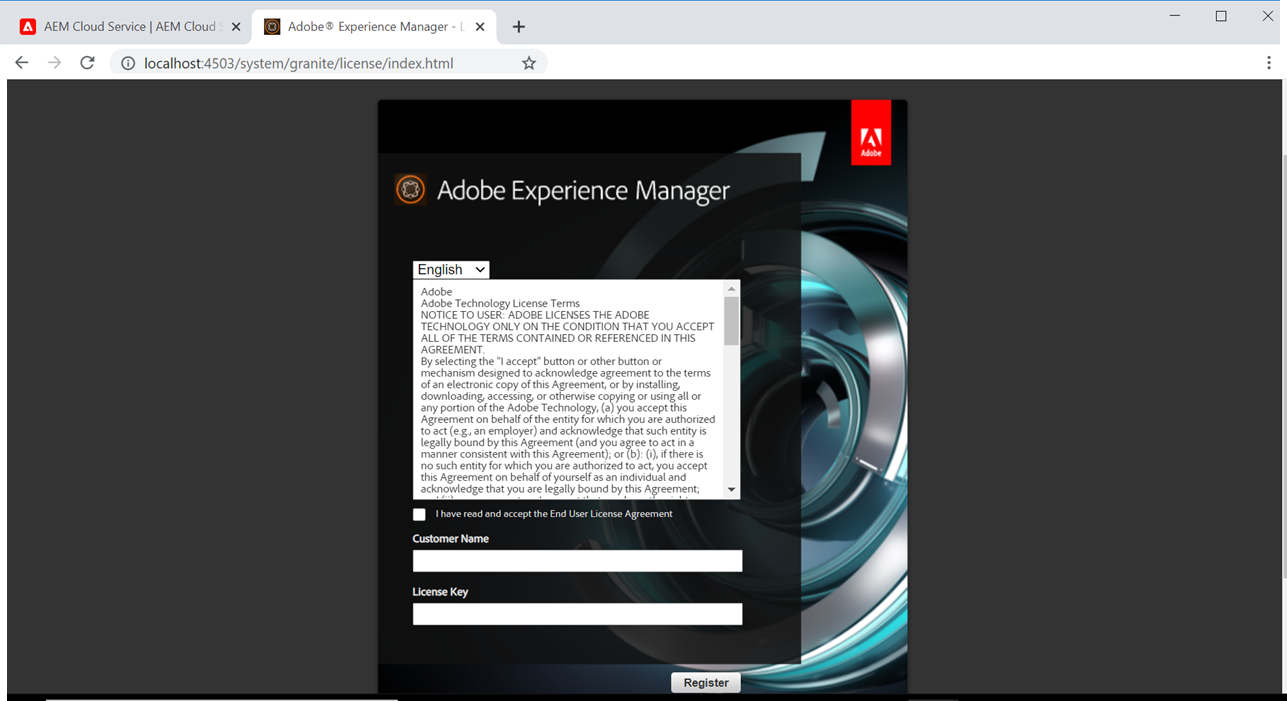
The server URL — http://localhost:4503 should be accessible once after the installation is completed, you should have the valid AEM license to access the server URL’s. Enter the license details first time when the URL’s are accessed


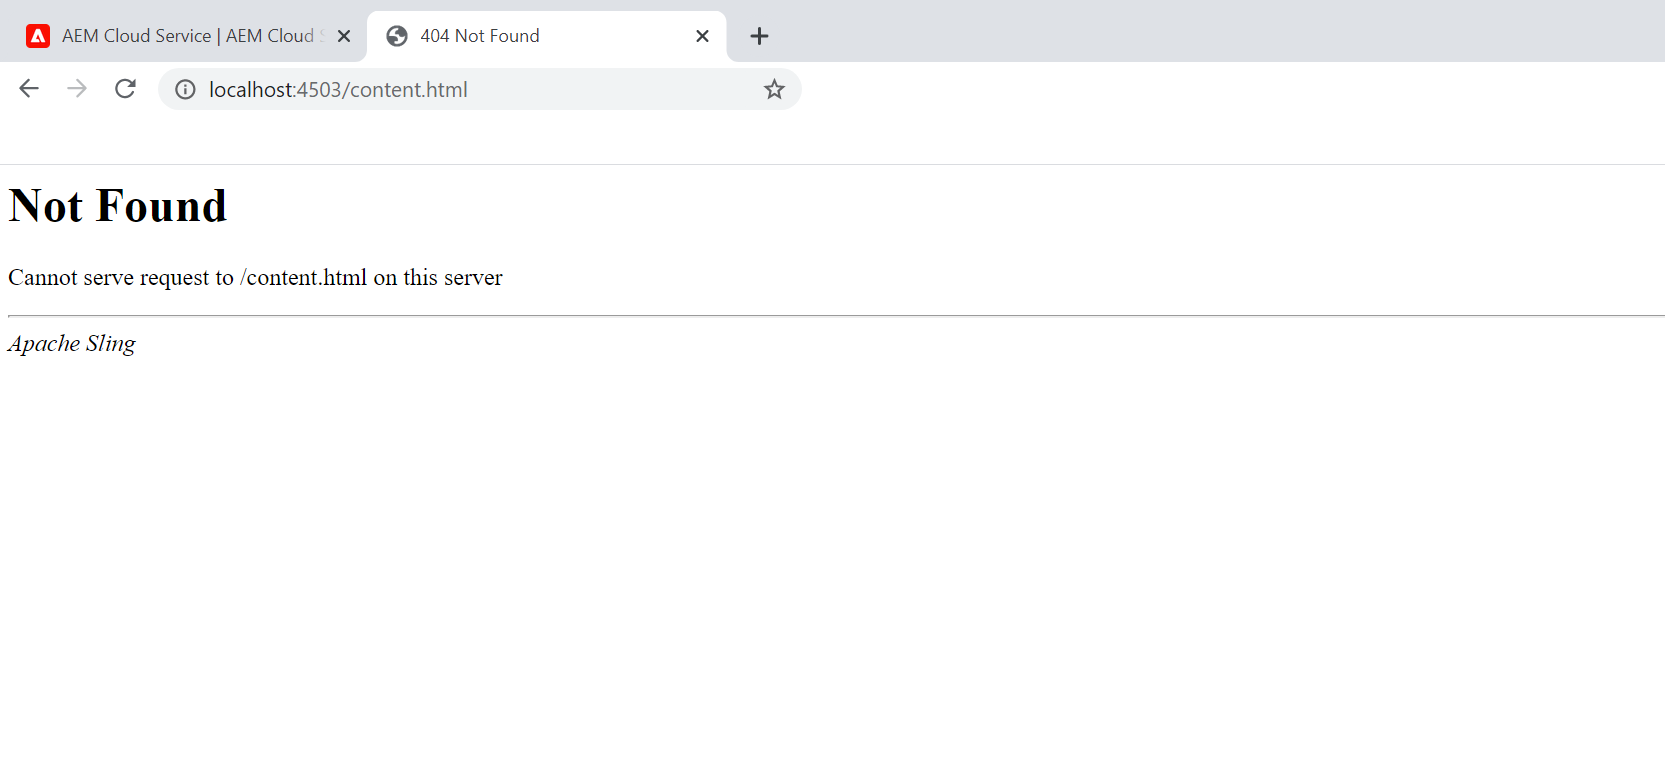
The ‘Not Found’ page is displayed as there is no default AEM website enabled on the server.
System Console — http://localhost:4503/system/console
Note: — The same steps can be followed for Author — rename the jar file to aem-sdk-quickstart-author-p4502.jar
Setup WKND Website
There is no default website configured in the new AEM instance, we can download the the sample WKND website package — aem-guides-wknd.all-0.0.2.zip from https://github.com/adobe/aem-guides-wknd/releases(you can also download the code and deploy).

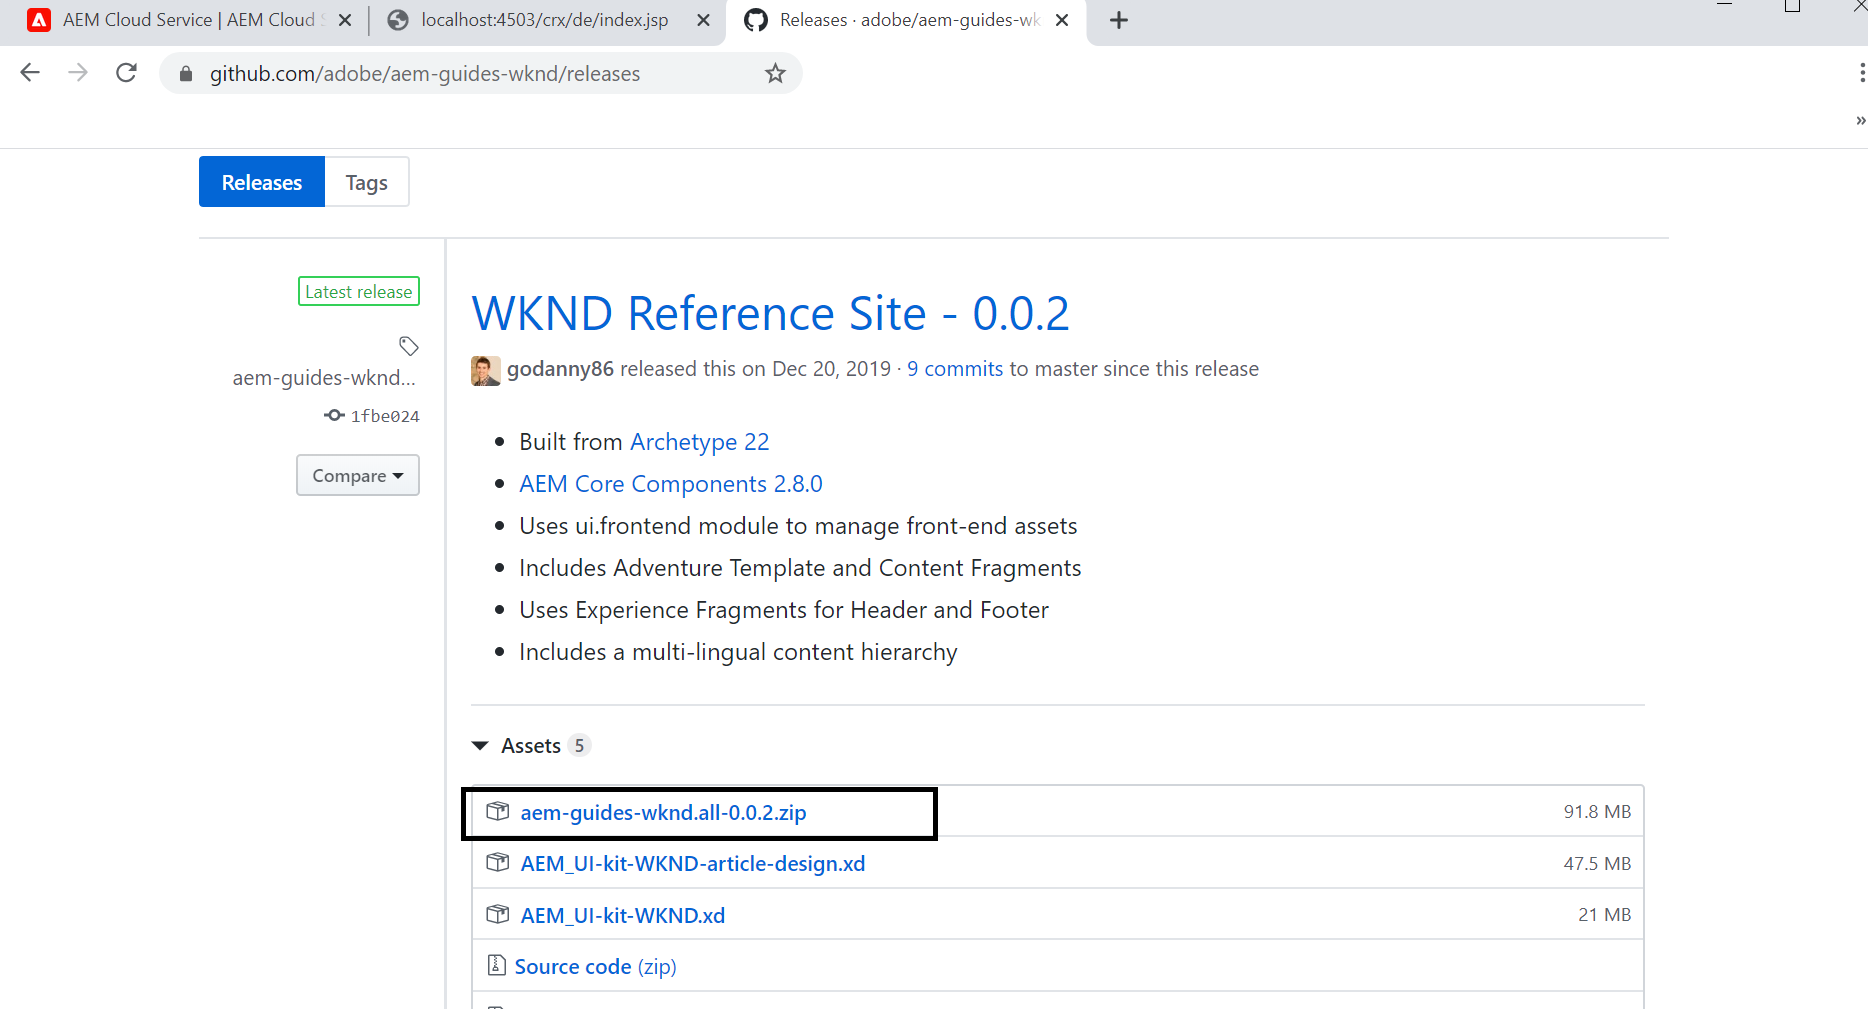
Upload the package to AEM package manager(http://localhost:4503/crx/packmgr/index.jsp) and install

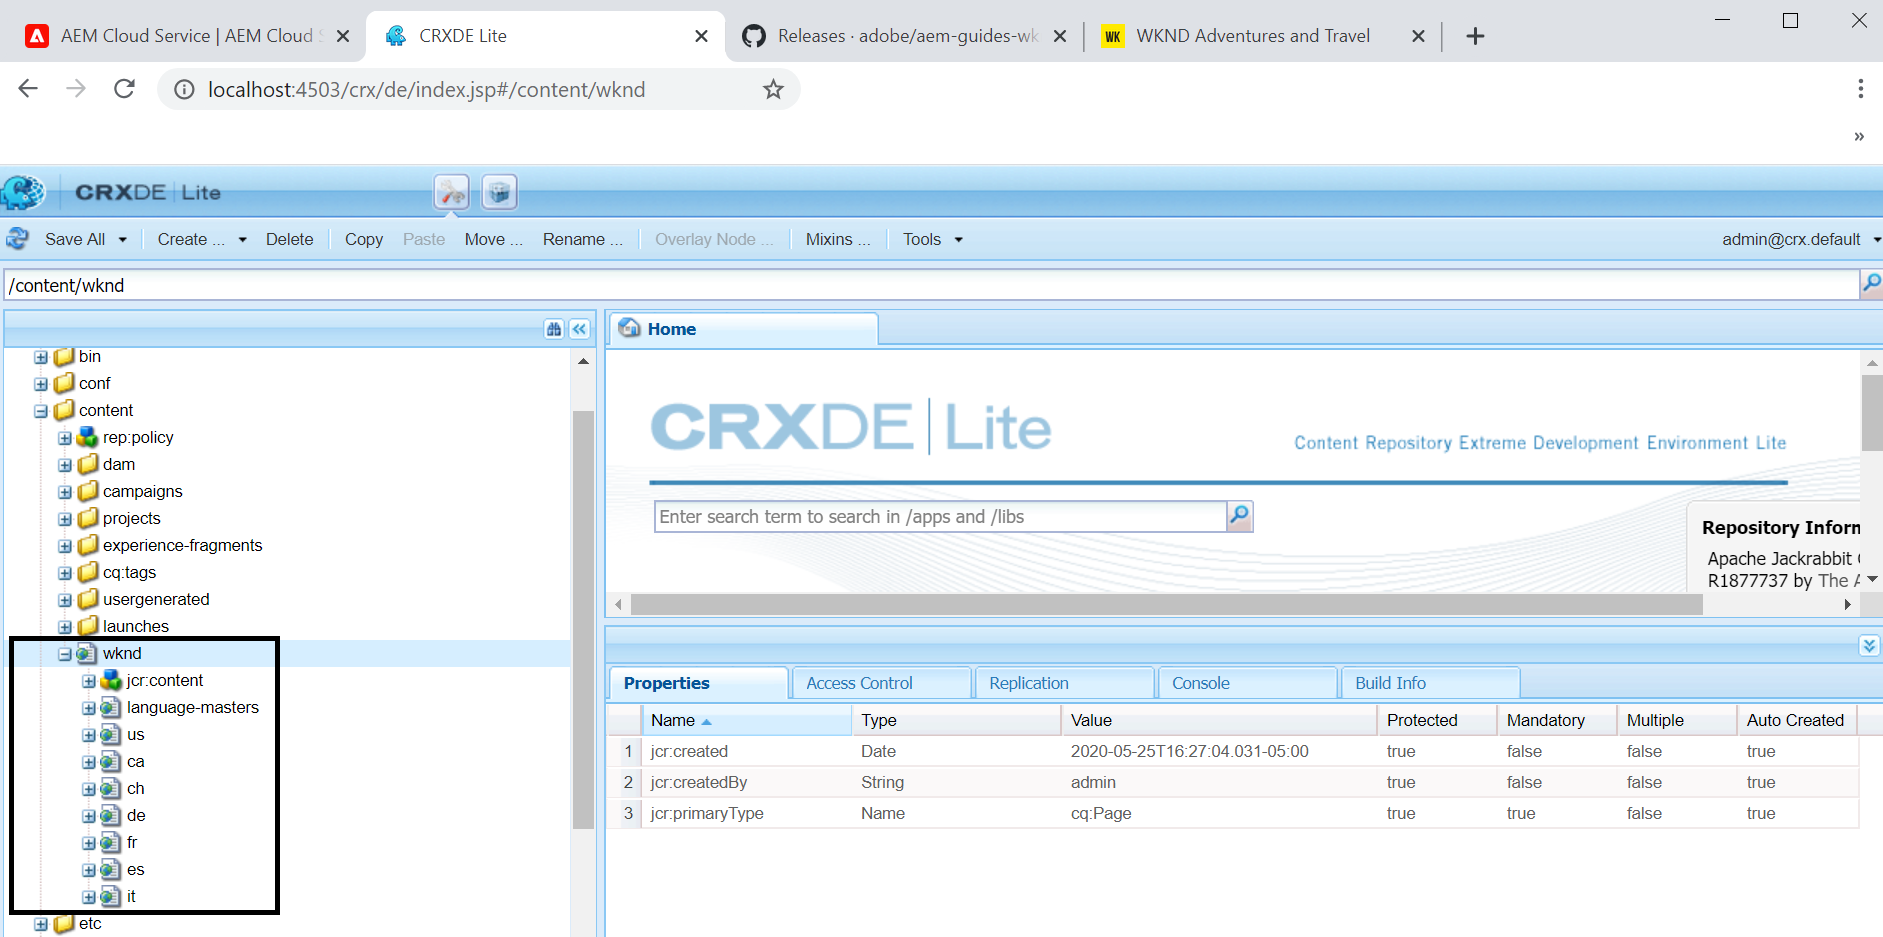
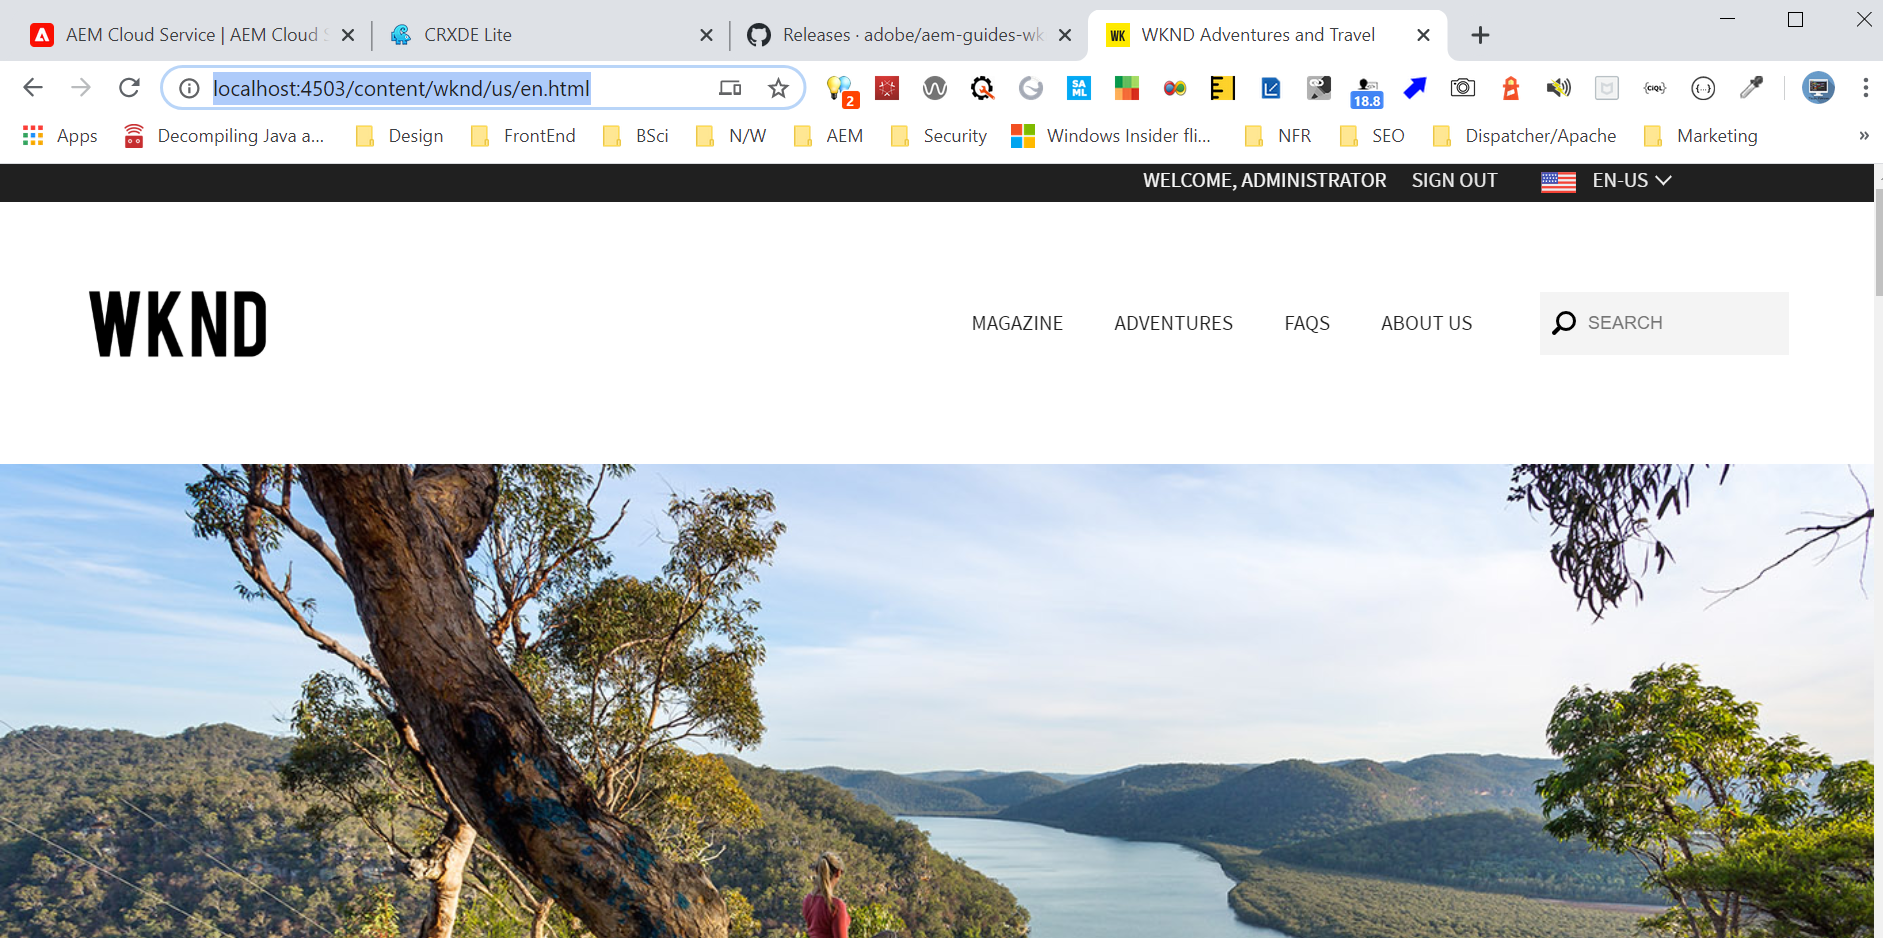
Now the WKND website is accessible through publisher — http://localhost:4503

Setup AEM Dispatcher
Extract aem-sdk-dispatcher-tools-2.0.22-windows.zip file created by extracting the SDK zip file(aem-sdk-2020.5.3375.20200520T082948Z-200507.zip) into the dispatcher folder(create the dispatcher local folder).
Download and Install the latest version of docker desktop — https://www.docker.com/products/docker-desktop, start the docker desktop before proceeding with the next steps.
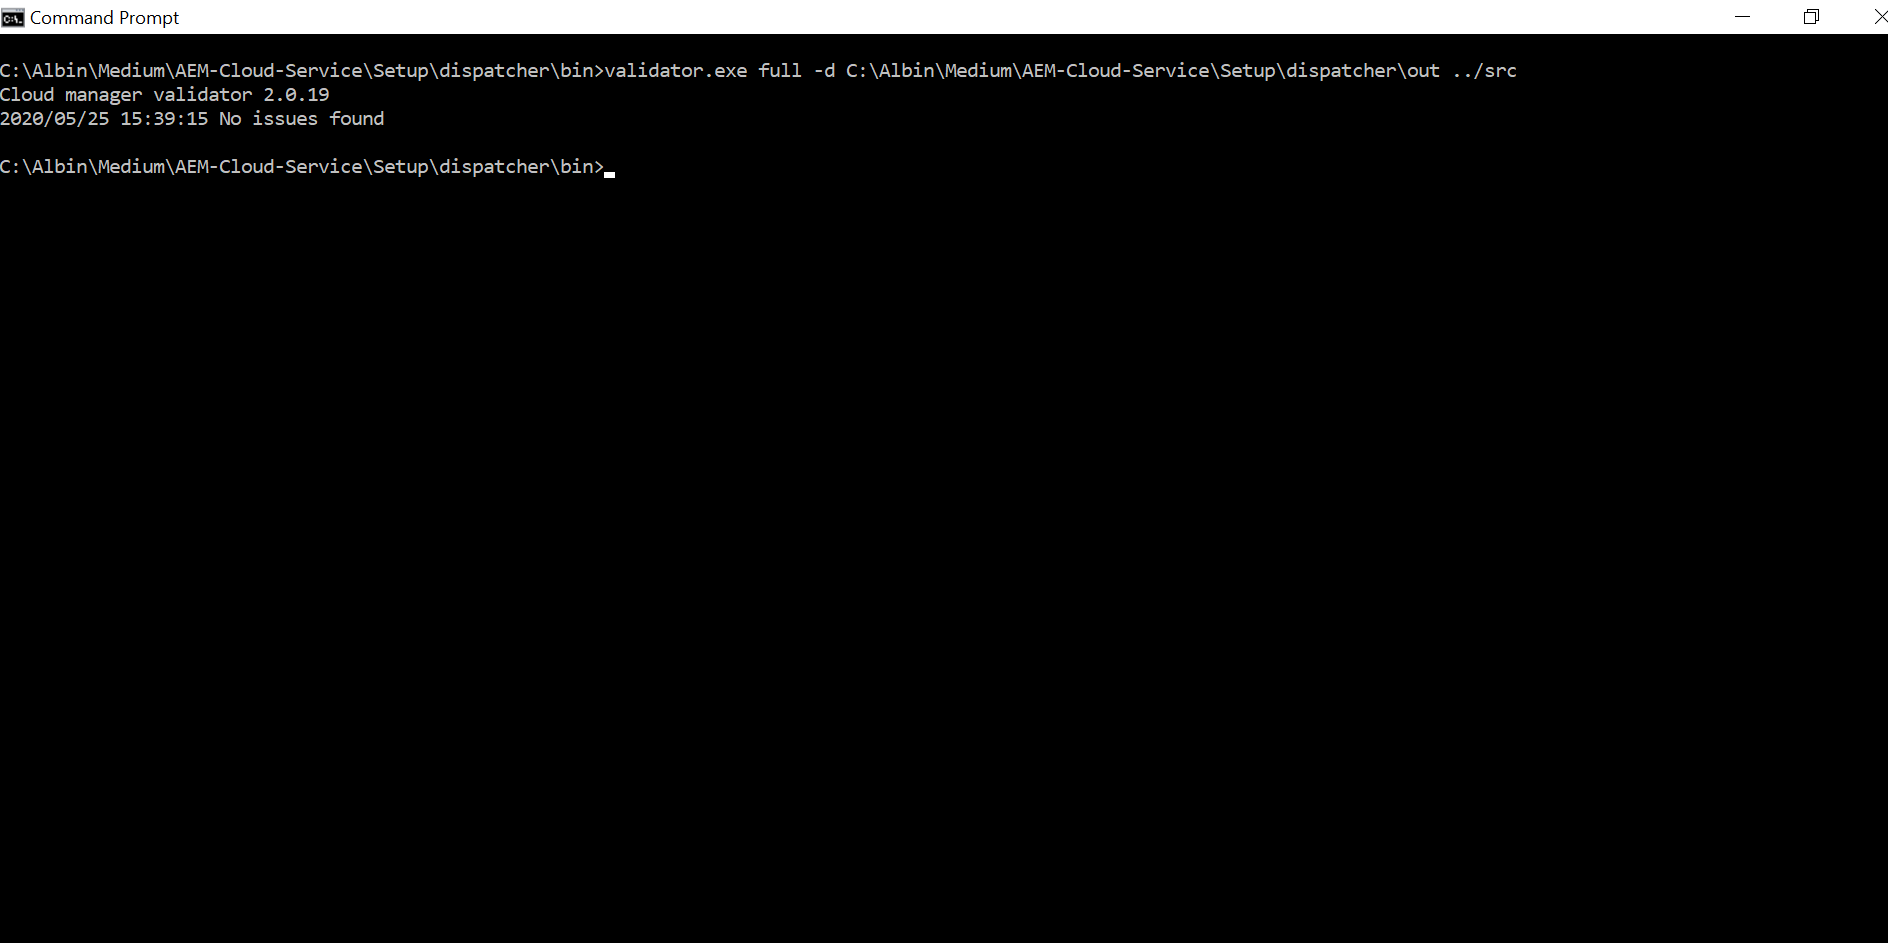
Validate the default dispatcher configurations, the default configurations are available under the dispatcher folder created above — dispatcher/src/conf.d and dispatcher/src/conf.dispatcher.d
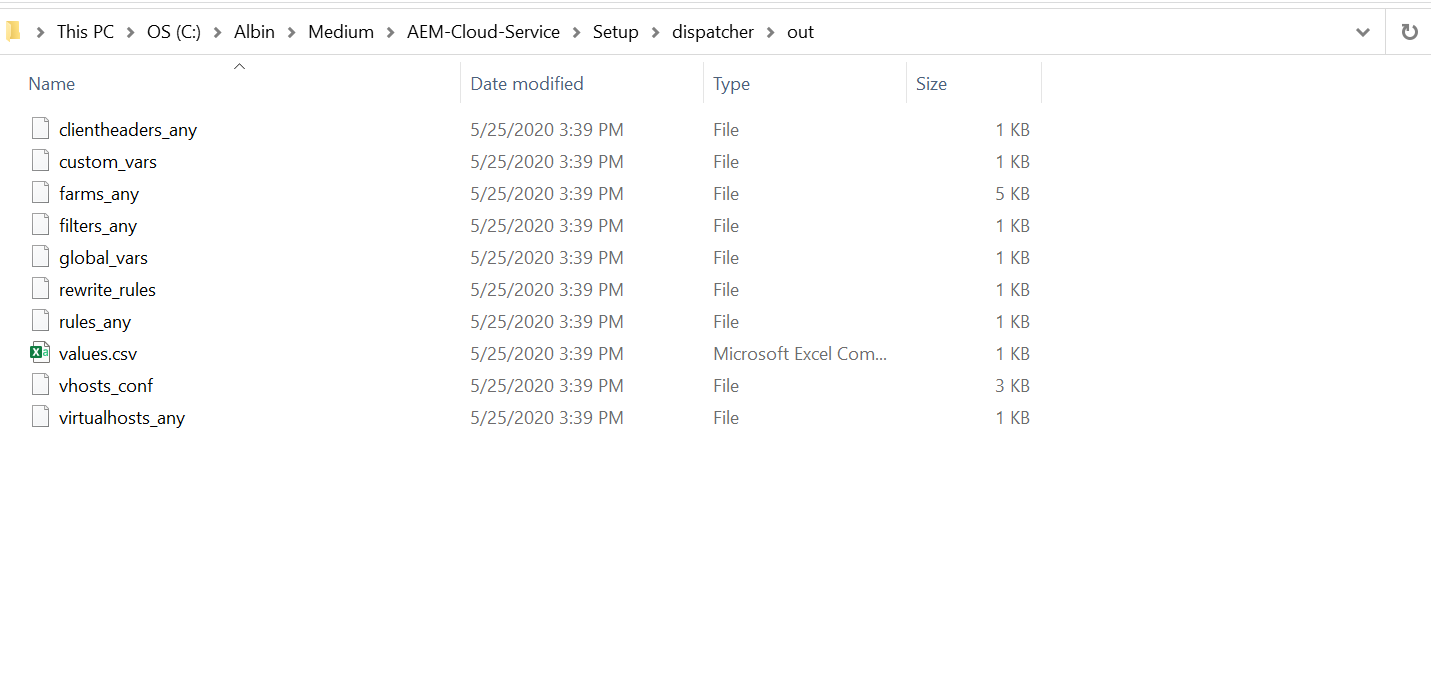
Navigate to dispatcher/bin folder from windows command prompt and execute — validator.exe full -d C:\Albin\Medium\AEM-Cloud-Service\Setup\dispatcher\out ../src
C:\Albin\Medium\AEM-Cloud-Service\Setup\dispatcher\out — output folder to keep the generated dispatcher configurations for docker


Navigate to dispatcher/bin folder in command prompt and execute — docker_run.cmd C:\Albin\Medium\AEM-Cloud-Service\Setup\dispatcher\out host.docker.internal:4503 8080
4503 — AEM Publisher port
8080 — Dispatcher port

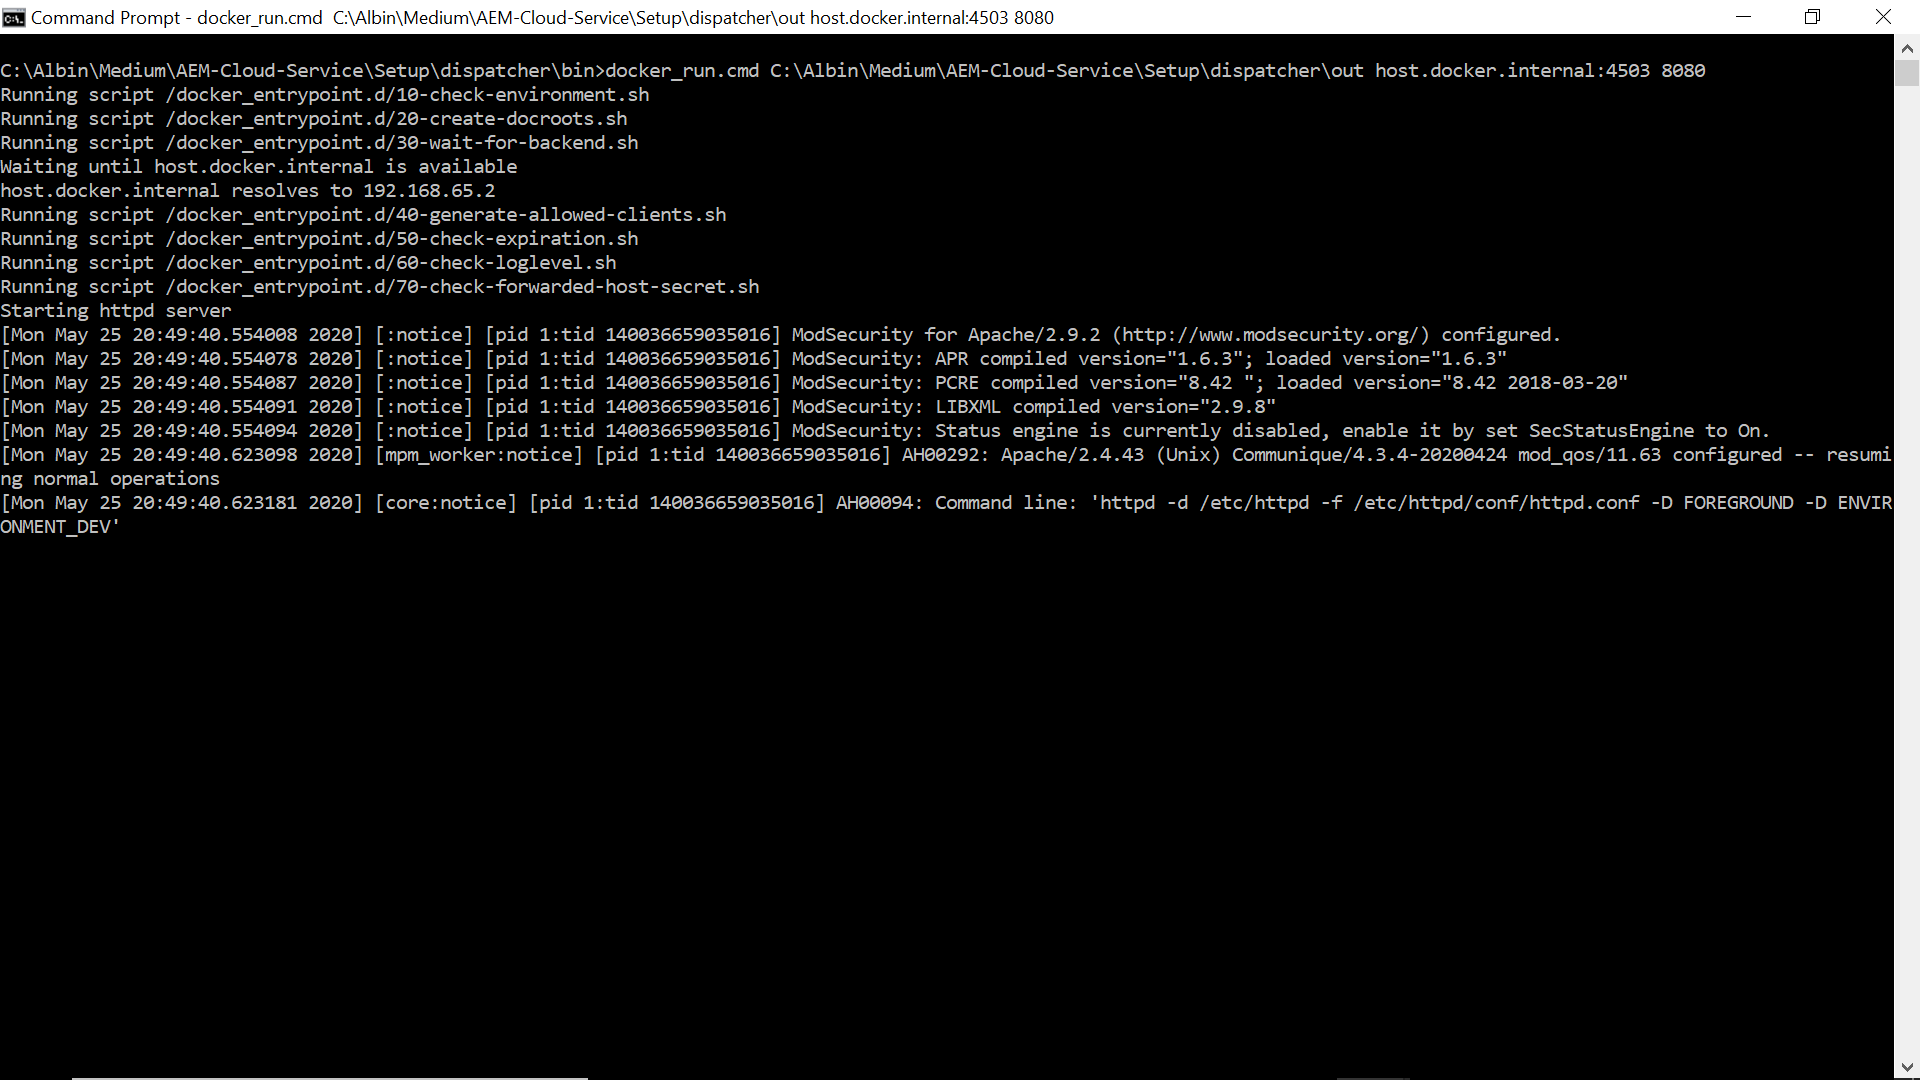
Now the dispatcher is running on port 8080 and connected to AEM publisher on port 4503
Access the WKND website through dispatcher — http://localhost:8080/


The basic local setup for the AEM as cloud service is completed now, follow the below steps to create new custom project for AEM cloud.
Create a new AEM Project for AEM Cloud
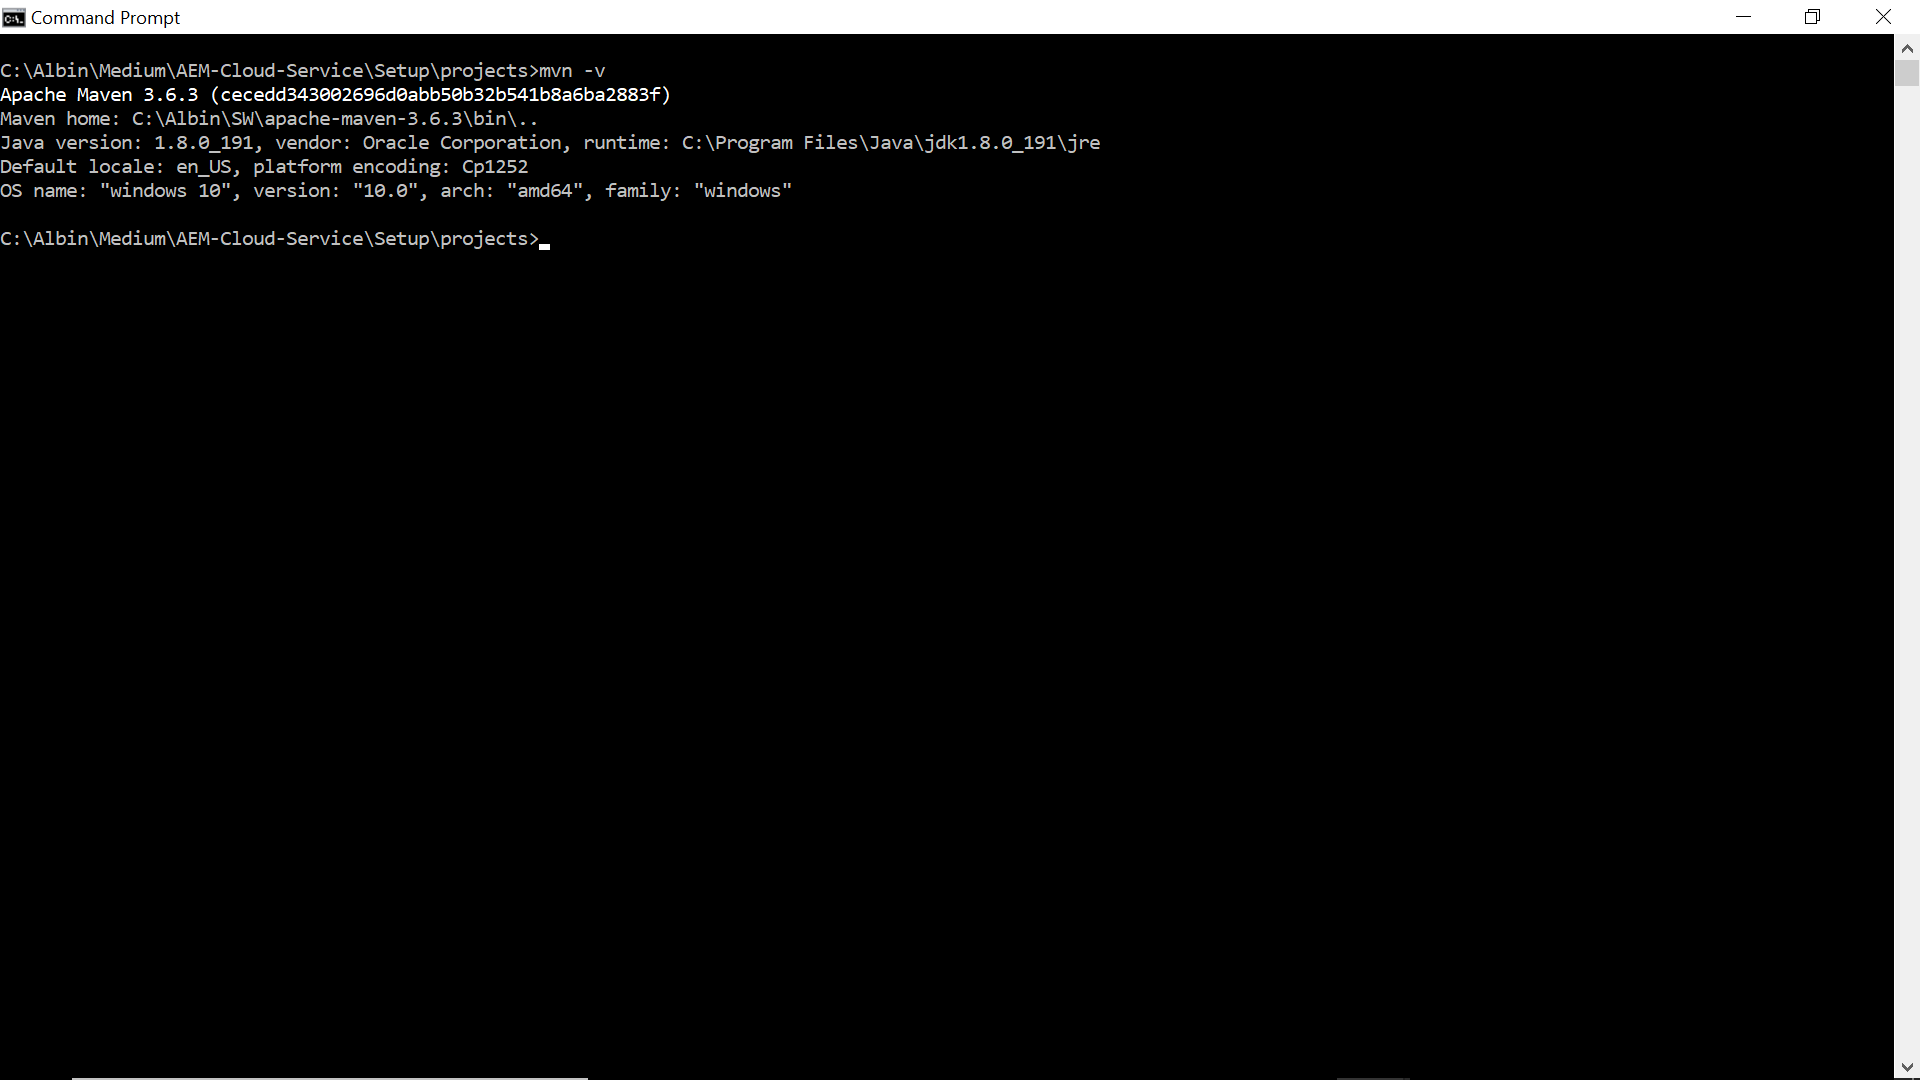
The new project supported for AEM cloud service can be created by using the below Maven command (the command should be executed as a administrator or with elevated access, the latest Maven version should be installed on the system)
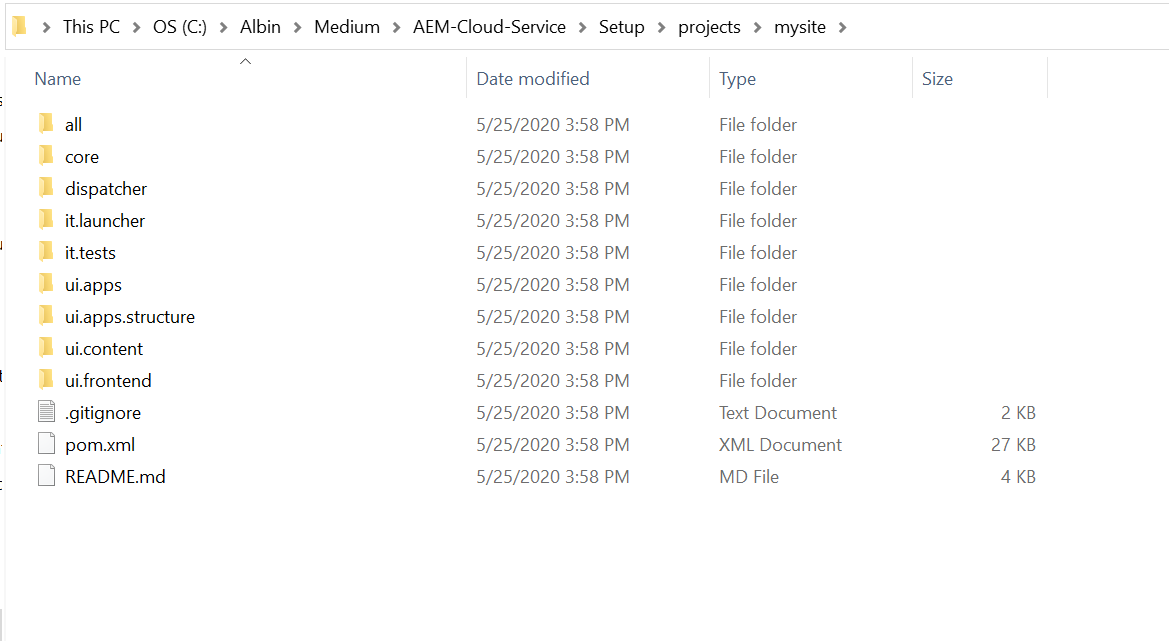
mvn -B archetype:generate -D archetypeGroupId=com.adobe.granite.archetypes -D archetypeArtifactId=aem-project-archetype -D archetypeVersion=23 -D aemVersion=cloud -D appTitle=”My Site” -D appId=”mysite” -D groupId=”com.mysite” -D frontendModule=general -D includeExamples=n


You can modify the project files and deploy to Local AEM server through the below mvn command(execute the command from the root folder of the project)
Author — mvn clean install -PautoInstallPackage
Publish — mvn clean install -PautoInstallPackagePublish
Conclusion
This concludes the local setup for AEM as Cloud service development in windows system(AEM servers and Dispatcher), this helps to develop and test the changes before moving the code packages on to the Cloud Service. The tested changes(AEM or Dispatcher) can be deployed to AEM as a Cloud service through Adobe Cloud Manager (Cloud Manager will run a CI/CD pipeline to ensure the quality of the deployment). AEM as a Cloud Service now provides the seamless upgrade experience to the AEM platforms.
No comments:
Post a Comment