This tutorial explains the details on configuring the Auto Completion enabled search form to a website with Adobe Search and promote.
Autocomplete, or word completion, is a feature in which the search form recommends the search terms based on the word user beginning to type.


Configure auto-completion
I am enabling the indexing through IndexConnector and enabling custom JSON based templates.
Refer the below URL for details on enabling IndexConnector and the custom templates.
Sample XML feed data
<feed xmlns:xs="http://www.w3.org/2001/XMLSchema" version="2.0">
 <channel>
  <title>Product Feed</title>
  <Item>
   <link>https://qa.example.com/product-title/p/prod1</link>
   <title>
   <![CDATA[Java Title1]]>
   </title>
   <description>
   <![CDATA[<p>Prod1 description</p>]]>
   </description>
   <productType>Java</productType>
   <ProductId>prod1</ProductId>
   <imageUrl>/content/dam/Images/product/prod1.jpg</imageUrl>
  </Item><Item>
   <link>https://qa.example.com/product-title/p/prod2</link>
   <title>
   <![CDATA[Java Title2]]>
   </title>
   <description>
   <![CDATA[<p>Prod2 description</p>]]>
   </description>
   <productType>java</productType>
   <ProductId>prod2</ProductId>
   <imageUrl>/content/dam/Images/product/prod2.jpg</imageUrl>
  </Item><Item>
   <link>https://qa.example.com/product-title/p/prod3</link>
   <title>
   <![CDATA[Java Title3]]>
   </title>
   <description>
   <![CDATA[<p>Prod3 description</p>]]>
   </description>
   <productType>java</productType>
    <ProductId>prod3</ProductId>
   <imageUrl>/content/dam/Images/product/prod3.jpg</imageUrl>
  </Item>
  <Item>
   <link>https://qa.example.com/product-title/p/prod4</link>
   <title>
   <![CDATA[Java Title4]]>
   </title>
   <description>
   <![CDATA[<p>Prod4 description</p>]]>
   </description>
   <productType>java</productType>
   <ProductId>prod4</ProductId>
   <imageUrl>/content/dam/Images/product/prod4.jpg</imageUrl>
  </Item>
  <Item>
   <link>https://qa.example.com/product-title/p/prod5</link>
   <title>
   <![CDATA[Lava Title]]>
   </title>
   <description>
   <![CDATA[<p>Lava description</p>]]>
   </description>
   <productType>Lava</productType>
    <ProductId>prod5</ProductId>
   <imageUrl>/content/dam/Images/product/prod5.jpg</imageUrl>
  </Item></channel>
</feed>
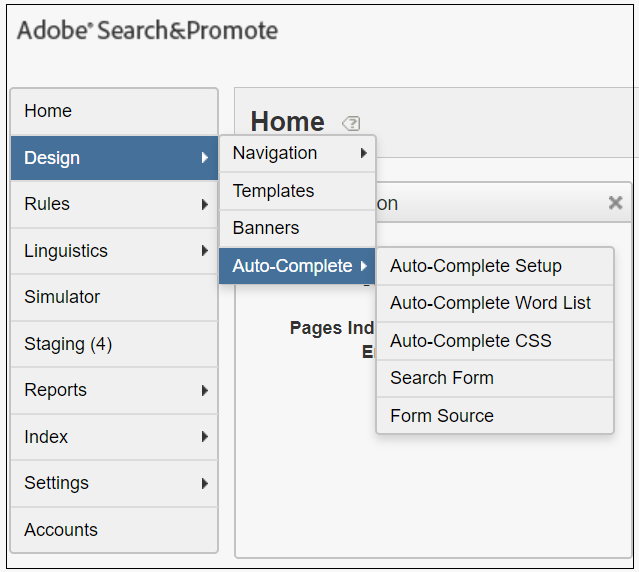
The various areas of Auto-Complete can be configured through Design → Auto-Complete

Auto-Complete Setup
Configure and setup the options that control the generation of the auto-complete enabled search form

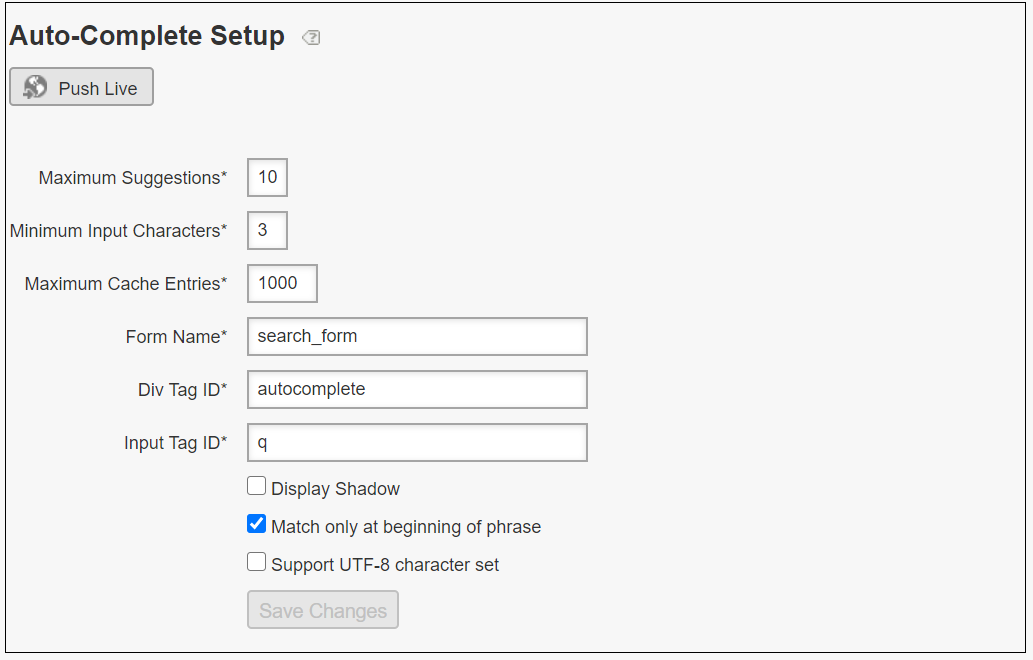
Maximum suggestions — Specifies the maximum number of items to display in the auto-complete suggestions list.
Minimum input characters — Specifies the number of characters that a customer must type into the auto-complete search form before it displays suggestions.
Maximum cache entries — Specifies the maximum number of previously requested auto-complete suggestions to cache in the customer’s browser. Generally, you should leave this setting at the default of 1000. While you can completely disable browser caching by setting this option to 0, it is not recommended.
Display shadow — Adds a cosmetic drop-shadow to the auto-complete suggestions list.
Form name — Specifies the “name” attribute of the auto-complete enabled search form’s “form” tag.
Div tag ID — Specifies the ID attribute of the auto-complete enabled search form’s “div” tag.
Input tag ID — Specifies the ID attribute of the auto-complete enabled search form’s “input” tag.
Match only at beginning of phrase — Specifies whether to match the with the beginning of phrase.
Enable the required configurations and save changes
Auto-Complete Word List
Configure the list of words and phrases that Auto-Complete displays to a customer as suggestions.

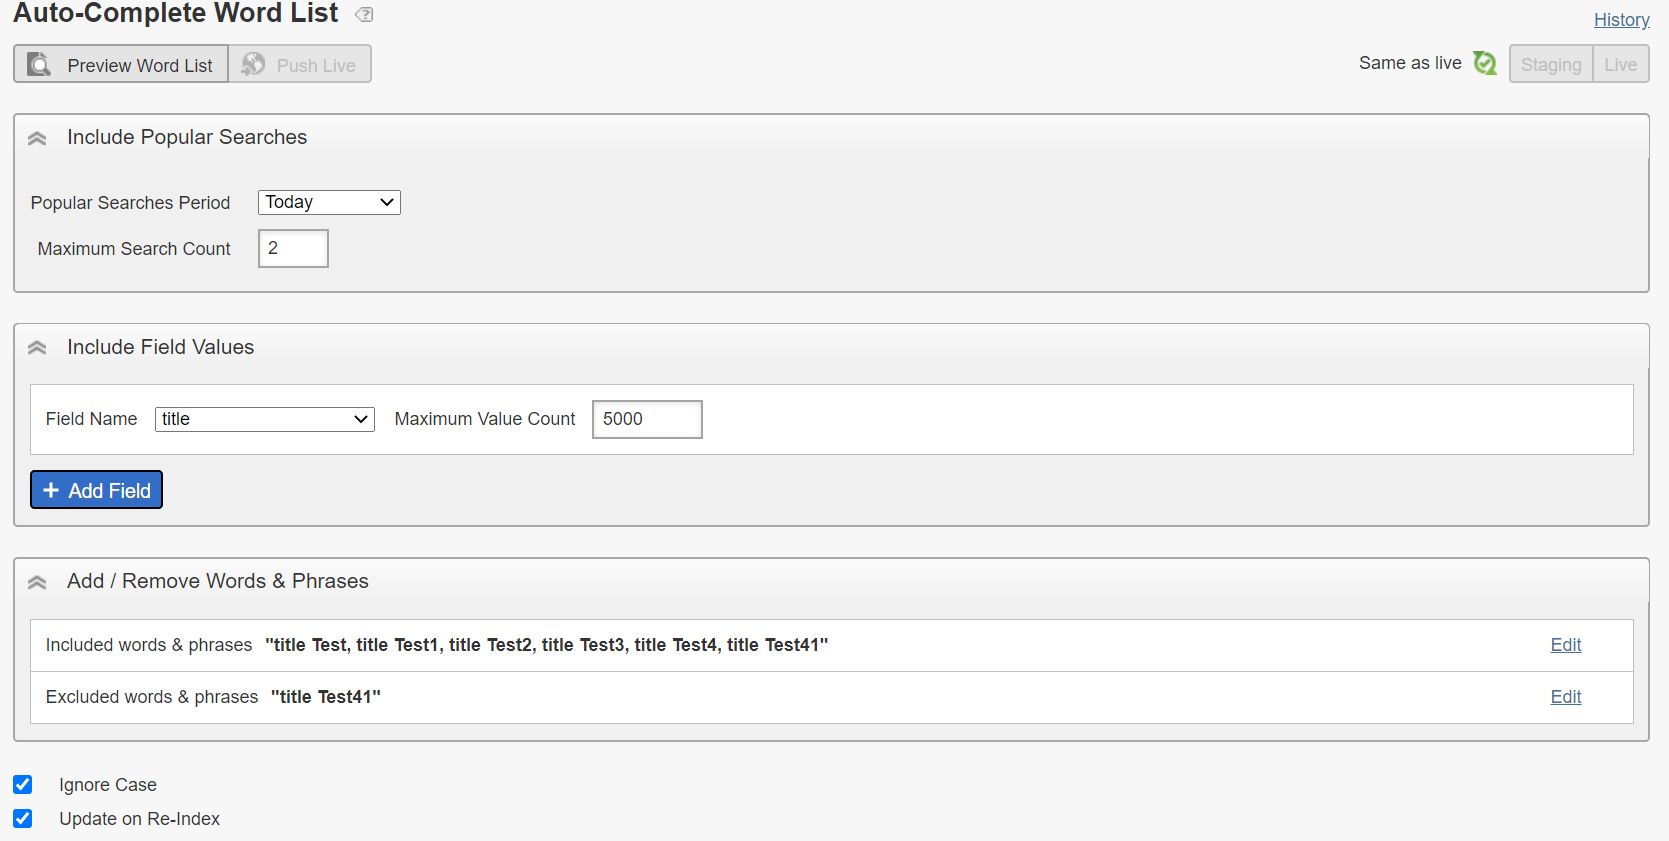
Popular Searches Period — Controls the time period for the inclusion of words and phrases from a customer’s recent searches.
Maximum Search Count — Controls the maximum number of searched words and phrases to include in the auto-complete word list. The top words and phrases, which are also the most popular, are included.
Field Name — Each field name defines the name of one field for which to include indexed values. Use + and — to add or remove field names.
Maximum Value Count — Defines the maximum count of field values that are allowed for the selected field name. The top values, which are also the most referenced, are included.
Add these words and phrases — The auto-complete word list is populated with the words and phrases that are listed in this area
Remove these words and phrases — Entries in this area are not displayed in the auto-complete word list.Regular expressions are allowed in this list. To specify a regular expression in this list, start the line with regexp followed by a single space, followed by the regular expression. Any lines in the word list that match the regular expression are removed
Ignore Case — Duplicate entries in the auto-complete word list that differ only by alphabetic uppercase/lowercase are removed; all word list entries are forced to lowercase.
Update on Re-Index — Auto-complete word list is automatically regenerated after each successful account re-index.
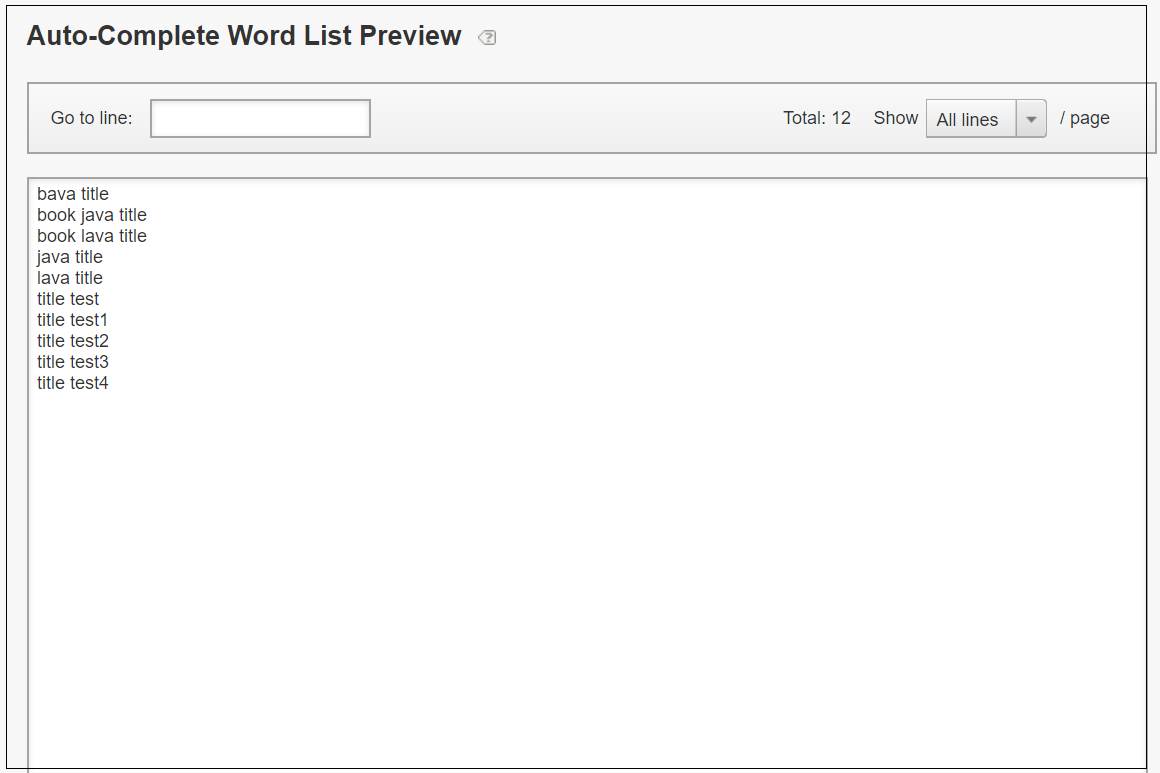
After enabling the the required configurations the final word list can be previewed — the words are included from different sources “Popular Searches”, “Field Values”, “Added Words & Phrases” and “Removed Words & Phrases”

Auto-Complete CSS
Configure the auto-complete cascading style sheet that you want to use. Auto-Complete CSS controls the content of autocomplete_styles.css, which is included as a part of the auto-complete enabled search form.The CSS you specify here controls the visual presentation of the auto-complete suggestion list.


Enable the required CSS changes.
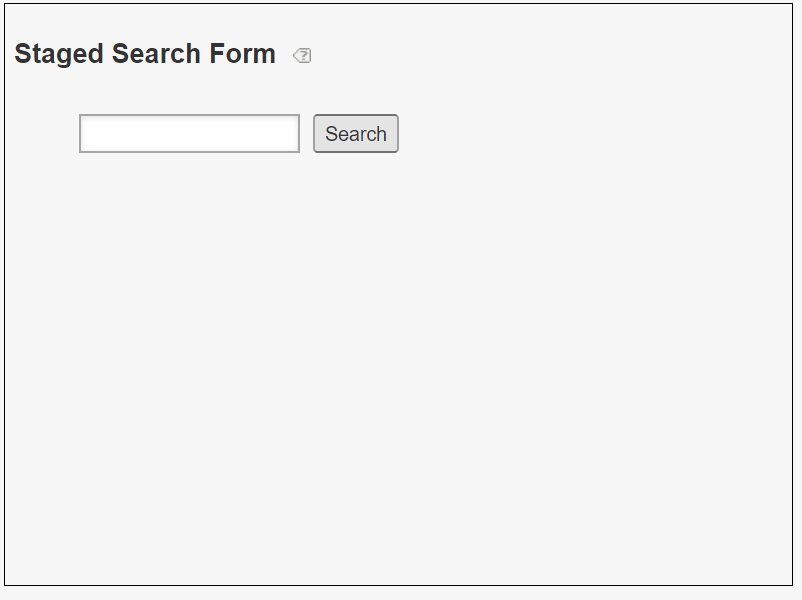
Now the form configurations ready, push the changes to live. The form can be previewed by clicking on “Search Form”

The search form HTML can be integrated to website now, retrieve the form source by clicking on “Form Source”


<html><!--To apply your custom auto-complete CSS, add the line below (un-commented) within the head section of the page containing this search form.  -->
<head>
<link rel="stylesheet" type="text/css" href="https://content.atomz.com/xxxxxxxxxx/publish/autocomplete_styles.css?sp_css_cache_ver=2" /></head><body>
<!-- Omniture HTML for Search w/Auto-Complete -->
<!-- Do not change the name of the form from "search_form"! --></br>
</br>
<div class="yui-skin-sam">
<form name="search_form" method="get" action="http://xxxxxxxxxx.guided.ss-omtrdc.net" target="_blank">
<input type="text" id="q" name="q" />
<input type="submit" value="Search" />
<div id="autocomplete"></div>
<input type="hidden" name="sp_cs" value="UTF-8" />
</form>
</div><!-- For maximum performance, place these tags at the bottom of the body section of the page(s) containing this search form.  -->
<script type="text/javascript" src="https://ajax.googleapis.com/ajax/libs/yui/2.8.0r4/build/utilities/utilities.js"></script>
<script type="text/javascript" src="https://ajax.googleapis.com/ajax/libs/yui/2.8.0r4/build/datasource/datasource-min.js"></script>
<script type="text/javascript" src="https://ajax.googleapis.com/ajax/libs/yui/2.8.0r4/build/autocomplete/autocomplete-min.js"></script>
<script type="text/javascript" src="https://content.atomz.com/xxxxxxxxxx/publish/autocomplete_data.js?sp_js_cache_ver=6"></script></body></html>

The values of sp_css_cache_ver and sp_js_cache_ver changed on every modification of auto complete setup.
The updated CSS and JavaScript values can be retrieved by enabling the presentation template, enable the required configuration in the presentation template based on the template type, I am using JSON template type in my case
custom_presentation_json.tmpl (Sample with minimal configuration)
<guided-content-type-header content="application/json" />
<guided-if-query-param-defined gsname="callback" /><guided-query-param gsname="callback" />(</guided-if-query-param-defined>
{
 "general" :
 {
  "query" : "<guided-query-param gsname='q' />",
  "total" : "<guided-results-total />",
  "page_lower" : "<guided-results-lower>",
  "page_upper" : "<guided-results-upper>",
  "page_total": "<guided-page-total/>"
 },"search-form":
    {
        "auto-complete-enabled": "<guided-if-autocomplete>1<guided-else-autocomplete>0</guided-if-autocomplete>",
        "css": "<guided-ac-css escape="ijson"/>" ,
        "form-content": "<guided-ac-form-content escape="ijson"/>",
        "javascript": "<guided-ac-javascript escape="js"/>"
     },"facets" :
     [

    ],
 "results" :
 [
  <guided-results gsname="default">
  {
   "index" : "<guided-result-index />",
   "title" : "<guided-result-field gsname="title" escape="ijson" />",
   "productType" : "<guided-result-field gsname="productType" escape="ijson" />"
  }<guided-if-not-last>,</guided-if-not-last>
  </guided-results>
 ]
}
<guided-if-query-param-defined gsname="callback">)</guided-if-query-param-defined>
Retrieve the details through http://xxxxxxxxxx.guided.ss-omtrdc.net/?do=json
{
"general": {
"query": "",
"total": "223",
"page_lower": "1",
"page_upper": "10",
"page_total": "23"
},
"search-form": {
"auto-complete-enabled": "1",
"css": "<link rel=\"stylesheet\" type=\"text/css\" href=\"//content.atomz.com/xxxxxxxxxx/publish/autocomplete_styles.css?sp_js_param=2\" />\n",
"form-content": "<div id=\"autocomplete\"></div>\n\n",
"javascript": "<script type=\"text/javascript\" src=\"http://ajax.googleapis.com/ajax/libs/yui/2.8.0r4/build/utilities/utilities.js\"></script>\n<script type=\"text/javascript\" src=\"http://ajax.googleapis.com/ajax/libs/yui/2.8.0r4/build/datasource/datasource-min.js\"></script>\n<script type=\"text/javascript\" src=\"http://ajax.googleapis.com/ajax/libs/yui/2.8.0r4/build/autocomplete/autocomplete-min.js\"></script>\n<script type=\"text/javascript\" src=\"//content.atomz.com/xxxxxxxxxx/publish/autocomplete_data.js?sp_js_param=4\"></script>"
},
"facets": [],
"results": [
{
"index": "",
"title": "Book Lava title",
"productType": "Book"
},
{
"index": "",
"title": "Book Lava Title",
"productType": "Book"
},
{
"index": "",
"title": "Book Lava title",
"productType": "Book"
},
{
"index": "",
"title": "Book Lava Title",
"productType": "Book"
},
{
"index": "",
"title": "Book Lava title",
"productType": "Book"
},
{
"index": "",
"title": "Book Lava Title",
"productType": "Book"
},
{
"index": "",
"title": "Book Lava title",
"productType": "Book"
},
{
"index": "",
"title": "Book Lava Title",
"productType": "Book"
},
{
"index": "",
"title": "Book Lava title",
"productType": "Book"
},
{
"index": "",
"title": "Book Lava Title",
"productType": "Book"
}
]
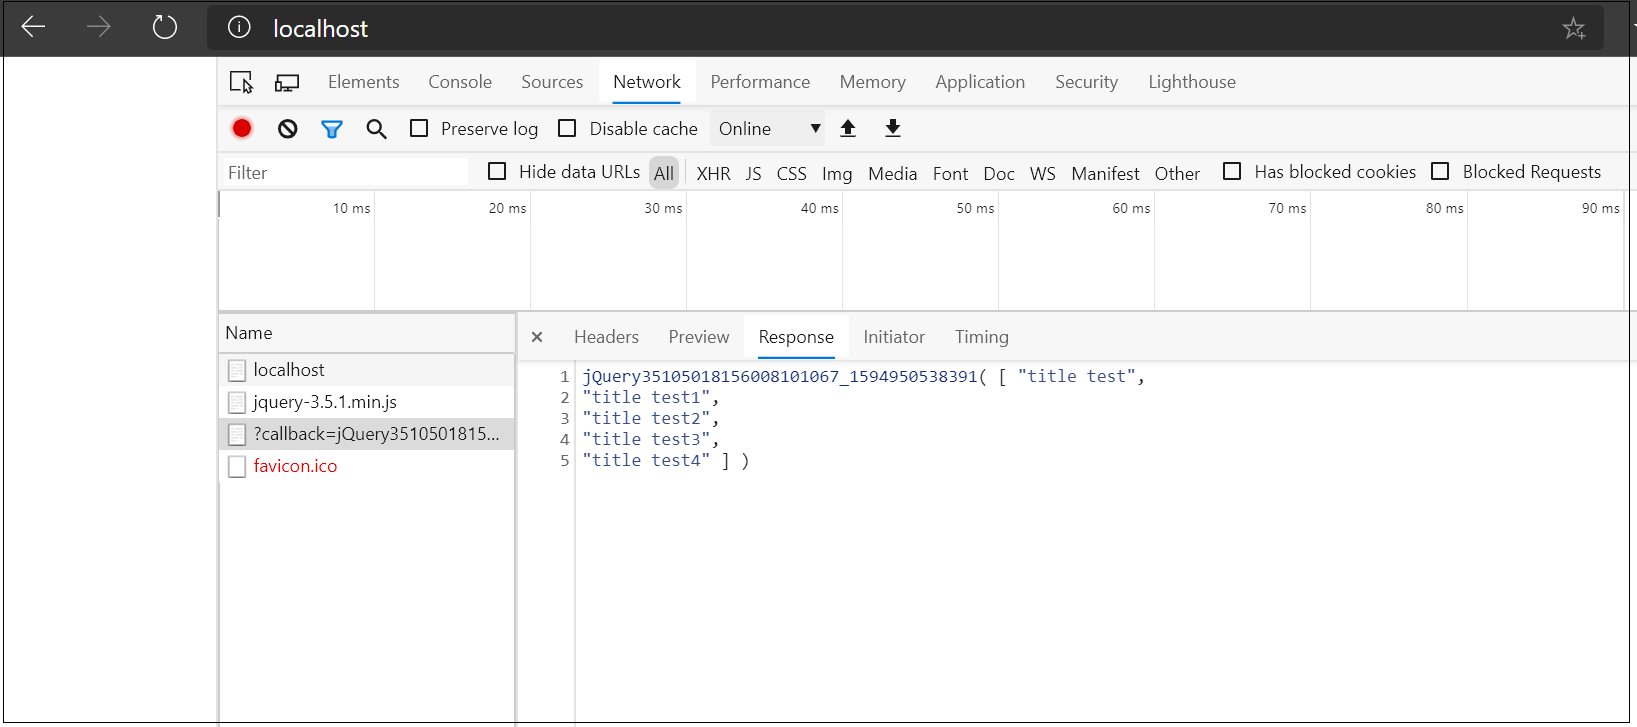
}If you are using custom search form with custom java script and CSS, the auto completion data can be retrieved through the below JSONP URL
https://content.atomz.com/autocomplete/spxx/xx/xx/xx/?callback=jQuery35109061281263500554_1594919810495&query=tit&max_results=7&beginning=1&ignore_apostrophes=1
beginning=0, matches the query data anywhere in the auto completion data
spxx/xx/xx/xx/ — Split the account number to this specific pattern
<html>
 <head>
  <script  src="https://code.jquery.com/jquery-3.5.1.min.js" integrity="sha256-9/aliU8dGd2tb6OSsuzixeV4y/faTqgFtohetphbbj0="  crossorigin="anonymous"></script>
 <head>
 <body>
  <script>var accountno='spxxxxxxxx';
  var splitan = accountno.substring(0, 4) + "/" + accountno.substring(4, 6) + "/" + accountno.substring(6, 8) + "/" + accountno.substring(8) + "/";
  var url = "https://content.atomz.com/autocomplete/" + splitan;
  var query = 'tit';
  var max_results = 7;
  var beginning = 1;
   $.ajax({
    url : url,
    data : {query: query, max_results: max_results, beginning: beginning},
    dataType : 'jsonp',
    success : function(data){
     if(data.length){
      alert(data);
      $.each(data, function(i, field){
          //add the individual data to the auto completion div
        });
     }else{

     }
    }
  });
</script>
 </body>
<html>

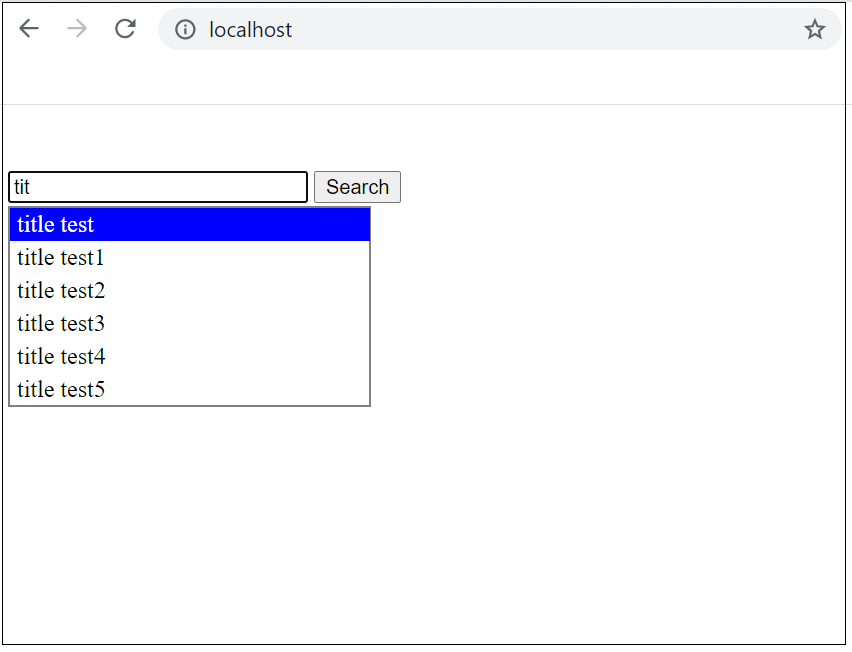
The Auto-completion can be used in the search form to recommends the search terms based on the word user beginning to type.
No comments:
Post a Comment