In this post, let us explore what Custom HTML Elements are and how to use Custom HTML Elements in AEM.
Custom Elements allow web developers to define new types of HTML elements.Once a custom element is defined, we can use it on par with built-in HTML elements.Some of the important features are enabled by Custom HTML elements.
- Define new HTML/DOM elements
- Create elements that extend from other elements
- Logically bundle together custom functionality into a single tag
- Extend the API of existing DOM elements
Web Components uses Custom HTML Elements as one of the building blocks to enable reusable custom elements(Components).
Rules on creating custom elements:
- The name of a custom element must contain a dash (-). So <my-element>, and <my-awesome-app> are valid names.
- You can’t register the same tag more than once. Attempting to do so will throw a DOMException
- Custom elements cannot be self-closing(<my-element/>), Always write a closing tag <my-element> </my-element>
Steps for creating Custom HTML Elements:
- Define a custom element e.g. <my-element> </my-element>
- Create a class with special methods.
class MyElement extends HTMLElement {
  constructor() {
    super();
    // element created
  }connectedCallback() {
    // browser calls this method when the element is added to the document
    // (can be called many times if an element is repeatedly added/removed)
  }disconnectedCallback() {
    // browser calls this method when the element is removed from the document
    // (can be called many times if an element is repeatedly added/removed)
  }static get observedAttributes() {
    return [/* array of attribute names to monitor for changes */];
  }attributeChangedCallback(name, oldValue, newValue) {
    // called when one of attributes listed above is modified
  }adoptedCallback() {
    // called when the element is moved to a new document
    // (happens in document.adoptNode, very rarely used)
  }// there can be other element methods and properties
}
Register the element:
// let the browser know that <my-element> is served by our new class customElements.define("my-element", MyElement);Refer to https://developer.mozilla.org/en-US/docs/Web/Web_Components/Using_custom_elements and https://web.dev/custom-elements-v1/ for more details.
Let us quickly see how to create Custom HTML Elements to format the data in HTML.
<time-formatted> </time-formatted>Attributes(datetime and the other formating options for Intl.DateTimeFormat):
datetime
year
month
day
hour
minute
second
time-zone-name
<html>
<head>
<script>
class TimeFormatted extends HTMLElement { // Class to handle custom elements functionalityconnectedCallback() {

    let date = new Date(this.getAttribute('datetime') || Date.now());this.innerHTML = new Intl.DateTimeFormat("default", {
      year: this.getAttribute('year') || undefined,
      month: this.getAttribute('month') || undefined,
      day: this.getAttribute('day') || undefined,
      hour: this.getAttribute('hour') || undefined,
      minute: this.getAttribute('minute') || undefined,
      second: this.getAttribute('second') || undefined,
      timeZoneName: this.getAttribute('time-zone-name') || undefined,
    }).format(date);
     }
   }
   customElements.define("time-formatted", TimeFormatted);  //Register custom HTML Element
</script>
</head>
<body>
<time-formatted datetime="2022-04-11"
year="numeric" month="long" day="numeric"
hour="numeric" minute="numeric" second="numeric"
time-zone-name="short"></time-formatted>
</body>
</html>
The formatted data is now displayed on the web page through custom elements and the specified attributes.

We can extend the Custom Element and the class to use additional callback methods and functionalities.
Let us quickly see how to enable the same custom elements to AEM.
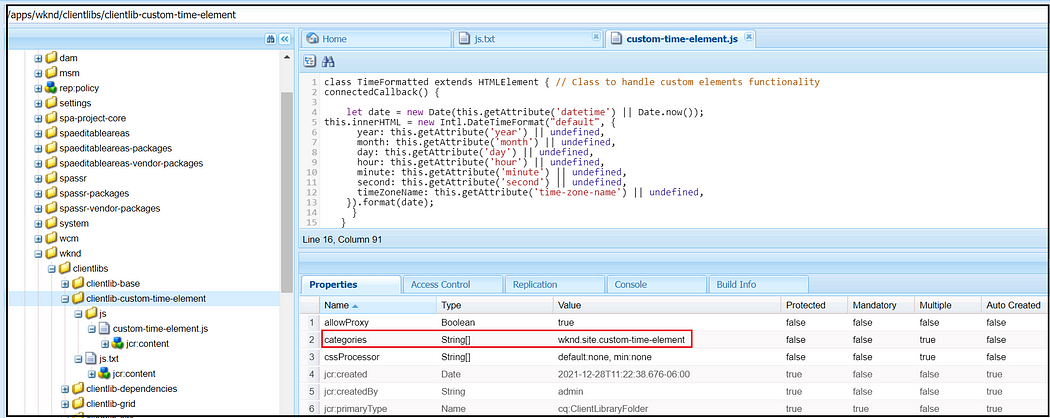
Create a client library(e.g., wknd.site.custom-time-element) with the required JS
class TimeFormatted extends HTMLElement { // Class to handle custom elements functionalityconnectedCallback() {
let date = new Date(this.getAttribute('datetime') || Date.now());this.innerHTML = new Intl.DateTimeFormat("default", {
year: this.getAttribute('year') || undefined,
month: this.getAttribute('month') || undefined,
day: this.getAttribute('day') || undefined,
hour: this.getAttribute('hour') || undefined,
minute: this.getAttribute('minute') || undefined,
second: this.getAttribute('second') || undefined,
timeZoneName: this.getAttribute('time-zone-name') || undefined,
}).format(date);
}
}
customElements.define("time-formatted", TimeFormatted); //Register custom HTML Element
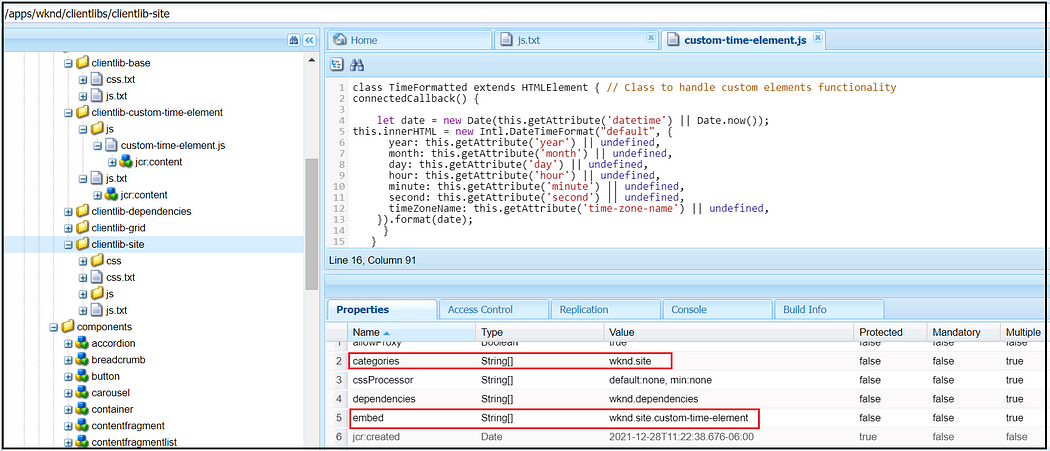
Embed the new client library as part of the site level client library
Create a Component to enable the custom element
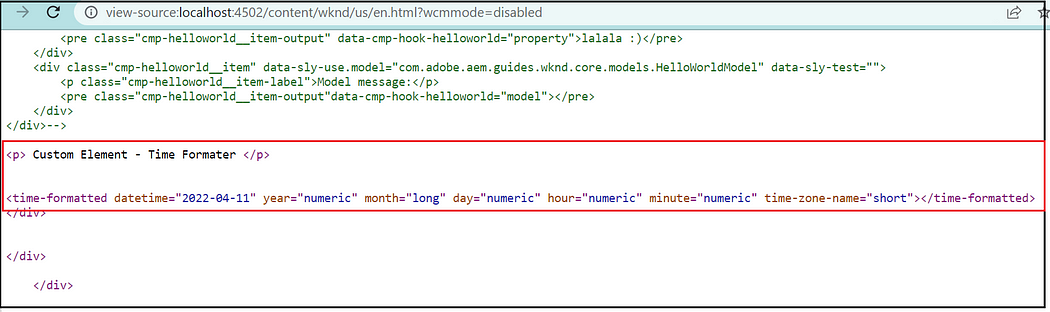
<p> Custom Element - Time Formater </p><time-formatted datetime=${properties.datetime}
   year=${properties.yearformat} month=${properties.monthformat} day=${properties.dayformat}
   hour=${properties.hourformat} minute=${properties.minuteformat} second=${properties.seconfformat}
   time-zone-name=${properties.timezonename}></time-formatted>
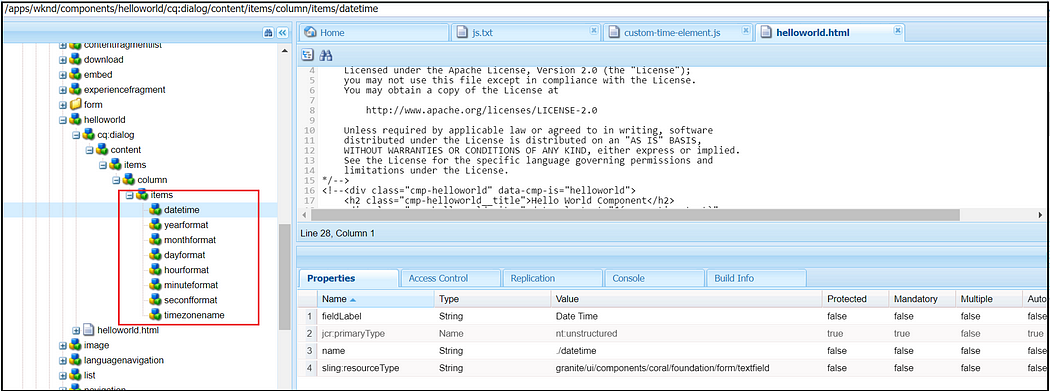
Create the required dialogs to enable the needed configuration attributes for the custom element.

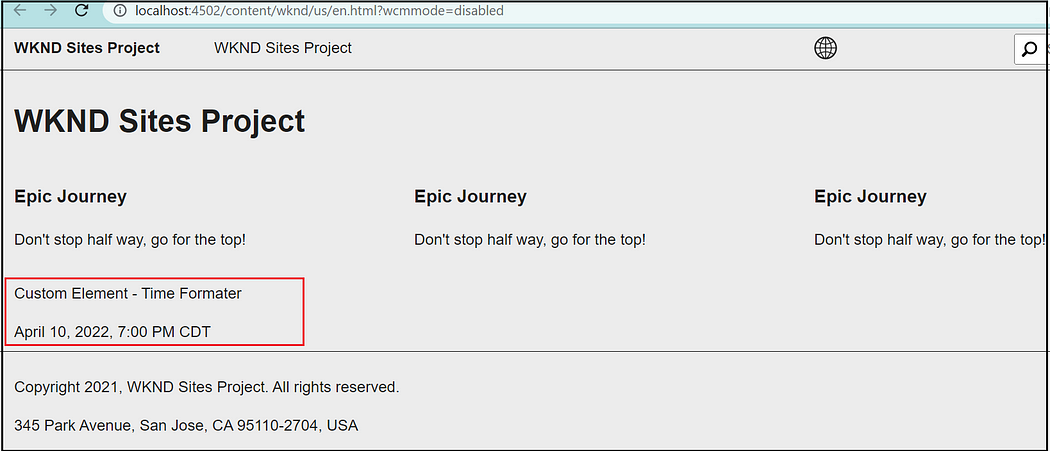
Now author the component to the required page. The user will now see the formatted data on the web page.
Maybe in the next post, let us see more on web components with additional features.ou cannot applaud your own story
No comments:
Post a Comment