Enable User Authentication for AEM Websites — Azure AD B2C | SAML Application with Azure AD B2C
Azure AD(Active Directory) B2C provides business-to-customer identity as a service. The end users can use preferred social, enterprise, or local account identities to get single sign-on access to your applications and APIs.Azure AD B2C is a separate service from Azure Active Directory (Azure AD).
It is built on the same technology as Azure AD but for a different purpose. It allows businesses to build customer-facing applications, and then allow anyone to sign up for those applications with no restrictions on the user account.
You can customize the entire user experience with your brand so that it blends seamlessly with your web and mobile applications. Customize every page displayed by Azure AD B2C when your users sign up, sign in, and modify their profile information. Customize the HTML, CSS, and JavaScript in your user journeys so that the Azure AD B2C experience looks and feels like it’s a native part of your application. Azure AD B2C uses standards-based authentication protocols including OpenID Connect, OAuth 2.0, and Security Assertion Markup Language (SAML).
Refer to https://docs.microsoft.com/en-us/azure/active-directory-b2c/overview for more details on Azure Active Directory B2C
The Active Directly SAML integration can be directly used if the requirement is just enabling the SAML integration(Author integration)without the need to have a more custom signup/sign-in/profile edit UI’s
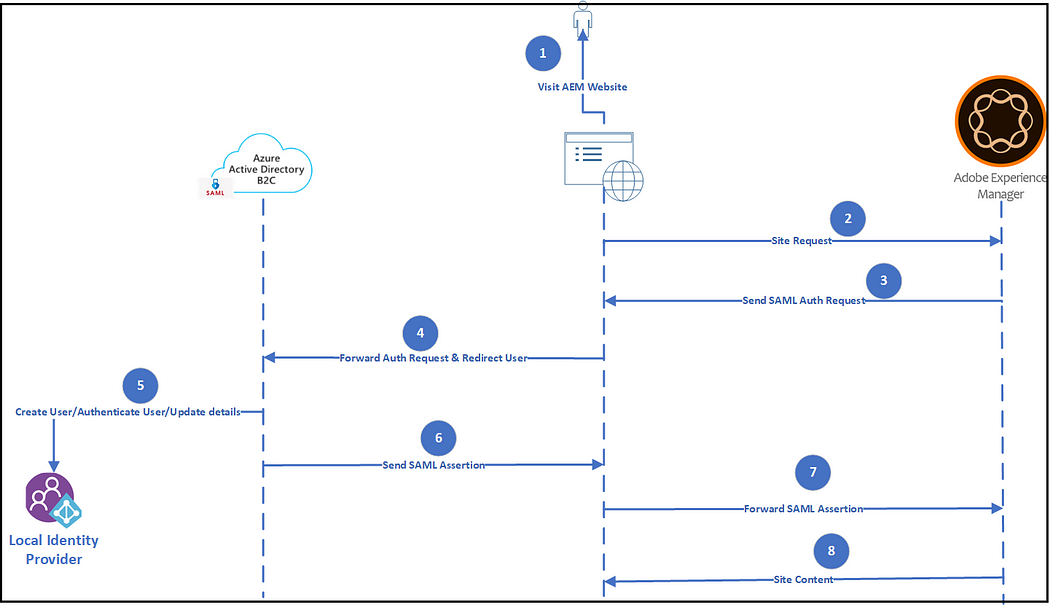
In this post, let us discuss how to enable AD B2C service to enable user signup/sign in for AEM websites.
As a first step create an Azure portal account through the “free” or “pay as you go” service.
Please note “albinsblog” referred across this post is the Initial domain name configured while creating the Azure AD B2C tenant through the Azure portal.
Azure AD B2C Configurations:
Azure Active Directory B2C tenant:
Before your applications can interact with Azure Active Directory B2C (Azure AD B2C), they must be registered in a tenant that you manage.
Refer to https://docs.microsoft.com/en-us/azure/active-directory-b2c/tutorial-create-tenant for more details on configuring B2C tenants.
SSL Certificate — Obtain/Upload SSL Certificate:
If the CA-signed certificate is not obtained then Self Signed certificate can be used but Self Signed Certificate will not provide guaranteed security as the CA-signed SSL certificate.
Refer to https://docs.microsoft.com/en-us/azure/active-directory-b2c/saml-service-provider?tabs=windows&pivots=b2c-custom-policy#obtain-a-certificate (the SSL certificate can be generated through other tools like OpenSSL) for obtaining the SSL certificate and uploading it to Azure AD B2C tenant.
Signing and encryption keys for Identity Experience Framework:
As a next step, Create the signing and encryption keys
Refer to https://docs.microsoft.com/en-us/azure/active-directory-b2c/tutorial-create-user-flows?pivots=b2c-custom-policy#add-signing-and-encryption-keys-for-identity-experience-framework-applications for more details on enabling Signing and encryption keys for Identity Experience Framework.
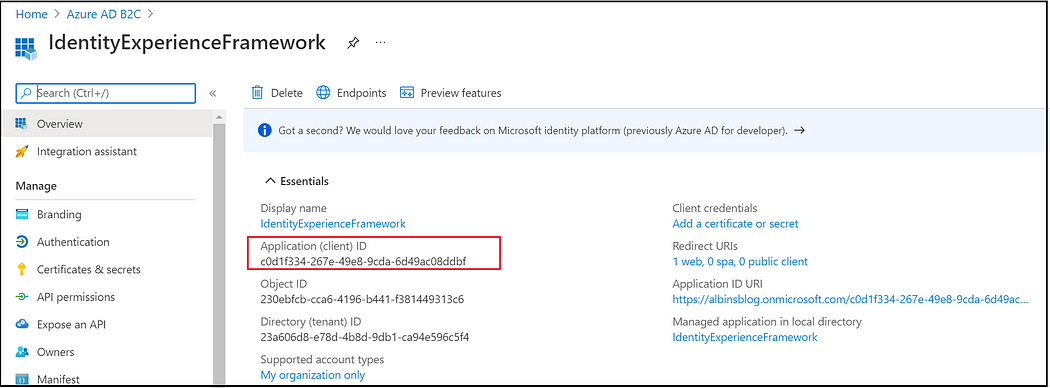
Register Identity Experience Framework applications:
Azure AD B2C requires you to register two applications that it uses to sign up and sign in users with local accounts: IdentityExperienceFramework, a web API, and ProxyIdentityExperienceFramework, a native app with delegated permission to the IdentityExperienceFramework app. Your users can sign up with an email address or username and a password to access your tenant-registered applications, which creates a “local account.” Local accounts exist only in your Azure AD B2C tenant.
Refer to https://docs.microsoft.com/en-us/azure/active-directory-b2c/tutorial-create-user-flows?pivots=b2c-custom-policy#register-identity-experience-framework-applications for more details on registering identity experience framework applications.
Custom Policies:
As a next step to enable the required custom policies, the starter pack can be downloaded from https://github.com/Azure-Samples/active-directory-b2c-custom-policy-starterpack, I am going to enable SAML with a Local account.
Customized LocalAccount/SAML policies to enable SignIn/SignUp/Profile Edit can be downloaded from https://github.com/techforum-repo/youttubedata/tree/master/active-directory-b2c/saml
Update the tenant name references in TrustFrameworkBase.xml, TrustFrameworkExtensions.xml, TrustFrameworkLocalization.xml, SignUpOrSigninSAML.xml, and ProfileEdit.xml
Replace ProxyIdentityExperienceFrameworkAppId and IdentityExperienceFrameworkAppId values in TrustFrameworkExtensions.xml.

Enable any custom claims required — Modify the TrustFrameworkExtensions.xml, SignUpOrSigninSAML.xml, and ProfileEdit.xml files(Refer to the custom City field configurations in the policy files for your reference)
Change the IssuerUri value in the TrustFrameworkExtensions.xml file — the issuer URL is the same as Entity Id, this will be configured in the AEM SAML auth handler.
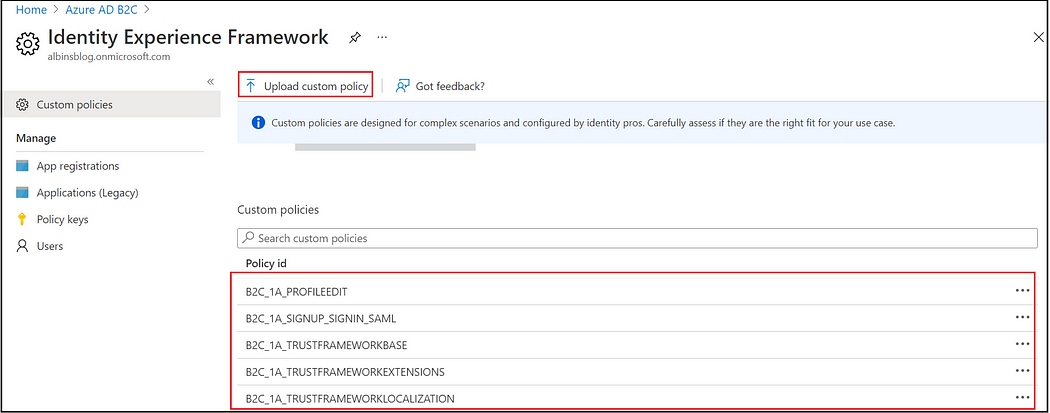
Now upload the policies to Azure AD B2C “Identity Experience Framework” in the below order
TrustFrameworkBase.xml
TrustFrameworkLocalization.xml
TrustFrameworkExtensions.xml
SignUpOrSigninSAML.xml
ProfileEdit.xml


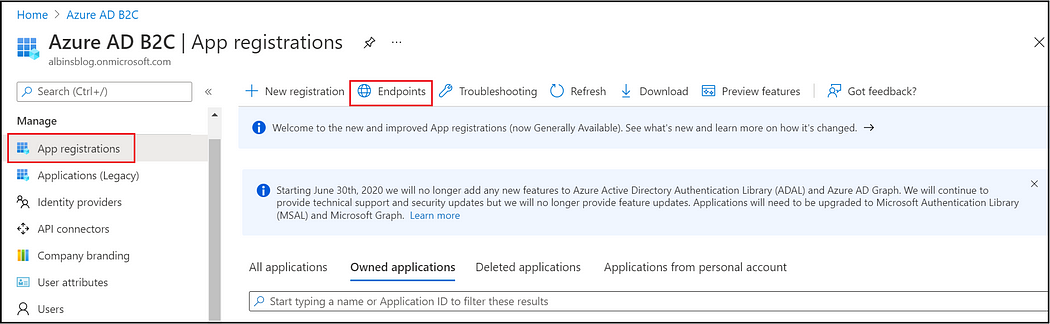
SAML App Setup:
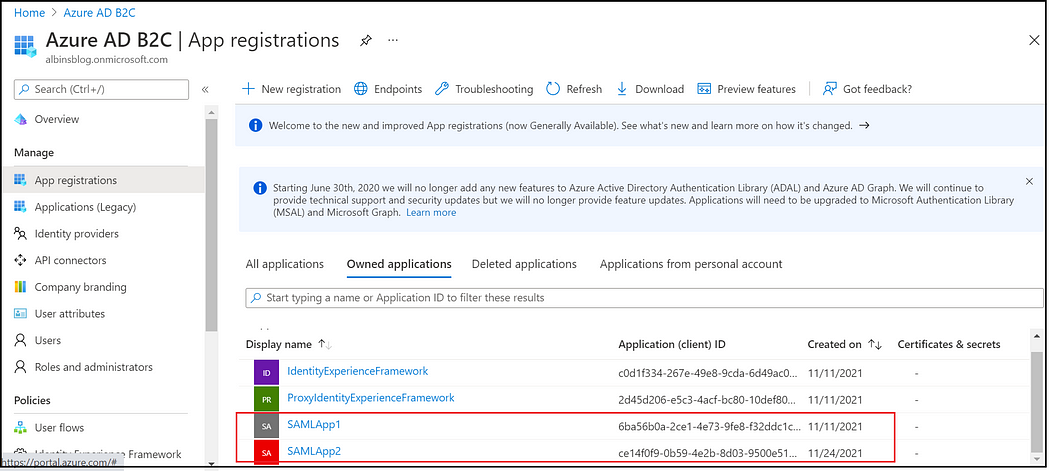
Register a SAML app through the Azure portal, refer to https://docs.microsoft.com/en-us/azure/active-directory-b2c/saml-service-provider?tabs=windows&pivots=b2c-custom-policy#register-your-saml-application-in-azure-ad-b2c for steps.
Specify the redirect URL as AEM SAML URL — e.g https://localhost/saml_login (replace with real website domain). The redirect URL should be enabled based on the content path specified in the AEM SAML auth handler. If the path is root(/) the redirect URL going to be https://localhost/saml_login, if the path is /content/wknd/us/en, the redirect URL going to be https://localhost/content/wknd/us/en/saml_login(the /saml_login should be appended to the content path specified while enabling the SAML Auth handler in AEM.
Enable identifierUris, replyUrlsWithType, and logout URL through the SAML App(SAMLApp1) manifest file.
The same identifierUris value should be defined as Entity id in the AEM SAML auth handler.
replyUrlsWithType — Enable the AEM return URL, the URL should end with /saml_login, also the URL must be enabled through HTTPS(replace with the real AEM URL).
"identifierUris":
[
 "https://albinsblog.onmicrosoft.com"
]"replyUrlsWithType":
[
 {
 "url": "https://localhost/saml_login",
 "type": "Web"
 }
]"logoutUrl": "https://localhost/system/sling/logout.html"
The IdentifierUris property must use a verified domain of the organization or its subdomain, by default onmicrosoft.com subdomain is enabled e.g albinsblog.onmicrosoft.com, custom verified domains can be enabled by following the steps specified in the following document — https://docs.microsoft.com/en-us/azure/active-directory/fundamentals/add-custom-domain#add-your-custom-domain-name-to-azure-ad


The SAML configuration details, including the SSL certificate(to be configured in AEM), can be reviewed through the SAML metadata endpoint.


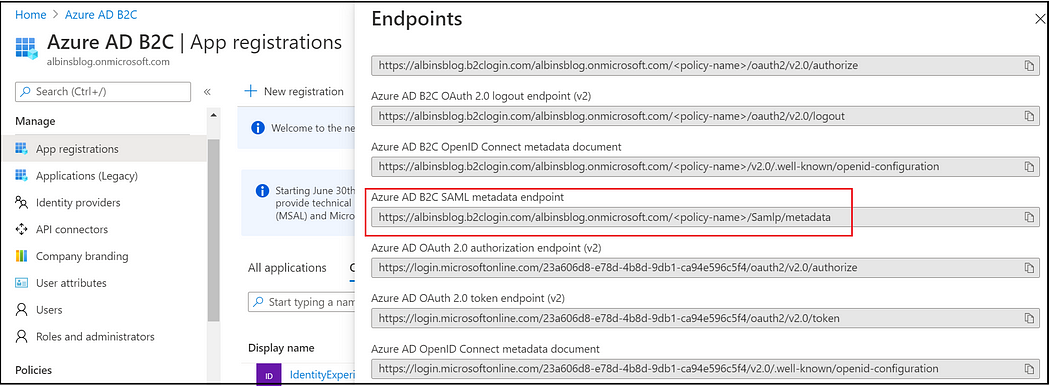
https://albinsblog.b2clogin.com/albinsblog.onmicrosoft.com/<<policy-name>>/Samlp/metadata
<policy-name> — Replace with the policy name specified in the SignUpOrSigninSAML.xml, https://albinsblog.b2clogin.com/albinsblog.onmicrosoft.com/B2C_1A_signup_signin_saml/Samlp/metadata


Let us now enable the AEM configurations:
AEM Configurations:
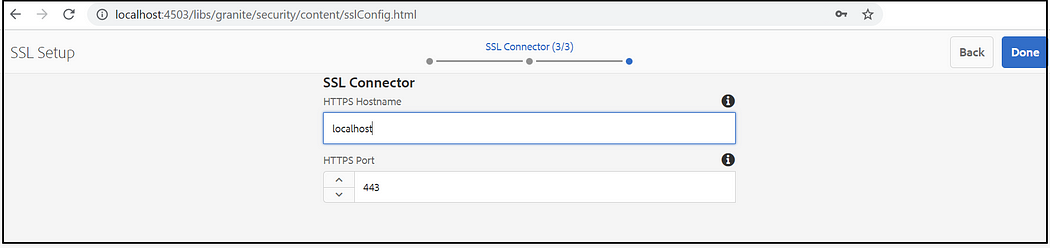
Enable SSL for AEM servers:
The saml_login URL should be enabled through HTTPS, even for local testing the HTTPS is mandatory(some functionalities may not work as expected with HTTP)
Refer to https://experienceleague.adobe.com/docs/experience-manager-learn/foundation/security/use-the-ssl-wizard.html?lang=en for enabling the SSL for AEM server( the same self-signed certificate can be downloaded for testing, I have modified the default AEM SSL port to 443 ”

SSL Certificate/Trust Store/KeyStore:
Copy the X509Data from SAML metadata URL — https://albinsblog.b2clogin.com/albinsblog.onmicrosoft.com/B2C_1A_signup_signin_saml/Samlp/metadata and add it to a file with crt extension, wrap the content between
-----BEGIN CERTIFICATE----------END CERTIFICATE-----
As a next step enable the AEM trust store and upload the above SAML SSL certificate
Tools → Security → Trust Store


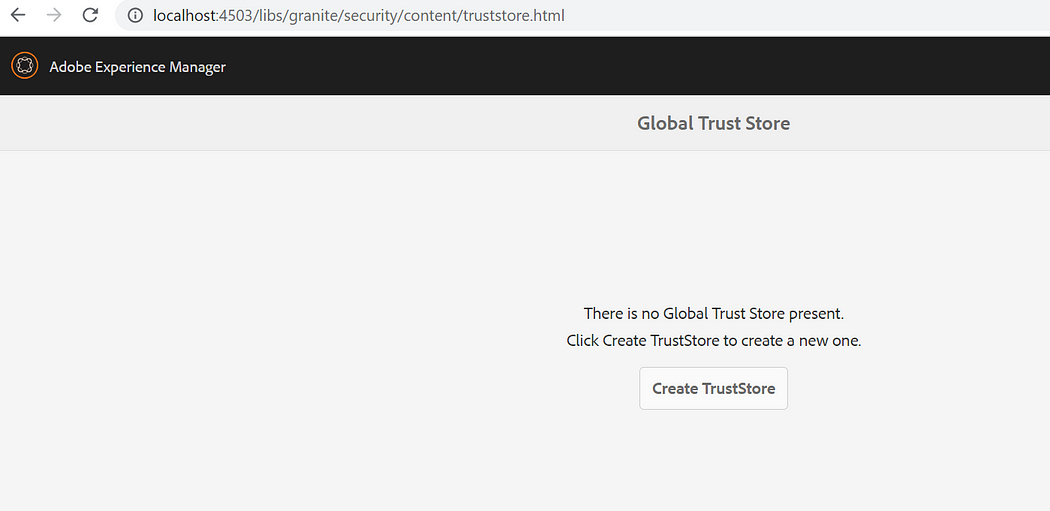
Create TrustStore, enter TrustStore password
Now upload the certificate file

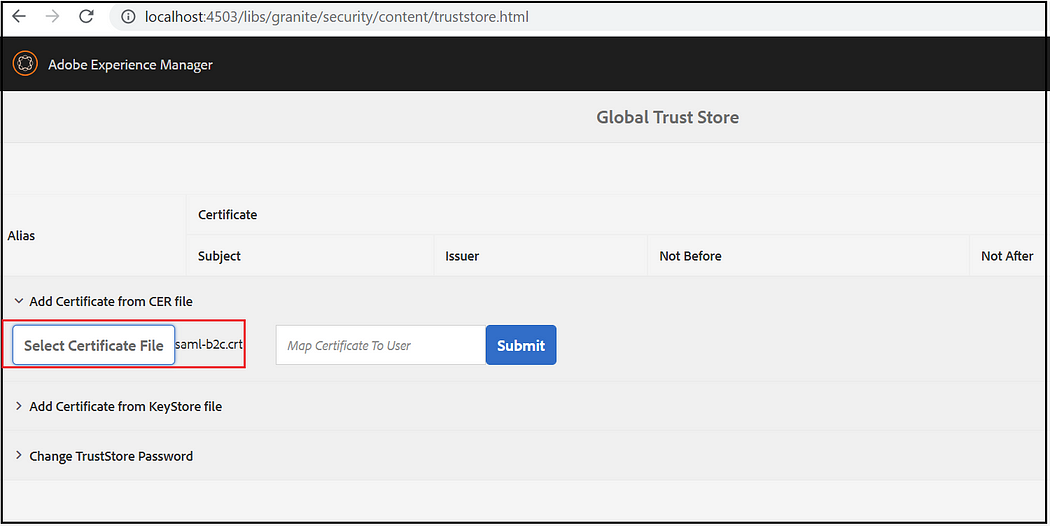
Copy the certificate Alias — this should be configured in SAML Auth Handler


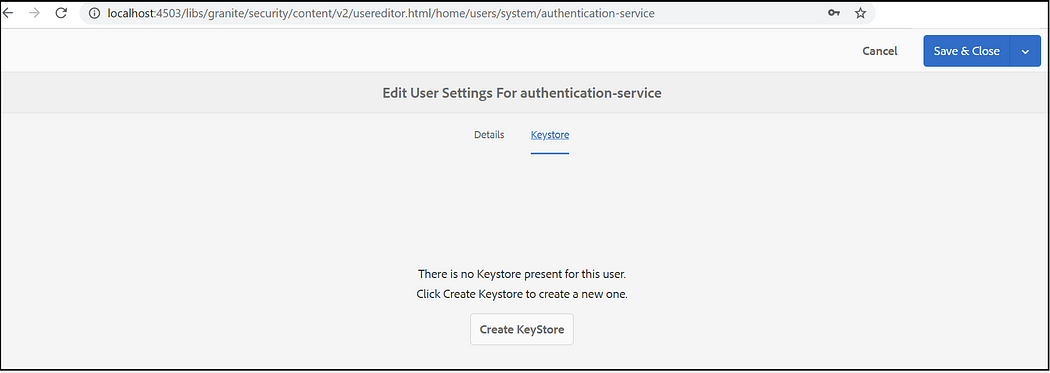
Now configure the Key Store
Tools → Security →Users, Look for “authentication-service” user
Create Key store, enter key store password

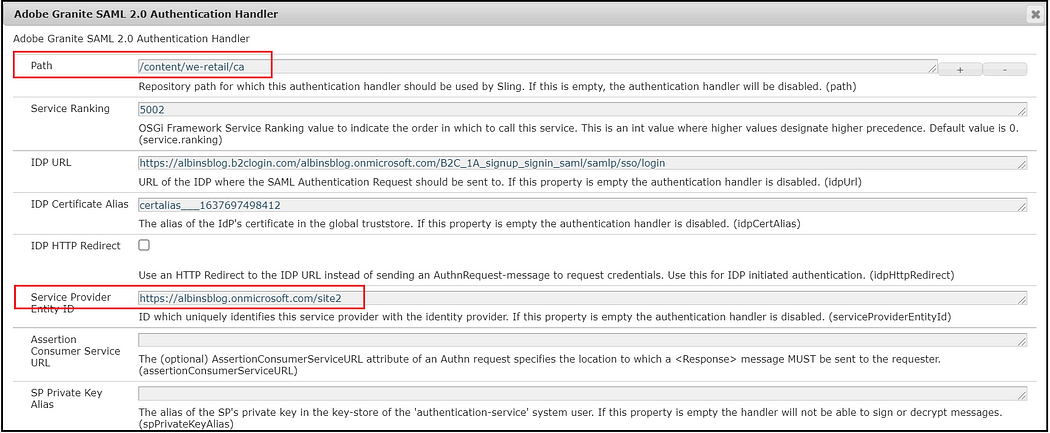
Enable SAML Authentication Handler:
Let us now enable the SAML authentication handler, update the Entity ID, cert alias, login/logout URL, attribute mappings, etc — the metadata can be fetched from Azure AD B2C metadata URL e.g https://albinsblog.b2clogin.com/albinsblog.onmicrosoft.com/B2C_1A_signup_signin_saml/Samlp/metadata
{
  "userIntermediatePath":"b2c",
  "serviceProviderEntityId":"https://albinsblog.onmicrosoft.com",
  "userIDAttribute":"email",
  "idpCertAlias":"certalias___1636725075225",
  "defaultGroups":[
    "administrators"
  ],
  "idpUrl":"https://albinsblog.b2clogin.com/albinsblog.onmicrosoft.com/B2C_1A_signup_signin_saml/samlp/sso/login",
  "logoutUrl":"https://albinsblog.b2clogin.com/albinsblog.onmicrosoft.com/B2C_1A_signup_signin_saml/samlp/sso/logout",
  "synchronizeAttributes":[
    "displayName=profile/familyName",
    "email=profile/email",
    "city=profile/city"
  ],
  "useEncryption":false,
  "handleLogout":true
}
Apache Sling Referrer Filter:
Enable referrer filter to allow B2C tenant URL
{
  "allow.hosts":[
    "https://albinsblog.b2clogin.com:443"
  ]
}
CORS Policy:
Enable the CORS policy to allow Cross-Origin POST Request from B2C tenants.
{
  "alloworigin":[
    "https://albinsblog.b2clogin.com"
  ]
}
Apache Sling Authentication Service(AEM Publishers):
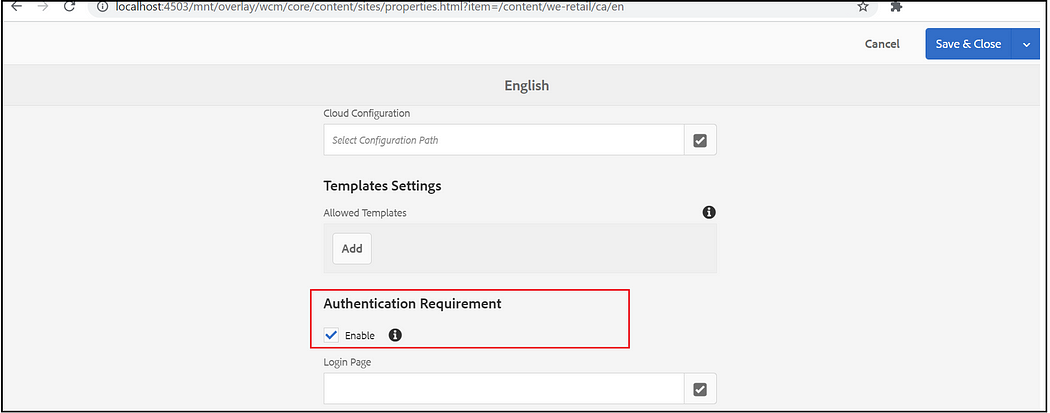
By default anonymous access is enabled for content in AEM publisher, enable the Authentication Requirements for required content paths through “Apache Sling Authentication Service”
{
"sling.auth.requirements":[
"+/content/we-retail/us",
"+/content/we-retail/ca"
]
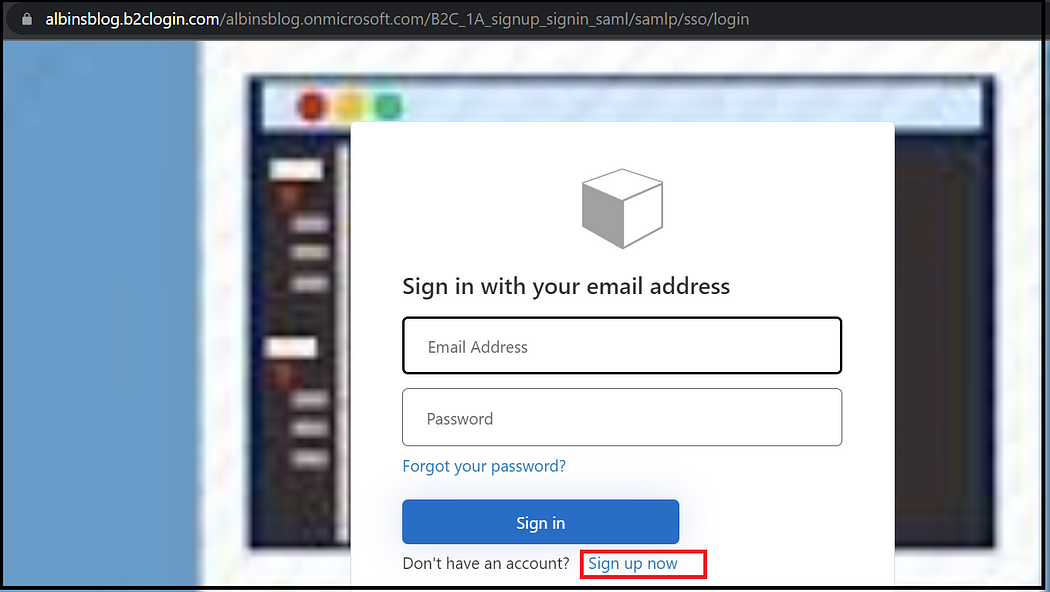
}Now the users will be directed to the Azure AD B2C login page while accessing any page under /content/we-retail/us, the users will be able to sign-in or signup to the website.


Profile Edit:
To edit the profile for a logged-in user, the SAML auth request should be posted to SAML login endpoint with SAML edit profile e.g https://albinsblog.b2clogin.com/albinsblog.onmicrosoft.com/B2C_1A_ProfileEdit/samlp/sso/login
Created a Custom JavaFilter to handle the profile edit scenario, the filter sends the profile edit request to Azure AD B2Cif the URL contains the “operation=profileedit” parameter.
Refer to the custom java filter here —https://github.com/techforum-repo/youttubedata/tree/master/active-directory-b2c/saml/aem-filter
Now the loggined users(if not users will be directed to the login page first) will be sent to the Profile edit page while accessing the URL with “operation=profileedit” e.g http://localhost:4503/content/we-retail/us/en.html?operation=profileedit

You can now create a small component to display the login status on the web page, the logged-in user details can be fetched through an AJAX service call to https://localhost/libs/granite/security/currentuser.json
Log out URL — https://localhost/system/sling/logout.html
Profile Edit URL — http://localhost:4503/content/we-retail/us/en.html?operation=profileedit
The “Sign In/Sign Up/Profile Edit” UI branding and the view can be customized based on the project need, also custom DNS can be enabled to support the company-specific login URL — e.g login.mysite.com
CUG(Closed User Group):
Another option is using CUG to enable the authentication for specific pages, the authentication will be requested while the user accessing that specific page and child pages. The CUG can be enabled through Page Properties — Advanced tab.

Configure the required user's groups that will have the access under permissions tab, I am enabling the administrator's group for the demo, enable a group with required permissions for real demo(add the user to the corresponding group on successful login)


Now the user will be redirected to the Azure AD B2C login page while accessing the CUG enabled pages and child pages.
Multi-Site Support:
To handle multiple sites, enable SAML handler for individual sites


Modify the Path — site path and the Entity ID — site-specific unique entity ID.


The enabled authentication handlers can be reviewed from http://localhost:4503/system/console/slingauth


Enable site-specific SAML Apps in Azure AD B2C, modify the manifest with the site-specific values
"identifierUris":
[
 "https://albinsblog.onmicrosoft.com/site1"
]"replyUrlsWithType":
[
 {
 "url": "https://my.site1.com/content/we-retail/us/saml_login",
 "type": "Web"
 }
]"logoutUrl": "https://my.site1.com/system/sling/logout.html"
As discussed earlier, identifierUris can be a site-specific custom domain (for the demo I am using the default domain with a unique context path).

Now the authentication is enabled for two different sites — https://my.site1.com/content/we-retail/us/en.html
https://my.site2.com/content/we-retail/ca/en.html
Encapsulated Token/HMAC key synchronization:
To make the authentication stateless across multiple publisher instances, enable Encapsulated Token also sync the HMAC key across all the publishers . Refer to https://medium.com/r/?url=https%3A%2F%2Fhelpx.adobe.com%2Fexperience-manager%2F6-5%2Fsites%2Fadministering%2Fusing%2Fencapsulated-token.html%23Introduction for more details on Encapsulated Token and the steps to enable Encapsulated Token and to sync the HMAC keys.
Users synchronization
When multiple publishers are used to serve the content in a load balance setup, the user created in one of the publisher should synced to rest of the publisher for seamless authentication.
Refer to https://experienceleague.adobe.com/docs/experience-manager-65/administering/security/sync.html for more details on enableing user sync through SlDistribution.
Dispatcher/CDN Configurations:
Add the following rule to the dispatcher website farm configuration /filter section
/0100 { /method "POST" /url "*/saml_login" }Also, ensure “login-token” cookie is whitelisted from CDN