Saturday, July 5, 2014

java.io.IOException: Server returned HTTP response code: 400 - While invoking the Salesforce login url from java to get the access token

java.io.IOException: Server returned HTTP response code: 400 - While invoking the Salesforce login url from java to get the access token

I was getting the below exception while invoking the Salesforce login url to get the OAuth access_token from java.

java.io.IOException: Server returned HTTP response code: 400 for URL: https://login.salesforce.com/services/oauth2/token
at sun.net.www.protocol.http.HttpURLConnection.getInputStream(HttpURLConnection.java:1436)
at sun.net.www.protocol.https.HttpsURLConnectionImpl.getInputStream(HttpsURLConnectionImpl.java:234)
at RestCaller.execute(RestCaller.java:46)
at RestCaller.main(RestCaller.java:10)

This exception will happen normally when the values of client_id, client_security, username and password are not specified correctly while invoking the login url - https://login.salesforce.com/services/oauth2/token to get the OAuth access token.

"grant_type=password&client_id=13MVG9Y6d_xxxxxxx&client_secret=8039xxxxx&username=albinsharpxxxxx&password=Albinxxxx"

In my case, I have specified all the values properly but still it was not working, it worked after resetting the password and getting the new security token - password(password+security token)

Invoking Salesforce REST based web service from Java

Invoking Salesforce REST based web service from Java

This post will explain the approach to call the Salesfore REST based webservice through java.
I have exposed a Apex class as REST service from salesforce to fetch the account details.

@RestResource(urlMapping='/AccountDetails/*')
global with sharing class AccountDetails {

    @HttpGet
    global static Account doGet() {
        RestRequest req = RestContext.request;
        RestResponse res = RestContext.response;
        String accountId = req.requestURI.substring(req.requestURI.lastIndexOf('/')+1);
        System.debug('Account Id:'+accountId);
        Account result = [SELECT Id, Name, Phone, Website FROM Account WHERE Id = :accountId];
        return result;
    }
}

The communication is of two steps
  •  getting the access_token 
  •  invoking the service endpoint by attaching the access_token to the request.
To obtain an access token, we will send an HTTP POST request to the authentication endpoint exposed by Salesforce - https://login.salesforce.com/services/oauth2/token  with the details client_id, client_secret, username and password.This values can be get from the configured Connected Apps from salesforce.


Friday, July 4, 2014

Ignoring the Host Name verification while invoking the HTTPS service through HttpsURLConnection

Ignoring the Host Name verification while invoking the HTTPS service through HttpsURLConnection

Sometimes you may receive the Host Name mismatch exception while invoking the HTTPS service from the Java client even though the valid certificate is installed to the key store.

javax.net.ssl.SSLHandshakeException: java.security.cert.CertificateException: No name matching <Host Name> found

The root cause of the exception is the CN name of the certificate is not matching with the host name used to connect the service.

In real scenario while the certificate is signed with third party certificate authority , the CN name will be specified as the host name of the server where the service is hosted or wildcard name will be specified e.g *.example.com to represent all sub domains in a domain. So there will not be any issue while connecting to the service.

This mismatch exception will happen most of the time communicating with self signed certificate, the certificate is signed with CN name that is not matching with the host name.

How to Fix the issue

To resolve the issue, the certificate should be signed with proper CN name or we can create a custom host name verifier to customize the host name verification functionality.

We have to return true from the custom host name verifier for the host name for which the CN name is mismatching.This will connect to the service irrespective of the host name used .

import java.io.BufferedReader;
import java.io.DataOutputStream;
import java.io.InputStream;
import java.io.InputStreamReader;
import java.net.URL;
import java.net.HttpURLConnection;

public class HTTPCaller {
static {
   javax.net.ssl.HttpsURLConnection.setDefaultHostnameVerifier(
   new javax.net.ssl.HostnameVerifier(){
       public boolean verify(String hostname,
               javax.net.ssl.SSLSession sslSession) {
           if (hostname.equals("localhost")) {
               return true;
           }
           return false;
       }
   });
}

    public static String execute() {
        String targetURL="https://localhost/test"
        URL url;
        HttpURLConnection connection = null;
        try {
            url = new URL(targetURL);
            url = new URL(url.toString());              

            connection = (HttpURLConnection)url.openConnection();
            connection.setRequestProperty("accept", "application/xml"); //for GET service to return xml payload

            InputStream is = connection.getInputStream();
            BufferedReader rd = new BufferedReader(new InputStreamReader(is));
            System.out.println("\n Received response" + System.currentTimeMillis());

            String line;
            StringBuffer response = new StringBuffer();
            while ((line = rd.readLine()) != null) {
                response.append(line);
                response.append('\r');
            }
            rd.close();
            return response.toString();
        } catch (Exception e) {
            e.printStackTrace();
            return (e.getClass().getName()+":"+e.getMessage().toString());
        }
        finally {
            if (connection != null) {
                connection.disconnect();
            }
        }
    }

Wednesday, July 2, 2014

Encrypting XML Payload through XSLT in Spring WS

Encrypting XML Payload through XSLT in Spring WS

The below document explain the approach to This document will explain the approach to encrypt the critical elements of XML payload while invoking the services in Spring WS or storing the data to a database table through XSLT.


Encrypting_XML_Payload.pdf

Tuesday, July 1, 2014

Unit Testing the Velocity Templates in spring

Unit Testing the Velocity Templates in spring

It is painful to test the Velocity Template  by deploying to the server while doing frequent changes.
The unit testing  will help as to overcome this and do proper testing without deploying the project to the server.
This post will explain the approach to unit test the Velocity Templates through eclipse.

Spring velocity configurations

Create a Velocity-test.xml configuration file to configure the velocity bean - instead of creating separate configuration file we can also use the project configuration file that has the velocity bean configuration (e.g. application-context.xml)


Change the vm template path accordingly.

Create a test java class (VelocityTest.java)

import java.io.*;
import java.util.ArrayList;
import org.apache.velocity.app.VelocityEngine;
import org.apache.velocity.context.*;
import org.springframework.context.ApplicationContext;
import org.springframework.context.support.ClassPathXmlApplicationContext;
import com.thomson.ecom.core.velocity.VelocityContextBuilder;
public class VelocityTest
{
public static void main(String[] args) throws Exception
{
ApplicationContext ctx = new ClassPathXmlApplicationContext("classpath:velocity-test.xml");
ArrayList<Employee> employeeList=new ArrayList<Employee>();

Employee emp1=new Employee();
emp1.setContactNo("111111");
emp1.setDept("CSC");
emp1.setEmail("[email protected]");
emp1.setEmpName("Albin");
emp1.setEmpNo("1");
emp1.setLocation("Bangalore");
employeeList.add(emp1);

Employee emp2=new Employee();
emp2.setContactNo("22222");
emp2.setDept("IT");
emp2.setEmail("[email protected]");
emp2.setEmpName("Albin1");
emp2.setEmpNo("2");
emp2.setLocation("Bangalore");
employeeList.add(emp2);

Employee emp3=new Employee();
emp3.setContactNo("33333");
emp3.setDept("IT");
emp3.setEmail("[email protected]");
emp3.setEmpName("Albin2");
emp3.setEmpNo("3");
emp3.setLocation("Bangalore");
employeeList.add(emp3);

VelocityEngine engine = ctx.getBean("velocityEngine", VelocityEngine.class);
Context velocityCtx = VelocityContextBuilder.getInstance().buildContext();
velocityCtx.put("empList", employeeList);

Writer w = new FileWriter(new File("D:\\Albin\\velocity.html"));
engine.mergeTemplate("EmployeeEmailTemplate.vm", velocityCtx, w);
w.close();

System.exit(0);
}
}

Change the velocity.html file path and the vm template name accordingly.
Pass the required inputs to the velocityCtx map.
Execute the VelocityTest.java; this will generate the velocity.html file in the specified location.

Resolving cvc-elt.1: Cannot find the declaration of element 'beans' in Spring

Resolving cvc-elt.1: Cannot find the declaration of element 'beans' in Spring

I was receiving the following exception while running the Spring application in standalone mode with maven and eclipse.

Exception in thread "main" org.springframework.beans.factory.xml.XmlBeanDefinitionStoreException: Line 11 in XML document from class path resource [encrypt/encrypting-test.xml] is invalid; nested exception is org.xml.sax.SAXParseException: cvc-elt.1: Cannot find the declaration of element 'beans'.
at org.springframework.beans.factory.xml.XmlBeanDefinitionReader.doLoadBeanDefinitions(XmlBeanDefinitionReader.java:396)
at org.springframework.beans.factory.xml.XmlBeanDefinitionReader.loadBeanDefinitions(XmlBeanDefinitionReader.java:334)
at org.springframework.beans.factory.xml.XmlBeanDefinitionReader.loadBeanDefinitions(XmlBeanDefinitionReader.java:302)
at org.springframework.beans.factory.support.AbstractBeanDefinitionReader.loadBeanDefinitions(AbstractBeanDefinitionReader.java:143)

Caused by: org.xml.sax.SAXParseException: cvc-elt.1: Cannot find the declaration of element 'beans'.
at org.apache.xerces.util.ErrorHandlerWrapper.createSAXParseException(Unknown Source)
at org.apache.xerces.util.ErrorHandlerWrapper.error(Unknown Source)

Unfortunately, I could not able to find any issue in my bean configuration file.

<? xml version="1.0" encoding="UTF-8 ?>
<beans xmlns="http://www.springframework.org/schema/beans" xmlns:xsi="http://www.w3.org/2001/XMLSchema-instance" xmlns:jee="http://www.springframework.org/schema/jee" xmlns:context="http://www.springframework.org/schema/context" xsi:schemaLocation=" http://www.springframework.org/schema/beans http://www.springframework.org/schema/beans/spring-beans-3.1.xsd http://www.springframework.org/schema/jee http://www.springframework.org/schema/jee/spring-jee-3.1.xsd http://www.springframework.org/schema/context http://www.springframework.org/schema/context/spring-context-3.1.xsd">

    <bean id="encryptXMLPayload" class="com.encrypt.EncryptXMLPayload">
          <property name="encryptor" ref="encryptor" /> 
          <property name="messageStylesheet" value="classpath:encrypt/encryptXMLPayload.xslt" />
     </bean>
     <bean id="encryptor" class="com.encrypt.Encryptor" init-method="init">
           <property name="keyData" value="pYOkcj4_kf-4hn-A-IkclLWDBJI-T5bd"/>
     </bean> 
 </beans>

After analysis, the issue is with version mismatch between the pom.xml(spring version configured) and the schema version  configured in the bean configuration file

<dependency>
<groupId>org.springframework</groupId>
<artifactId>spring-core</artifactId>
<version>3.0.0.RELEASE</version>
<scope>compile</scope>
</dependency>

<? xml version="1.0" encoding="UTF-8 ?>
<beans xmlns="http://www.springframework.org/schema/beans" xmlns:xsi="http://www.w3.org/2001/XMLSchema-instance" xmlns:jee="http://www.springframework.org/schema/jee" xmlns:context="http://www.springframework.org/schema/context" xsi:schemaLocation=" http://www.springframework.org/schema/beans http://www.springframework.org/schema/beans/spring-beans-3.1.xsd http://www.springframework.org/schema/jee http://www.springframework.org/schema/jee/spring-jee-3.1.xsd http://www.springframework.org/schema/context http://www.springframework.org/schema/context/spring-context-3.1.xsd">


How to Fix


The issue got resolved after changing the schema version to 3.0 in the bean configuration file as shown below

<? xml version="1.0" encoding="UTF-8 ?>
<beans xmlns="http://www.springframework.org/schema/beans" xmlns:xsi="http://www.w3.org/2001/XMLSchema-instance" xmlns:jee="http://www.springframework.org/schema/jee" xmlns:context="http://www.springframework.org/schema/context" xsi:schemaLocation=" http://www.springframework.org/schema/beans http://www.springframework.org/schema/beans/spring-beans-3.0.xsd http://www.springframework.org/schema/jee http://www.springframework.org/schema/jee/spring-jee-3.0.xsd http://www.springframework.org/schema/context http://www.springframework.org/schema/context/spring-context-3.0.xsd"> 

The spring version configured in the pom.xml and the schema version used in the bean configuration files should be matching.

Loading configuration properties from Database Table in Spring Application

Loading configuration properties from Database Table in Spring Application

This is better approach to store the configuration properties to a database table so that this can be managed easily.
This post will explains the approach to store and retrieve the configuration properties from database table in spring project.

Bean definition in Spring context file:

Configure the below bean definition to the spring context file

<!--  Loads properties to set environment-specific values within the DB table for that environment -->
<bean class="org.springframework.beans.factory.config.PropertyPlaceholderConfigurer">
<property name="systemPropertiesModeName" value="SYSTEM_PROPERTIES_MODE_OVERRIDE" />
<property name="properties">
<bean class="org.apache.commons.configuration.ConfigurationConverter"
factory-method="getProperties">
<constructor-arg>
<bean class="org.apache.commons.configuration.DatabaseConfiguration">
  <constructor-arg>
  <ref bean="propertyDataSource"/>
</constructor-arg>
     <constructor-arg value="Properties"/>  <!--  DB Table -->
     <constructor-arg value="prop_key"/> <!-- DB Key Column -->
   <constructor-arg value="prop_value"/> <!--  DB Value Column -->
   </bean>
</constructor-arg>
</bean>
</property>
</bean>

Properties database table

The Properties database table should be pre-created with the required configuration values

Prop_keyProp_value
ftp.hostlocalhost
ftp.useralbin

Data source configuration

The datasource ref bean  propertyDataSource should be configured in the spring context file.

<jee:jndi-lookup id="propertyDataSource" jndi-name="java:comp/env/jdbc/propertyDS"/>

Here i am using the Tomcat server, the actual datasource - jdbc/propertyDS should be configured in context.xml file of the Tomcat server.

<Resource name="jdbc/propertyDS "
auth="Container"
type="javax.sql.DataSource"
username="property_user"
password="property "
driverClassName="com.microsoft.sqlserver.jdbc.SQLServerDriver"
url="jdbc:sqlserver://localhost:1433;DatabaseName=Soa"
maxActive="4"
maxIdle="2"/>

Refer the properties

Now the properties can be referred as shown below

<bean id="ftp" class="com.doc.FTPService">
<property name="host" value="${ftp.host}"/>
<property name="user" value="${ftp.user}"/>
</bean>

Sunday, June 29, 2014

Spring Web service with NTLM Authentication

Spring Web service with NTLM Authentication

NTLM is a proprietary authentication scheme developed by Microsoft and optimized for Windows operating system.

This post will explain how to invoke the NTLM authentication enabled web services from spring integration.

Spring Web Service uses the Apache HTTPClient to communicate to the NTLM authentication enabled services.

We named our spring bean as WebServiceNTLMAuhCommunicationClientImpl, it will extend the class org.springframework.ws.client.core.support.WebServiceGatewaySupport

We have overridden the method initGateway to set the org.apache.commons.httpclient.NTCredentials object to CommonsHttpMessageSender.

The userName, password and the domain name should be provided to createthe NTCredential object.

The afterPropertiesSet method on CommonsHttpMessageSender class should be invoked after setting the credential - afterPropertiesSet method will set the credentials to HttPClient.

WebServiceNTLMAuhCommunicationClientImpl.java

import org.apache.commons.httpclient.Credentials;
import org.apache.commons.httpclient.NTCredentials;
import org.springframework.ws.client.core.support.WebServiceGatewaySupport;
import org.springframework.ws.transport.http.CommonsHttpMessageSender;

public class WebServiceNTLMAuhCommunicationClientImpl extends WebServiceGatewaySupport {
 private String basicAuthUsername;
 private String basicAuthPassword;
 private String domain;
 private String hostname;


 public String getHostname() {
  return hostname;
 }

  public void setHostname(String hostname) {
  this.hostname = hostname;
 }

  public Object send(String url, Object request)
 {
  return this.getWebServiceTemplate().marshalSendAndReceive(
    url, request, null);
 }

 public void setBasicAuthPassword(String basicAuthPassword)
    {
     this.basicAuthPassword = basicAuthPassword;
    }

  public void setBasicAuthUsername(String basicAuthUsername)
    {
     this.basicAuthUsername = basicAuthUsername;
    }

 public String getDomain() {
  return domain;
 }

  public void setDomain(String domain) {
  this.domain = domain;
 }

  @Override
    protected void initGateway() throws Exception
    {
  if(this.basicAuthUsername != null || this.basicAuthPassword != null)
  {
    ((CommonsHttpMessageSender)this.getMessageSenders()[0]).setCredentials(getCredentials());
    ((CommonsHttpMessageSender)this.getMessageSenders()[0]).afterPropertiesSet();
  }
  super.initGateway();
    }

 private Credentials getCredentials() {
   return new NTCredentials(this.basicAuthUsername, this.basicAuthPassword, getHostname(), getDomain());
 }

}

Wednesday, June 25, 2014

javax.management.MBeanException: The configuration file, deployed-composites.xml, does not contain the composite-revision element

javax.management.MBeanException: The configuration file, deployed-composites.xml, does not contain the composite-revision element

We were receiving the following exception while deploying the composite to the SOA server in Solaris.

The exception was thrown while activating the component.

compositeMgrTask:
     [java] Connecting to: service:jmx:t3://localhost:8004/jndi/weblogic.management.mbeanservers.runtime
     [java] connection initiated
     [java] javax.management.MBeanException: The configuration file, deployed-composites.xml, does not contain the CRMASYNC/zz!5.3.19 composite-revision element.
     [java]     at oracle.as.jmx.framework.standardmbeans.spi.OracleStandardEmitterMBean.doInvoke(OracleStandardEmitterMBean.java:986)

The actual exception is the component was not deployed successfully due to some exception and it is trying to activate the same .

The exception while deploying the component is

[deployComposite] setting user/password..., user=weblogic
[deployComposite] Processing sar=/shared/11g/soa_deploy/code/config/scripts/../../LoadBalancerProbe/zz/deploy/sca_zz_rev5.3.19.jar
[deployComposite] Adding sar file -/shared/11g/soa_deploy/code/config/scripts/../../LoadBalancerProbe/zz/deploy/sca_zz_rev5.3.19.jar
[deployComposite] INFO: Creating HTTP connection to host:localhost, port:8004
[deployComposite] INFO: Received HTTP response from the server, response code=500
[deployComposite] ---->response code=500, error:There was an error deploying/undeploying composite on SOA1: Error in reading data from deployer client.: /var/tmp/sar_base_dir_07be0448-8481-4ade-a2e9-253e5a8ba33c/sca_zz_rev5.3.19.jar (No such file or directory).

Based on the error, the deployer could not able to retrieve the jar file from the tmp location.
After analysis, the /var/tmp space is full and the script could not able to write the jar file.
We can use df -kh command to find the space utilization


How to Fix

To resolve the issue login as root user and clear the /var/tmp folder.

Thursday, June 12, 2014

Generating JAXB artifacts from XSD/WSDL through Maven

Generating JAXB artifacts from XSD/WSDL through Maven

The maven-jaxb2-plugin can be used to generate the java classes from both XSD/WSDL.

Plugin configuration in Pom.xml

The below plug in configuration can be used in the pom.xml file to generate the sources.
<plugin>
  <groupId>org.jvnet.jaxb2.maven2</groupId>
  <artifactId>maven-jaxb2-plugin</artifactId>
  <version>0.7.3</version>
  <executions>
    <execution>
      <id>app1-stub-generation</id>
      <goals>
        <goal>generate</goal>
      </goals>
      <configuration>
        <schemaDirectory>src/main/resources</schemaDirectory>
        <schemaIncludes>
          <include>*.xsd</include>
        </schemaIncludes>
        <generatePackage>com.thomson.ecom.service.bean.demo</generatePackage>
        <clearOutputDir>false</clearOutputDir>
        <generateDirectory>src/main/java</generateDirectory>
        <strict>true</strict>
      </configuration>
    </execution>
 
 
  </executions>
</plugin>

Change the include accordingly to generate for wsdl -   <include>*.wsdl</include>

Generate the sources

To generate the sources, Right click on pom.xml-->Run As-->Maven generate-sources


This will generate all the java classes to src/main/java

Wednesday, June 11, 2014

Configuring JAXB2-Maven-Plugin not to clear the outputdirectory

Configuring JAXB2-Maven-Plugin not to clear the outputdirectory

JAXB2-Maven-Plugin will help us to generate the java classes from the xsd.
By default the plugin clears the existing contents in the ouputdirectory and generate the new java classes into the outputdirectory.

Some cases we may need to generate the java classes from multiple source xsd's so we have to configure the plugin not to clear the outputdirectory.

Yo have to add <clearOutputDir>false</clearOutputDir> in the plugin configuration.

<plugin>
            <groupId>org.codehaus.mojo</groupId>
            <artifactId>jaxb2-maven-plugin</artifactId>
            <executions>
                <execution>
                    <goals>
                        <goal>xjc</goal>
                    </goals>
                </execution>
            </executions>
            <configuration>
                <!-- The schema directory or xsd files. -->
                <schemaDirectory>${basedir}/src/main/resources</schemaDirectory>
                <!-- The package in which the source files will be generated. -->
                <packageName>com.service.bean.demo</packageName>
                 <clearOutputDir>false</clearOutputDir>
                <!-- The working directory to create the generated java source files. -->
                <outputDirectory>${basedir}/src/main/java</outputDirectory>
            </configuration>
        </plugin>

Tuesday, June 10, 2014

Changing the default Maven repository location in eclipse

Changing the default Maven repository location in eclipse

Sometimes we may required to modify the default maven repository location to custom location for the eclipse project.
Eclipse project will have the variable M2_REPO defined as read only.


The following steps will help as to change the default Mavan repository location.

Modify the settings.xml file in the <<USER_HOME>>/.m2 and add the localRepository value accordingly.


If the .m2 folder ia not available in the USER_HOME create the same(md .m2) and also create a settings.xml file and update the file with the following contents(change the value of localrepository and the repository url accordingly)

Saturday, June 7, 2014

Load Balancing Rules for Oracle SOA Suite Infrastructure

Load Balancing Rules for Oracle SOA Suite Infrastructure

This blog explain the details about the load balancer rule setup for Oracle SOA Suite infrastructure.


Download Load_Balancing_Rules_For_SOA.pdf

Sunday, June 1, 2014

Approach to Resolve the Load balancer routing the Oracle SOA Suite Request to Unavailable SOA-INFRA

Approach to Resolve the Load balancer routing the Oracle SOA Suite Request to Unavailable SOA-INFRA 

The below document explain the approach to resolve the Load balancer routing the Oracle SOA Suite request to unavailable SOA-INFRA.


Download Load_Balancer_Probe_SOA-INFRA.pdf

Friday, May 30, 2014

Oracle BPEL Vs. Oracle BPM

Oracle BPEL Vs. Oracle BPM

For the recent project i was comparing the Oracle BPEL and Oracle BPM and thought of sharing the same.
This document is based on my understanding and views not of oracle views.


Download Oracle_BPEL_Vs._Oracle_BPM.pdf

Friday, May 23, 2014

Component Metrics are Unavailable for the SOA Composite in EM console - Oracle SOA Suite 11g

Component Metrics are Unavailable for the SOA Composite in EM console - Oracle SOA Suite 11g

I was facing a strange issue with Oracle SOA Suite EM console. Whenever opening the SOA Composite the component metrics are not getting displayed and it is shown as Unavailable.


The issue is only happening in Development environment but it is working fine in all the other environments.
I could not able to find any exception related to this issue in any of the log files.

Unfortunately the Component metrics are getting displayed after refreshing the SOA Composite(from right corner of EM page as shown in the above diagram) from EM console


Deployment plan file to replace the Binding Adapter Properties/Attributes – Oracle SOA Suite

Deployment plan file to replace the Binding Adapter Properties/Attributes – Oracle SOA Suite

The deployment plan file will help us to dynamically replace the Oracle SOA Suite Composite properties.

This post explain the steps to replace the Properties/Attributes of the Direct Binding Adapter in Composite.xml. The same steps can be used to replace the Properties/Attributes of all the Binding Adapters.

Generate the Plan file:

The plan file can be generated through JDeveloper or through ANT script.

Generating Plan file through JDeveloper:

Right Click on Composite.xml and click on generate config Plan.


Change the generated plan file contents accordingly to replace the properties and attributes of the composites. 

Add the required attributes to the corresponding Binding and change the values accordingly(by default the attributes will not be added to the corresponding binding in the plan file) and also change the value of required properties accordingly.

Thursday, May 22, 2014

The selected WSDL contain a direct binding but seems to be of the wrong type - Oracle SOA Suite

The selected WSDL contain a direct binding but seems to be of the wrong type - Oracle SOA Suite

You will be receiving the message "The selected WSDL contain a direct binding but seems to be of the wrong type. Looking for Oracle Service Bus type.Please check your WSDL selection" while trying to create the direct binding to invoke the OSB service.


This message says the OSB proxy service is not configured with SB transport.
Configure the OSB Proxy service with the SB transport to invoke the same from SOA composite through Direct Binding.

When looking up the OSB service from JDeveloper SOA Resource Browser, the Proxy will be shown as direct for SB transport services.

Wednesday, May 21, 2014

Re-Deploying the DBAdapter application - Oracle SOA Suite

Re-Deploying the DBAdapter application - Oracle SOA Suite

Accidentally we have deleted the DBAdapter application from the weblogic server console in Oracle SOA Suite and all the database connection factories created was failing.

This post will explain how to Re-Deploy the Resource Adapter - DBAdapter application and recover the connection factories.

The same steps can be followed to recover any Resource Adapter applications

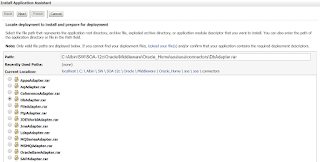
Steps to redeploy Resource Adapter

  • Login to weblogic console
  • Go to deployments
  • Click on Install 
  • Select $Oracle_HOME/soa/connectors as the path and select Dbadapter.rar
reinstall_resource_adapter

  • Click on Next
  • Click on Next and select the target server
reinstall_resource_adapter
          

Wednesday, May 14, 2014

Configuring the Oracle Enterprise Repository plugins for Jdeveloper

Configuring the Oracle Enterprise Repository plugins for Jdeveloper

This post explain the steps to configure the Oracle Enterprise Repository Plugins in JDeveloper(JDeveloper version used is 11.1.1.5.0)

In JDeveloper click on Help-->Check For Updates

Select the Oracle Enterprise Repository plugins  as shown below.
The Oracle Enterprise Repository Adapter plugin will help us to access the assets and artifacts available in the Oracle Enterprise Repository .
The Oracle Enterprise Repository Harvester will help us to  harvest a Oracle SOA Suite project to the Oracle Enterprise Repository.


Click on Next and click on Finish


Restart the JDeveloper while prompted
After successful installation of the plugins you can able to to see the "Oracle Enterprise Repository Connection" as new connection type  and also right clicking the SOA project we can see "Submit Project To Enterprise Repository" and right clicking the files(XSD, WSDL) we can see "Submit File To Enterprise Repository"